It looks like you're using an Ad Blocker.
Please white-list or disable AboveTopSecret.com in your ad-blocking tool.
Thank you.
Some features of ATS will be disabled while you continue to use an ad-blocker.
share:
INTRODUCTION
Many people talk about "living off the land" but how does one do that in practice rather than theory? How much "land" do you have to work with? What nutrition does a human body need and what foods provide it? How much of each food source should you grow for how many people? What do you put by and what is the best way to do that safely while retaining both nutritional value and quality? What are the risks to be aware of (pests, vermin, animals, weather)? What are the costs in terms of money, labor, space? And how do you prepare these foods in the right combination to make satisfying meals?
PROJECT GOAL
This project will research, document through actual gardening, and share: methods of self-managed (aka non-commercial) food production, foraging and preservation; and the many complicating factors involved therein.
Due to the enormous scale of this body of knowledge, this project is not intended to be all-inclusive, nor complete. For purposes of empirical testing the "gardening season" will be that of the northern hemisphere, however research will be provided across many regions, zones and hemispheres, with members indicating in their posts what hemisphere or zone their research/observations hail from.
The bulk of the research will be focused on non-animal food products.
PROJECT DISTRIBUTION
Following are the broad topics for which members will provide their reports. Members will provide greater detail about their particular area of focus in their opening post. Members may post about additional topics they are not currently assigned to.
***What nutrition does a human body need and how can we self-produce it? VeritasAequitas
***The complications of planning, managing, protecting, and harvesting a garden in various places. All gardening contributors - otherpotato, okiecowboy, woodsmom, SpaDe_, retirednature, Druid42
***Urban gardening. okiecowboy
***How to maximize yields in the space you have. retirednature, otherpotato, SpaDe_, Druid42
***Foraging - how to safely find food without growing it. woodsmom
***Food preservation - the pros and cons of various techniques related to food safety, time/energy output to preserve, shelf life, and preservation impacts on nutritional yields. Druid42, otherpotato
***The reality of home grown vs. supermarket foods, government policies regarding home grown, and the plight of the indie gardener. Templar74
PROJECT PLAN - LEVEL 2 PROJECT - 5 POSTS PER CONTRIBUTOR
The project begins today and will run through October, concluding when each contributor has completed five posts and the project leader has completed the project summary post.
Each participant should contribute one post by the end of May summarizing individual research plans. Gardeners will want to include information about their personal gardens relevant to their research contribution.
Plan is to post approximately once per month to ensure we meet the project end-goal.
Every contributor will provide at least one post based on non-empirical research, with sources provided. (AKA gardeners will need to get out of the garden once!)
POSTING GUIDELINES
Five posts of substantive content between now and October.
Each post includes the following in a headline, so that the research can be read in the appropriate context:
**Post number
**Hemisphere/Zone number (as applicable)
**Topic covered in the post.
Pictures are encouraged. Providing pictures in a supplementary post is recommended to maintain readability. (Note: Picture addendums do NOT count toward the post minimum).
As stated in the forum rules, commentary about other members' posts should NOT be made in the research thread until the project is closed. This does not apply to contributors who reference previous posts in their own post - feel free to cite work in the thread within your own contribution.
To discuss research comments outside the thread, use the 2013 gardening thread, U2U, or start a new thread if the research is particularly provoking.
RESEARCH PARAMETERS - SOURCES
It must be noted that most sources in this thread will be the researchers themselves. Or other gardeners who are posting in informal forums. Or a journal kept by an grandmother back in the 1940s. With that in mind source-policing needs to be flexible, with the exception of the "formal" research post where members should exercise caution about the reliability of the sources referenced. In short, just bear in mind the nature of the project being undertaken. Watching a broccoli plant grow and documenting it is a valid form of research.
Post #1, Getting Started, Northern Hemisphere, Alaska, cold zone 4
Feeding ourselves and our families is a challenge we have faced since the beginning of our history on this planet. In this age of prepackaged convenience, GMO foods and added chemicals, feeding our family in a truly healthy way has become more difficult for us in our modern age to make the healthy choices than it was for our ancestors. We have more food available to us now, we just have to be more aware of our choices. On the other hand our world has become smaller and more connected due to the technology available to us. This provides us with the opportunity to have options not naturally provided for us in our specific regions. One way to provide such good foods for our families is to garden. A simple age old process of planting seeds brings us back to the source of our food and puts the choice of what is available into our own hands.
Gardening to create our own food source can seem like a daunting task to a beginner, when in reality it can be a fairly simple undertaking. Especially if we utilize the resources that are available to us already.
Planning is the first step in starting any garden endeavor. Observe the space you have in mind for at least a week and take note of sun exposure, water runoff and wind conditions.
The next step is to figure out what plants you want, and how many you need of each to provide for everyone that you have in mind. Look into the yield of each plant when making these decisions. Some plants, like lettuce, can even be harvested continually throughout the season. One lettuce plant can give you a half a dozen salads, for example.
Now that you have an idea of what you would like to plant, look at your soil structure in the area you plan to plant. All soil is not created equal, you may need to make amendments to give your plants a closer to ideal environment. One book that I have found to be useful is Teaming With Microbes A Gardener's Guide to the Soil Food Web by Jeff Lowenfels and Wayne Lewis. There are many sources of information on soil structure. Ideally, you want to have a fluffy airy soil with lots of pockets to hold air and nutrients to feed the roots of your plants. Your soil should also hold some water without becoming waterlogged and drowning your plants.
Do the research into your own growing zone. A zone is a loose classification of your growing area. This will determine your success with a lot of your crops. There can be some fudging, but in general the zone map works pretty well. Micro climates may also be taken into consideration, but if you are a beginner, stick with the USDA zones that have already been established. You may also want to contact your local agricultural office for any area specific tid bits.
Another important step in planning your garden is considering what you want from it. In many cases vegetables are a given. Have you thought about expanding into simple medicinals? Many culinary herbs can often suit a double purpose. Thyme, for example, is great as a culinary herb, and can also help fight off colds and flu.
Determine how you are going to start your plants and what your end goal is. Are you growing a garden to save money? Are you concerned about Genetically Modified Organisms? Do you just want some fresh food outside to supplement your diet? Every garden is as individual as the person who plants it, and your personal preferences need to be taken into account.
I want to stress here that a hybrid is not always going to be GM!! A hybrid plant is a natural process in which one plants pollen fertilizes another plant. Sometimes it will create new characteristics. This is a Hybrid. A genetically modified organism, or GMO, is a result of a lab experiment in which they actually splice new genes into existing plants to create , for example, the plants own internal pesticide.
Seeds and plants are the next step. You have a multitude of options. Heirloom varieties are nice choices, they have been around for generations at minimum. Not only do you get a non GMO food source from them, you are also helping to preserve a species of food plant that may be on it's way to extinction otherwise. You may even choose to buy pre started plants. Check out your local garden clubs, they may set up seed swaps to trade and get new seed to try for minimal or no cost. I have also found vegetable starts at my local farmers market, maybe you will get lucky too.
In my far Northern location, I may be in a zone 4 according to the map, but my season is nearly 2 months shorter than the rest of the zone 4's in the United States, so I like to trick the seasons a bit. You can extend your growing season with a few old tricks. Raised beds will warm your soil sooner than trying to plant in a typical in ground garden bed. You can also use cold frames and cloches to protect tender plants from late and early season frosts. (continued)
A simple and cheap cloche to protect your tender starts is simply a milk jug with the bottom cut off. They set down nicely over the plant and can be
easily placed and removed. You can also use yogurt cups and even newspapers to start your seeds in. There are many creative gardening solutions out
there that require little to no out of pocket cost.
Composting is one of the best things you can do for your gardens and your wallet. I built a double compost bin with old pallets from my husbands workplace that were slated for the dump. I placed 2 side by side on level ground near my gardens. We connected those together and placed 5 more upright pallets to make the walls, 2 along the back, one in the center to separate the bins and one on each end. This gives me the ability to add to one pile while the other cooks down. In my cold climate I have to wait a few years to cook a pile all the way down. The process is sped up by turning regularly, keeping it moist, and feeding it a beer and a soda pop (regular, not diet) twice a season. Feeding our plants is vital if we expect to get the nutrients from them that we desire. A good compost is only one option, fish emulsion, worm castings and compost tea are other high density nutrient solutions.
One way to have a good harvest with minimal maintenance is to plant perennial foods. These include asparagus, chives, rhubarb, berries and fruit trees, among many many others. I rely on my perennials to catch up to me every year, by the time the main spring fuss is well underway with the veggie gardens, I can turn around and make a nice rhubarb crisp as a reward. There is nothing more pleasant than having food ready for you with no effort, while you are spending every bit of extra energy you may have on the fussier varieties.
There is so very much more, as always! A garden can provide you with peace of mind, exercise, fresh air, confidence in your own abilities, it can even save you trips to the store on busy evenings. There is something special about the ability to feed ourselves. It takes us a step closer to our own humanity that seems to be slipping from our grasp. It teaches our children that their food comes from the land and not a box, and that is priceless to me.
Thanks for reading, my season is starting later than normal this year, so my future posts will be a bit less abstract.
First off, a big thankyou to otherpotato for allowing me the chance to join in on what I hope will be an epic thread of all things
gardening, our Mods of course, and my many and varied research participants for getting involved on a project I think is not only important for us and
our future generations, but is something we need to bring awareness to.
Post #1, An eye-opening. Southern Hemisphere, Queensland, Australia. Subtropical; zone 9.

In a world where this has become the norm, people are slowly but surely waking up to the fact that your local supermarket, often touted as “fresh and quality” is merely a front for either months old, genetically modified or poor quality, mass-produced fruits and vegetables that have generally had all the nutritional value robbed of them long before you check them out of your local store.
In the coming reports, I will be exposing some of the covert practices that go on in big corporations, the methods they use to pass off poor produce as high quality, and how they influence both governments and laws to ensure you only buy their product.
I will also delve into home grown gardens, the difference between true organic and store organic, and how people of all walks of life from city to country and beyond are banding together in this day and age of corporate greed to create their own crops and their own food, and forming bonds within communities by both getting their hands dirty, and swapping and trading what they grow.
I will look at the controversy and the laws being implemented by our own governments at the behest of corporations such as Bayer and Monsanto to quell this uprising, and look at local takes from both sides as to the massive swathes of government and abandoned land and how it is being used to effect by these “Guerrilla Gardeners” across the world.
Lastly, we will go inside the local farmer’s market and see just how these backyard, home grown movements have become the new black for those willing to boycott the local supermarket in favour of locally grown, organic produce. I will weigh the pros and cons of such a market, and whether what you buy there is really better both nutrionally and financially for you and your family.
For my opening, I want you the reader, to do a couple of things for me. Firstly, the next time you go shopping, see for yourself just where your produce/fruit and veg is from. Is it local? Is it something you know benefits local primary producers? Does it have these great symbols all over it, touting it as organic, such as this?

It’s easy to be sucked in by the flashy gimmicks corporations use to display their ‘healthy’ alternatives. It also makes people feel good paying that little bit extra to the local supermarket for that guarantee of 100% organic produce. Doesn’t it?
Well sirs and madams. No. It isn’t.
While laws do exist to stop major corporations from essentially lying about what is organic, and what is either GE (Genetically Engineered) or even vegetables laden with preservatives to keep them looking fresh for many months after they have been picked, there are certain technicalities many corporations use to circumvent this truth.
You see, most corporations generally have an elite team of lawyers, spin doctors and publicists on hand to make anything sound like anything they want it to. Doesn’t make sense? Let me enlighten you.
Ever see the ‘light’ craze on packaged foods? Light crackers (99% fat free! Honest!), light this, light that. The English language is a funny thing when used to full effect.
Sure, we see something ‘light’ and automatically assume it has less calories, less fat, less this, less that, because why? Because it’s light of course!
Now let me show you something.

What would you say this colour was? Light Brown maybe?
Let me say that again. LIGHT brown. As in light colouration.
You see how simple that was? Light crackers! Help your waistline! Pay a little more for something that’s good for you! (Well not really. The cracker is only ‘lighter’ in colour than our regular product. You get the idea though.)
Yes, that’s how they do it. A very simple little play on words.
Oh sure, they were eventually caught out passing off foods that had just as high fat and salt content, and paid off their fines to the relevant government bodies, forced to change their recipes etc, but how much of this actually goes unnoticed? Take a look at just how many lines your local supermarket stocks. Are they all truthful, exactly as it says they are?
(Cont Below)
“Growing your own food is like printing your own money.”
- Ron Finley, Guerrilla Gardener, 2013.
Post #1, An eye-opening. Southern Hemisphere, Queensland, Australia. Subtropical; zone 9.

In a world where this has become the norm, people are slowly but surely waking up to the fact that your local supermarket, often touted as “fresh and quality” is merely a front for either months old, genetically modified or poor quality, mass-produced fruits and vegetables that have generally had all the nutritional value robbed of them long before you check them out of your local store.
In the coming reports, I will be exposing some of the covert practices that go on in big corporations, the methods they use to pass off poor produce as high quality, and how they influence both governments and laws to ensure you only buy their product.
I will also delve into home grown gardens, the difference between true organic and store organic, and how people of all walks of life from city to country and beyond are banding together in this day and age of corporate greed to create their own crops and their own food, and forming bonds within communities by both getting their hands dirty, and swapping and trading what they grow.
I will look at the controversy and the laws being implemented by our own governments at the behest of corporations such as Bayer and Monsanto to quell this uprising, and look at local takes from both sides as to the massive swathes of government and abandoned land and how it is being used to effect by these “Guerrilla Gardeners” across the world.
Lastly, we will go inside the local farmer’s market and see just how these backyard, home grown movements have become the new black for those willing to boycott the local supermarket in favour of locally grown, organic produce. I will weigh the pros and cons of such a market, and whether what you buy there is really better both nutrionally and financially for you and your family.
Fresh Is Best
For my opening, I want you the reader, to do a couple of things for me. Firstly, the next time you go shopping, see for yourself just where your produce/fruit and veg is from. Is it local? Is it something you know benefits local primary producers? Does it have these great symbols all over it, touting it as organic, such as this?

It’s easy to be sucked in by the flashy gimmicks corporations use to display their ‘healthy’ alternatives. It also makes people feel good paying that little bit extra to the local supermarket for that guarantee of 100% organic produce. Doesn’t it?
Well sirs and madams. No. It isn’t.
While laws do exist to stop major corporations from essentially lying about what is organic, and what is either GE (Genetically Engineered) or even vegetables laden with preservatives to keep them looking fresh for many months after they have been picked, there are certain technicalities many corporations use to circumvent this truth.
You see, most corporations generally have an elite team of lawyers, spin doctors and publicists on hand to make anything sound like anything they want it to. Doesn’t make sense? Let me enlighten you.
Ever see the ‘light’ craze on packaged foods? Light crackers (99% fat free! Honest!), light this, light that. The English language is a funny thing when used to full effect.
Sure, we see something ‘light’ and automatically assume it has less calories, less fat, less this, less that, because why? Because it’s light of course!
Now let me show you something.

What would you say this colour was? Light Brown maybe?
Let me say that again. LIGHT brown. As in light colouration.
You see how simple that was? Light crackers! Help your waistline! Pay a little more for something that’s good for you! (Well not really. The cracker is only ‘lighter’ in colour than our regular product. You get the idea though.)
Yes, that’s how they do it. A very simple little play on words.
Oh sure, they were eventually caught out passing off foods that had just as high fat and salt content, and paid off their fines to the relevant government bodies, forced to change their recipes etc, but how much of this actually goes unnoticed? Take a look at just how many lines your local supermarket stocks. Are they all truthful, exactly as it says they are?
(Cont Below)
edit on 18/5/2013 by 74Templar because: spelling
Just because something has a big flashy sticker stating what you are eating is 100% organic, doesn’t necessarily make it so. For all the twisting of
words these corporations do, it may just be the sticker that’s 100% organic. Just something to think about.
In my next report, I will be exposing more of the little ploys big corporations use to sell their wares, and what they are and have been up to, playing God with the foods we eat. I will look at how they have their tendrils in everything from governments to crops to producers, and how we can be more aware of what these corporations are doing to us, our children and the world around us.
In my next report, I will be exposing more of the little ploys big corporations use to sell their wares, and what they are and have been up to, playing God with the foods we eat. I will look at how they have their tendrils in everything from governments to crops to producers, and how we can be more aware of what these corporations are doing to us, our children and the world around us.
Post #1 - Northern Hemisphere - Zone 5/6 - New England
Topic: Why I started this research project. And so can you.
Main bed: 18 feet x 32 ft
Garlic bed: 20 feet x 30”
(Apologies to those on the metric system...).
First, a big thank you to the forum mods for keeping us on the straight-and-narrow, and to all the contributors helping to make this research project a success. I appreciate the time it takes to craft a well-thought out post - especially when we’re all busy with lives and never-ending gardening tasks.
May all who visit find something of value in this endeavor.
As I've said before, this type of "research" is a bit different than other projects. It depends on first-hand observation. I've tried to build in a more "traditional" research component but readers should understand that empirical study will weigh heavily here. To say it another way: It’s one thing to post links to facts about food production. It's another thing to actually produce food.
One thing is clear to me: Everyone who is posting in this thread cares deeply about how we feed ourselves. Please listen to that message in their posts.
MY FOCUS
In addition to posting updates about my garden, I’ll be contributing in the areas of:
**preservation - specifically canning and freezing
**crop rotation - my methods and what I base them on
**companion planting - ditto
**seasonal planting - ditto
**weed control - I'm going to focus on nutsedge
A little about me and my garden:
I have been gardening in earnest for the last three years. I’m not an expert by any stretch, but here's what helps me to be generally successful.
1) wormy soil
2) full sun and partial shade
3) human touch
4) trying, despite failure
5) learning from people who already failed
6) the internet
7) everyone wants fresh produce
water, nutrients, seed, sun, soil, rain, time, moon, weather...A person could go crazy trying to explore every factor in detail. Let’s all go crazy together....
STATE OF THE GARDEN
Garlic bed - “Perennials” - Garlic, Lettuce, Swiss Chard, Dill, Onions
The plants in this bed are all considered “companions” and I am testing this theory. They have root depths that don’t compete with one another so they can be planted in closer proximity. The garlic takes up the rear of the bed, with the lettuce, chard, onions and dill interspersed in front of the strip. This is the first year I’ve tried some of these plants as perennials - meaning some were left to reseed last year. My hope is to keep this bed going by letting these crops go to seed each year, supplementing with new seed as needed.
Garlic
The garlic patch is fully self-sustaining at this point. We let the garlic grow, go to seed, leaves brown up, then pull up the garlic and dry it in our garage. It’s then stored, hanging, in our canning room. We haven’t had to buy any garlic for the last two years. The original seed came from my grandmother, which came from her mother in law which came from I don't know where...
Lettuce
I let the lettuce go to seed last year and it came back nicely. We have several heads of loose leaf red, some loose leaf green, and some head romaine. It’s a bit crowded, so the head variety doesn’t get as full, but it was a happy accident. I’ve decided to let it do what it wants. We’ve been picking since early April. I’ll let it bolt again this summer and try to thin better next year. (As an aside I had a second patch of lettuce on the other side of the garden which I let bolt as well. We had baby lettuce sprouting everywhere during the cooler months prior to deep freeze - fun to have fresh lettuce in November).
Swiss Chard
The five Swiss Chard plants all came back and we’ve had two small harvests so far. I found that the first planting of chard in this bed last year didn’t yield much - it may need a second season to get established. I’ve decided it might be best to establish a second permanent location for the chard - the garlic bed may not have enough room for what will meet our year-round needs (five is NOT enough for seasonal use and freezing). I started a second patch in the main bed but may need to try transplanting as that space needs to rotate year to year. No idea how chard takes to transplanting.
Onions
Onions were a fluke. I started spring onions/scallions from seed last year and they barely did anything. This year I have a cluster of four bulbs popping out of the ground. I’d like to try a reseeding experiment (thanks woodsmom!). I also picked up a bag of red onion sets that didn’t look too promising. Decided to try them as an experiment. These were planted 2-4 inches deep, depending on amount of green growth, spaced 4-6 inches apart, in between the chard, lettuce, garlic, and dill.
(cont'd)
edit on 21-5-2013 by otherpotato because: Forgot my post number
(cont'd)
Sunflowers
We always grow sunflowers and this year I had 36+ sunflowers sprout up in assorted places. I successfully transplanted all of them but one. Some I moved into the main herb bed, some I moved to a different part of the garden, and some I moved next to the peas as a climbing experiment. We always get one super giant sunflower that is the talk of the neighborhood. This will be the first year we haven’t sown any ourselves.
MAIN BED
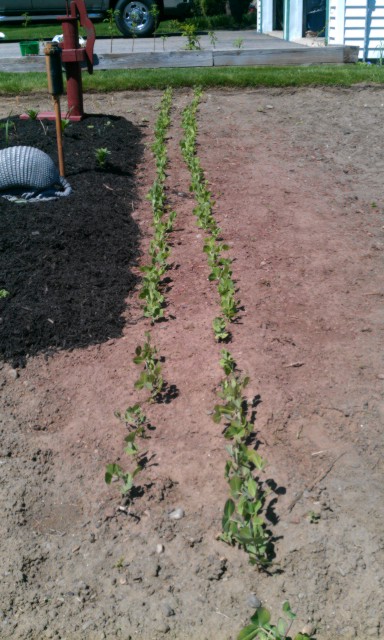
Peas - Planted April 6, 2 rows with 3” spacing - Thomas Laxton, Super Snappy, Dwarf Grey Sugar
These are the crown jewel of my garden and have a special place in my heart. They were rotated to the front of the garden this year (in last year’s broccoli spot - leafy greens are in the peas’ spot from last year). The Thomas Laxton (shelling pea) are in the middle, with snap peas and snow peas on each end. I saved some seed from the dwarf gray and super snappy last year and most of this saved seed sprouted. I have a few gaps in my rows from seeds that didn’t sprout but chose not to resow those spaces. I have not counted the exact number of pea plants - will update that in the next post. Also note I added some support this year to help them stay more upright. Last year I let them self support but they got very top heavy. This didn’t appear to affect their production.
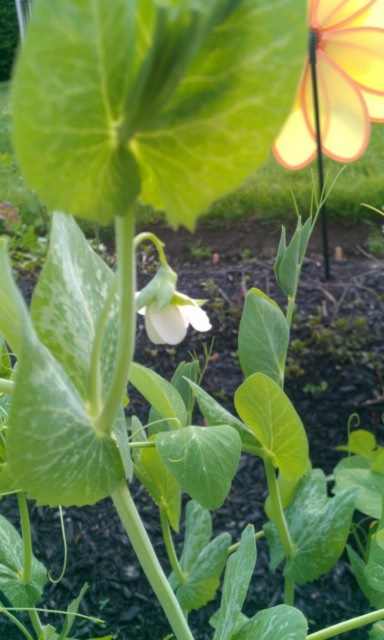
Happy surprise today: first pea blossom!!!
Broccoli - started indoors March 24 - Hybrid Green Magic, Waltham, DiCiccio; repotted April 6; transplanted 18” apart in two rows April 28
Moved the broccoli to the row above where the peas were last year. My seedlings got all mixed up so I have no idea which is which (whoops). Planted 17 in the ground and 1 didn’t make it. I have plans to resow late summer for a second crop.
Swiss chard, lettuce, spinach - Direct sow April 15 & 26; Arugala April 28; second spinach planting May 18
Planted the back row with leafy greens. Added a second sowing on May 18 of more baby spinach and regular spinach to extend the harvest and also because you need a ton to have enough to freeze. Have done one picking of baby spinach so far.
Corn - direct sow May 4, Sweet red variety
I did a short row of corn early in the season. It took some time to sprout as we had a cool, rainy spell right after I planted - first sprouts came up week of May 13. The variety for this early patch is a 75 day harvest red sweet corn. I’m leaving enough time in-between sowings so that the corn doesn’t cross-pollinate.
Carrot/Beet bed - direct sow April 15 - rainbow carrots; Reseeded May 18
My grandparents always mixed sand into the soil before planting carrots. I forgot about that and always wondered why my carrots grew with, um, appendages. This year I finally took their advice and grabbed some sand from the kids’ sand box, I’d say about a gallon’s worth of sand for this patch (guesstimation). I thinly seeded an initial row of carrots to avoid the trauma of thinning (aka carrot abortion) that is so necessary for good carrot production. Reseeded this past weekend to fill in the gaps.
Grammy also plants beets in between the rows so I tried that as well. We only ever care about the beet tops. They are starting to come along.
Bush Beans and Soybeans - direct sow May 4
Exact date is fuzzy - sowed a half row of bush beans and a half row or soybeans. Started sprouting around May 13 (soybeans first). Beans are always prolific when they start producing so I wisened up and split the plantings. This is my first year with soybeans.
CONTAINERS
Potatoes - Kennebec and some other variety I forget right now.... - planted March 31
I started the potatoes in six containers. I crowd the plants ( 4 inches apart) which results in smaller potatoes, but I’m still in my experimental phase with potatoes. I‘m always trying to maximize small spaces so I crowd to see how things produce under those conditions.
Potatoes don’t play well with a lot of other plants, so I have not wanted to give them a space in my garden yet (maybe not ever unless I expand quite a bit). Last year I planted too late and got smaller plants (it appears they are not fond of heat). This year I started them early and they're flourishing....except for that frost incident. We got a frost on May 14 and some of the leafier potatoes got hit on the tops. We gave them a few days and cut back the dead growth and they are nearly where they were a week ago. If all goes well this year I'll get more containers and space them better. Even though potatoes are poison.
**************
So that's my planting update. Next planting update once the rest is in - tomatoes, peppers, squashes, cukes, melons, second planting of beans and corn, and anything else.
My next post will focus on a garden weed that is near and dear to my heart: nutsedge. Nutsedge control is no easy task, as I will explain. I will also delve into its surprising use as a food source for those who care to exercise proper planning. (which I don't - I prefer a pitchfork.)
Happy growing....
edit on 21-5-2013 by otherpotato because: (no reason given)
edit on 21-5-2013 by otherpotato because: (no
reason given)
Post #1, Northern Hemisphere, Zone 6, NE Ohio.
Topic: All-At-Once Planting.
(A special thanks goes out to the ATS Research Forum and Team Leader otherpotato for the ability to participate in what is sure to be an interesting project. I employ time tested gardening methods, having gardened for many, many years, and while my techniques are not meant to be a standard, they have proven to yield results, and have been used for over three generations. I tend to maximize yields with my methods, with the major intent of producing enough vegetables to can and/or freeze for the upcoming winter months. My goals for this project are to provide an A-Z explanation of how vegetables are planted, harvested, and preserved relative to the planting zone that I am in.
Around the beginning of May every year, it's time to tune up the rototiller and start tilling, albeit a chance of frost is still possible. This gives aeration to the soil, and allows the incumbent weeds to decompose. At this time, the first tilling, the garden size is determined, and the possible crops are contemplated. The first tilling was on May 3rd, and in this file photo dated May 10th, I am prepared to do a second tilling:
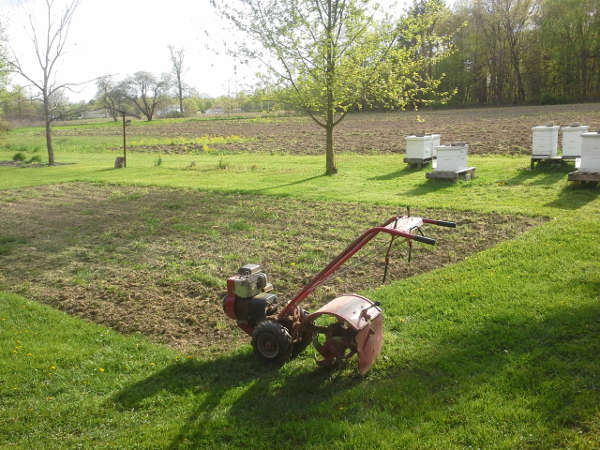
Notice the one week old growth of weeds? Weeds are truly the bane of every gardener!
Since this is the second tilling, I am able to set the tiller to a deep setting, and aerate down to the 6 inch level:
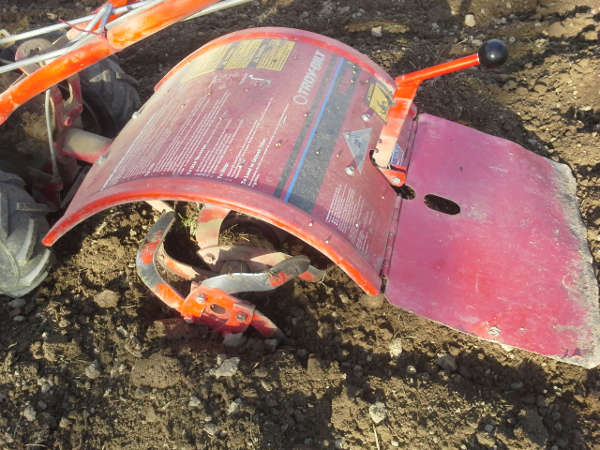
During the garden bed preparation process, you'll notice that I walk behind the tiller, mostly for steering and control purposes, but that leaves undesirable compacted areas where my footprints are.
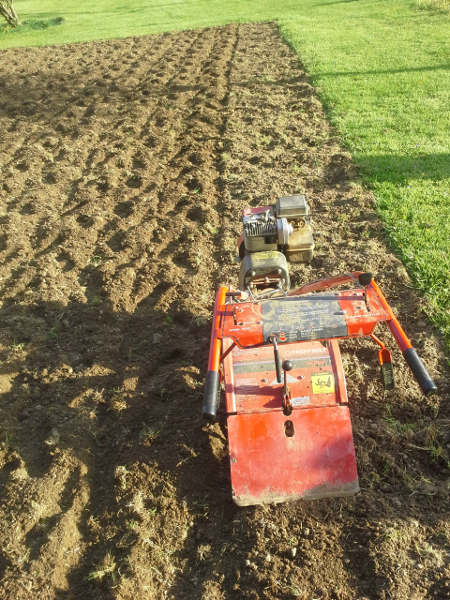
On the final pass, I'll stand beside the tiller, guiding it with one hand, as the soil is loose, well refined, and almost ready to plant.
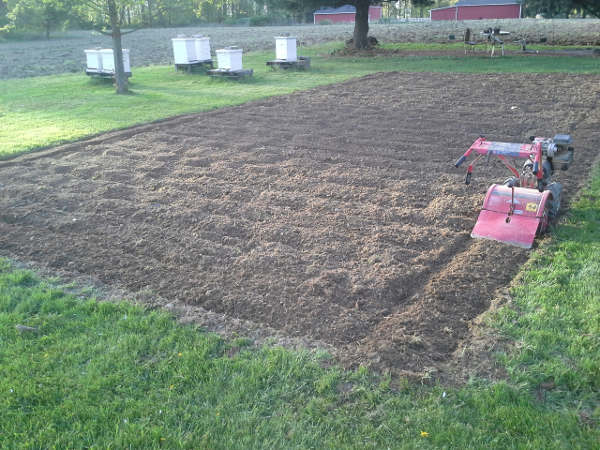
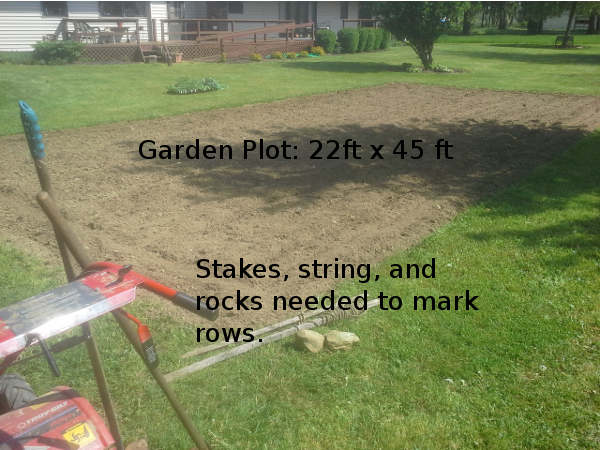
May 17th rolls around, and all danger of frost has passed. I'll make just one more pass over the whole garden bed, and we'll begin planting. Last year's garden was 17 x 40, so this year I made it 5ft larger on two sides.
The day before, May 16th, we went to a local greenhouse to pick up our veggie plants and seeds:
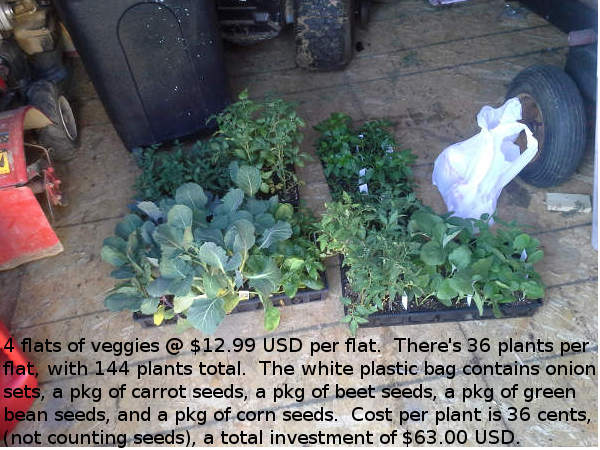
The amount of plants and seeds to buy is a quick calculation, based on the total size of the garden. We make every row 24" apart, as will be explained in a bit, and 2' will go into 45' 22 times. We'll have 21 rows at 22' in length. Spacing for plants to maximize yield depends on the plant, from 6 inches to 20 inches, so I'll average 10-16 plants per row and say a dozen plants per row. Well, 12 x 21=252 plants, but we are planning on corn, beans and onions, which are all seeds, so rough estimates say half seed and half plants. The plants take priority, and the seeding will be done after the plants are in.
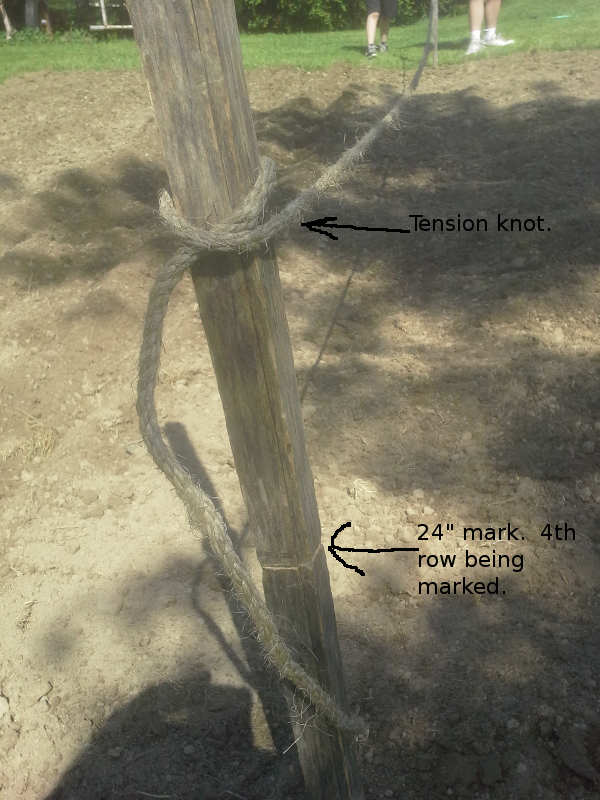
The first step is to mark all 21 rows, and I use a rather crude but effective method. Two stakes, some rope, and a mark on each stake at the 24" mark. The rock is used to tap the stake into the soft, freshly tilled soil, and the rope is tensioned between the two stakes.
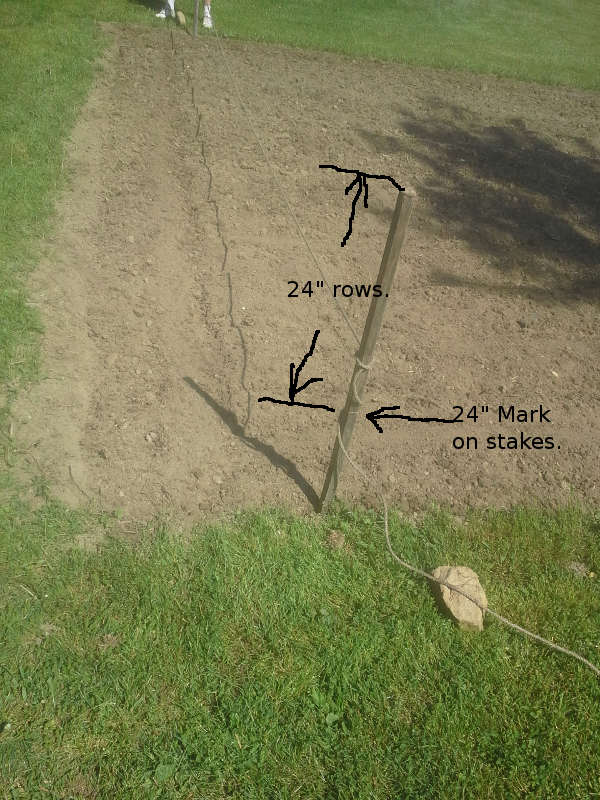
It's the method my grandfather used, and it still works to this day. Why complicate it?
You sight from directly above the rope, and scratch a row into the soil, and walk to the other end, marking your row. Dig it about 3 inches deep, making a nice furrow, and you'll have plenty of loose soil to pack back around the plants once they are in.
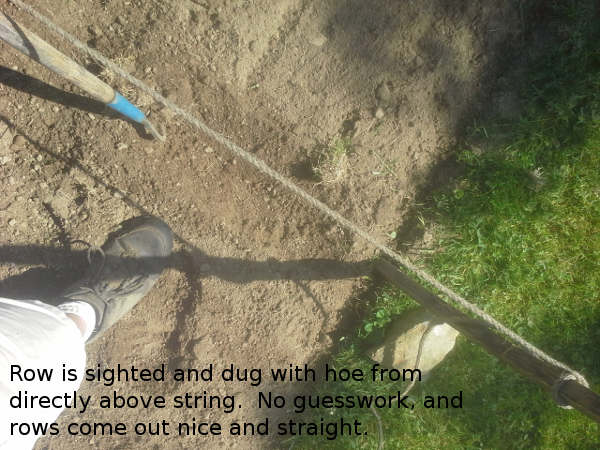
You use the hole the stake has made as the start point for the next row, laying the stake top centered in the empty hole, and the 24" mark shows you where to tap the stake in next. Once all the rows are marked, it's time to commence planting.
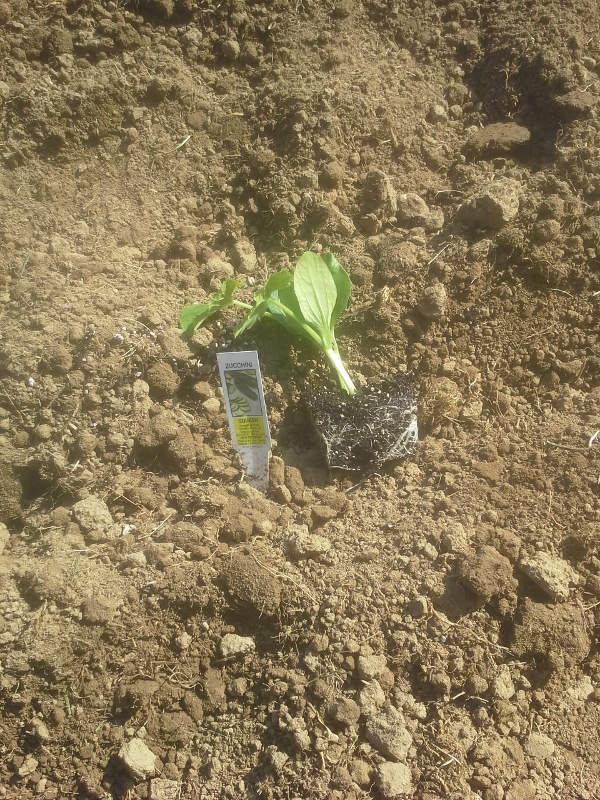
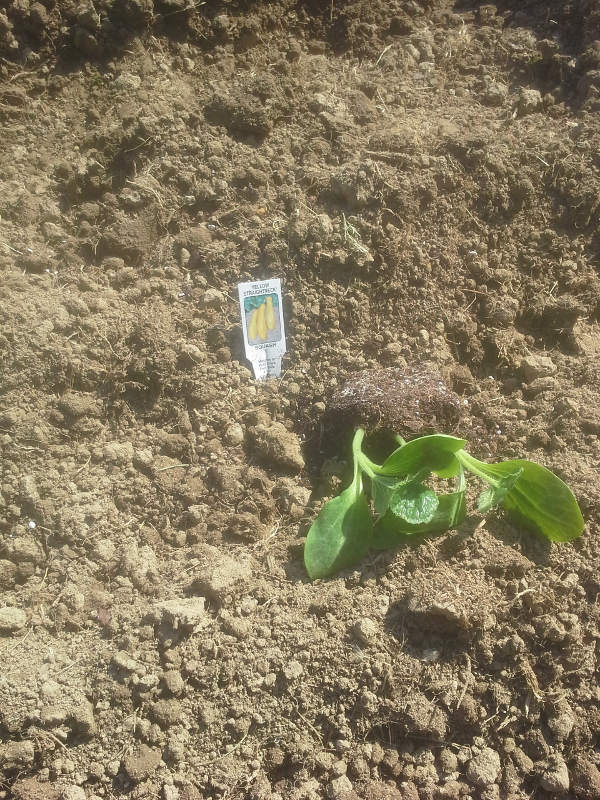
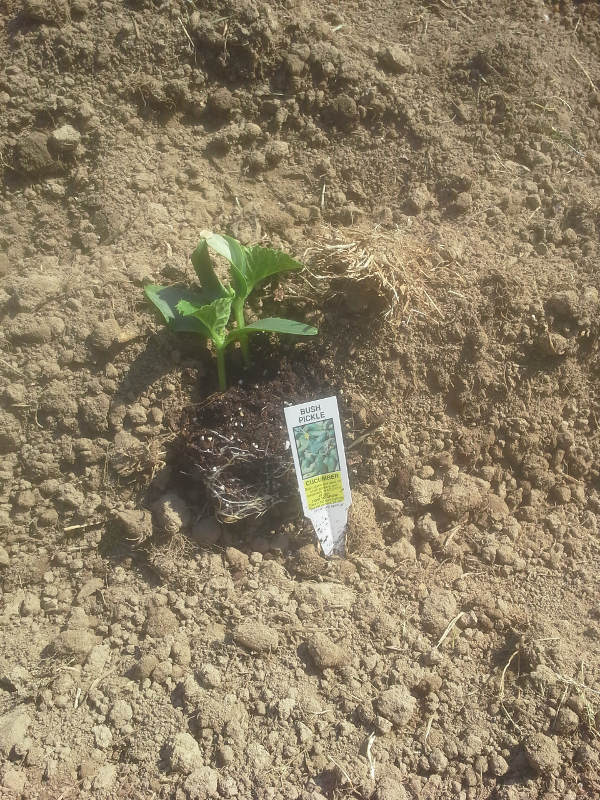
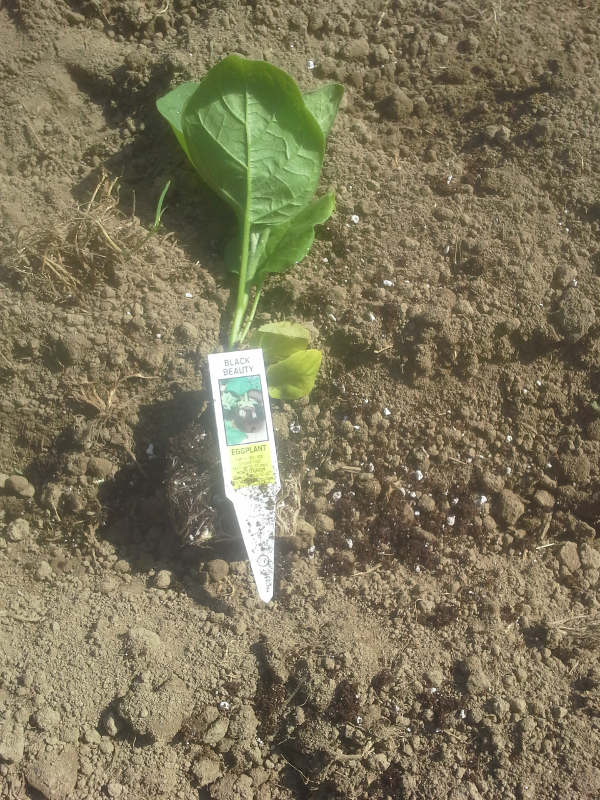
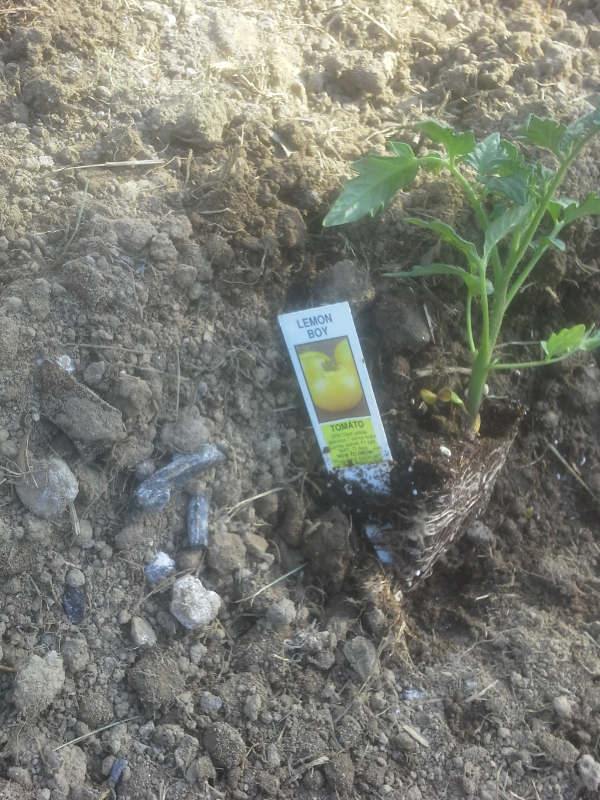
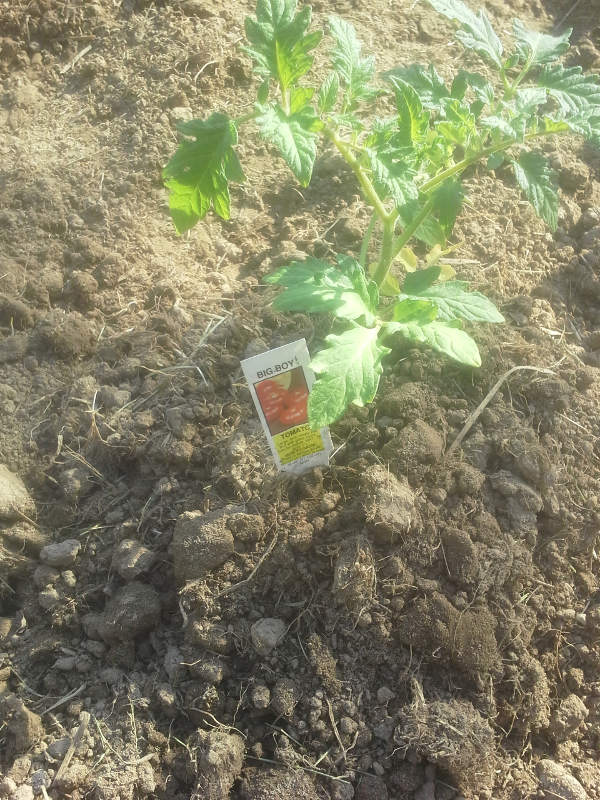
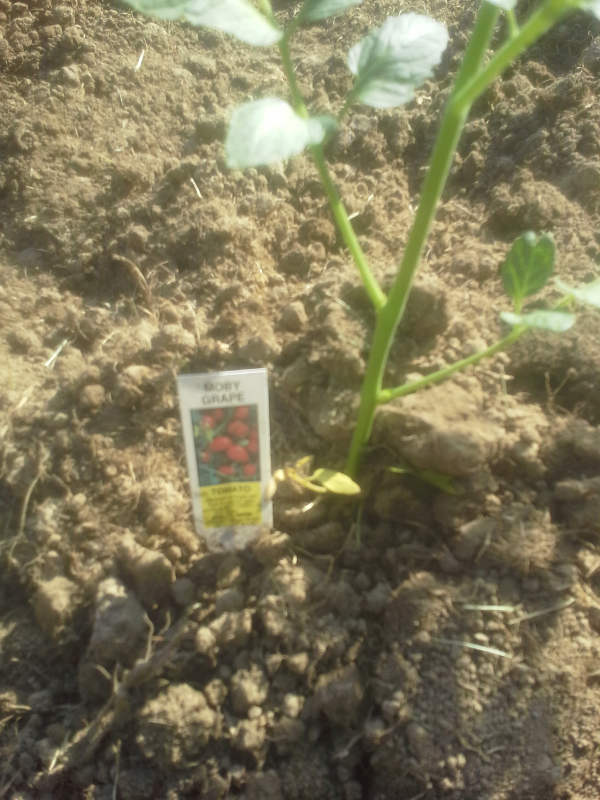
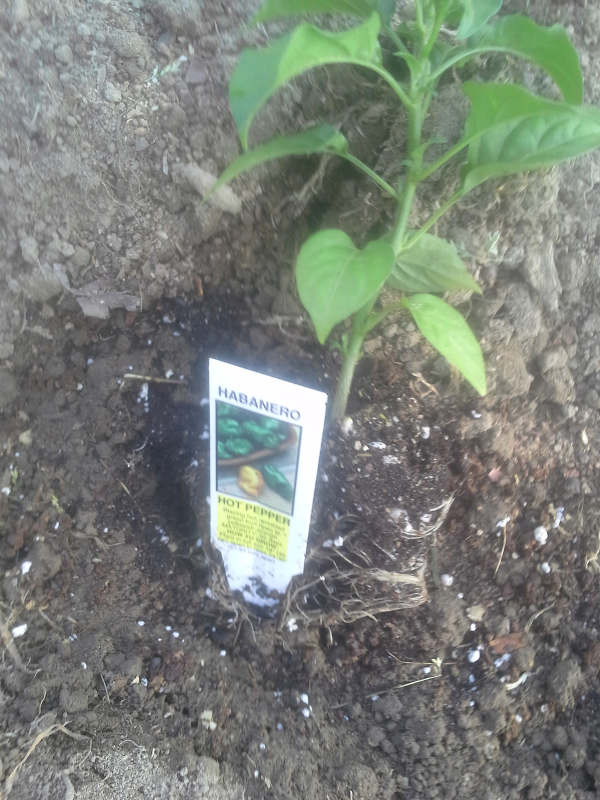
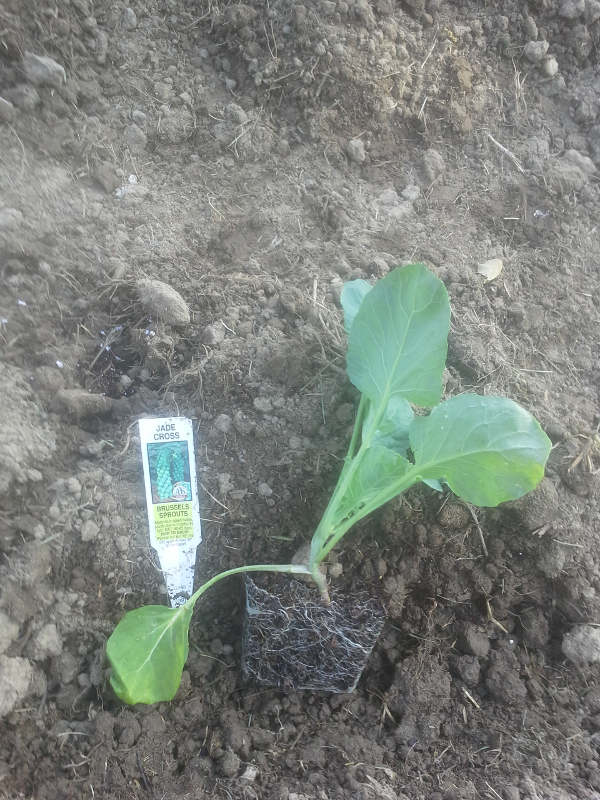
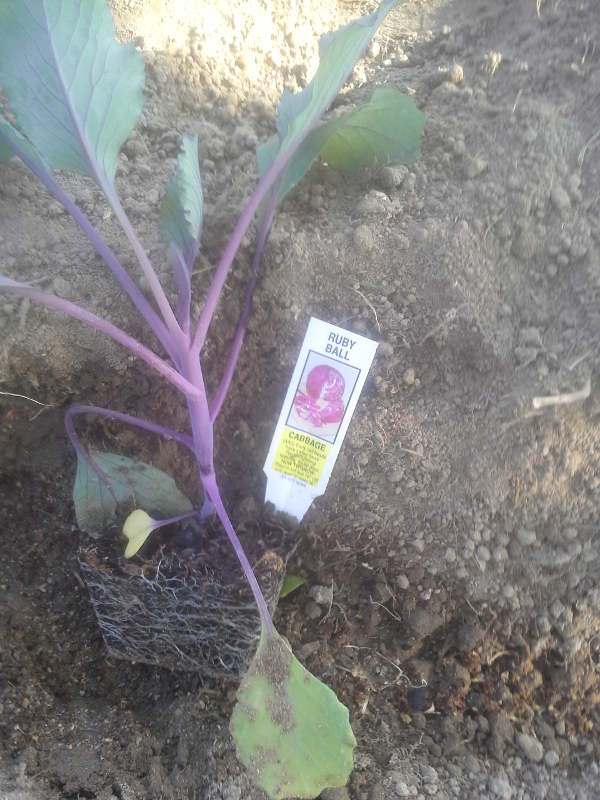
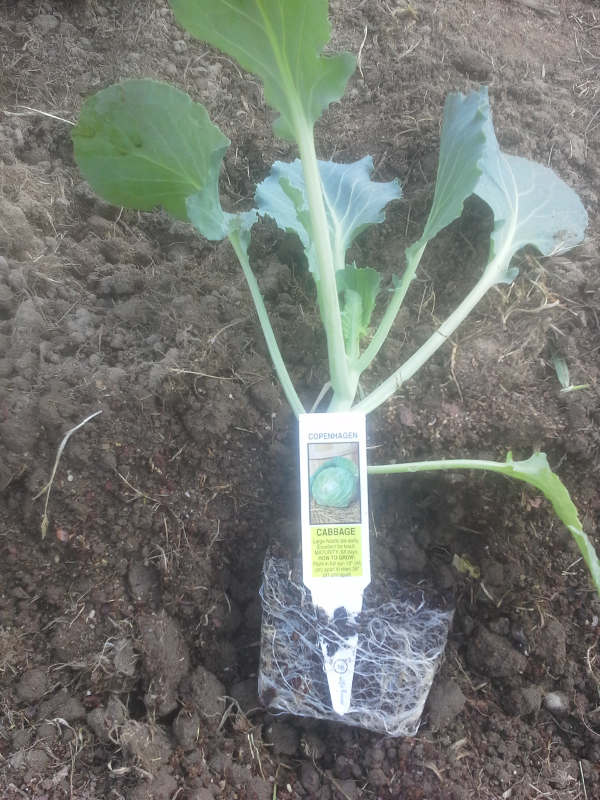
Introducing the cast of characters in this year's feature presentation (Feel free to zoom in on the plant tags to read about their characteristics, "crtl+" works in most browsers):
3
3
6
6
6
6
12
24
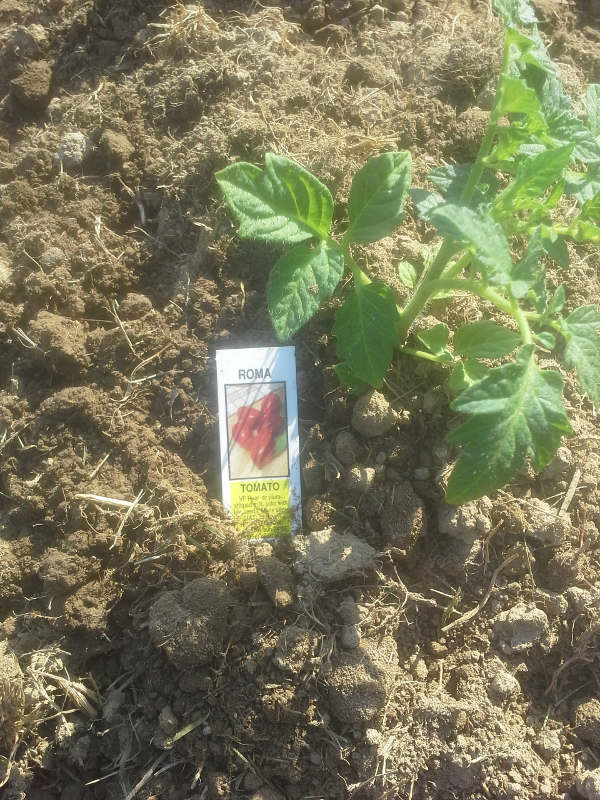
6
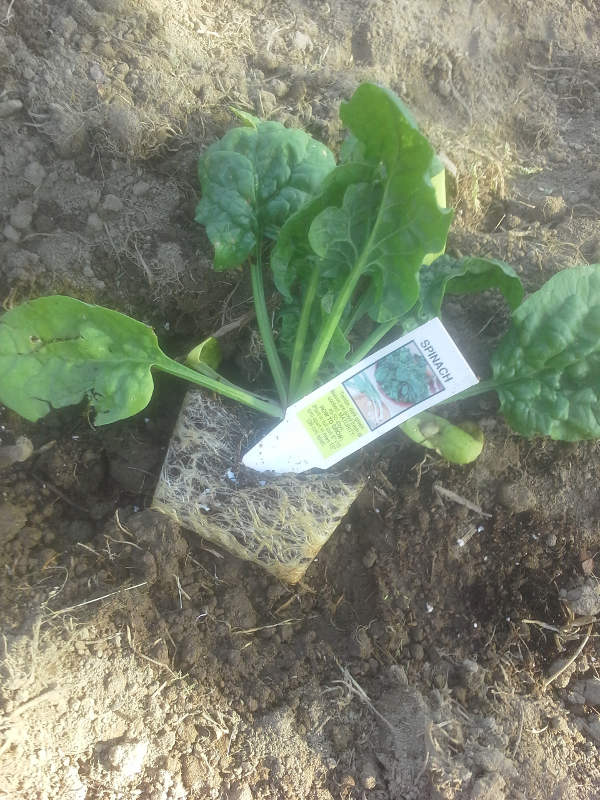
12
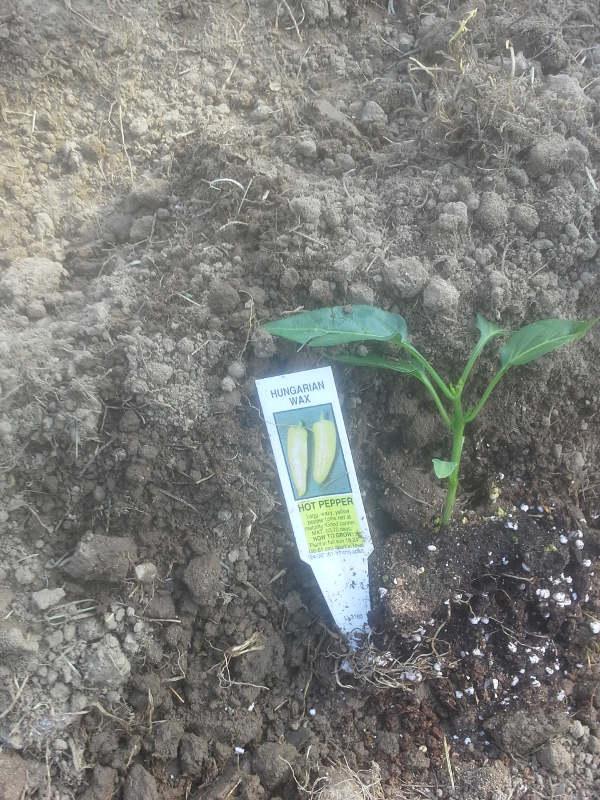
3
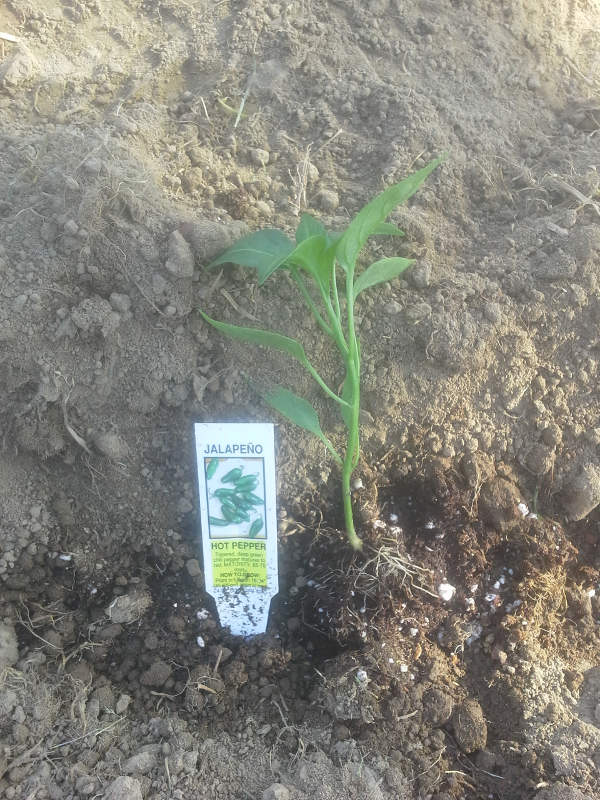
3
6
6
12
9
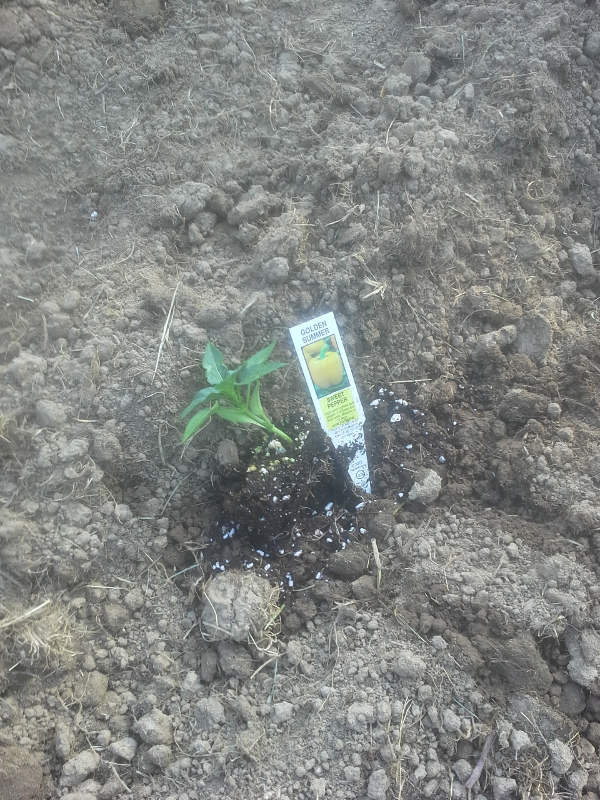
9

12
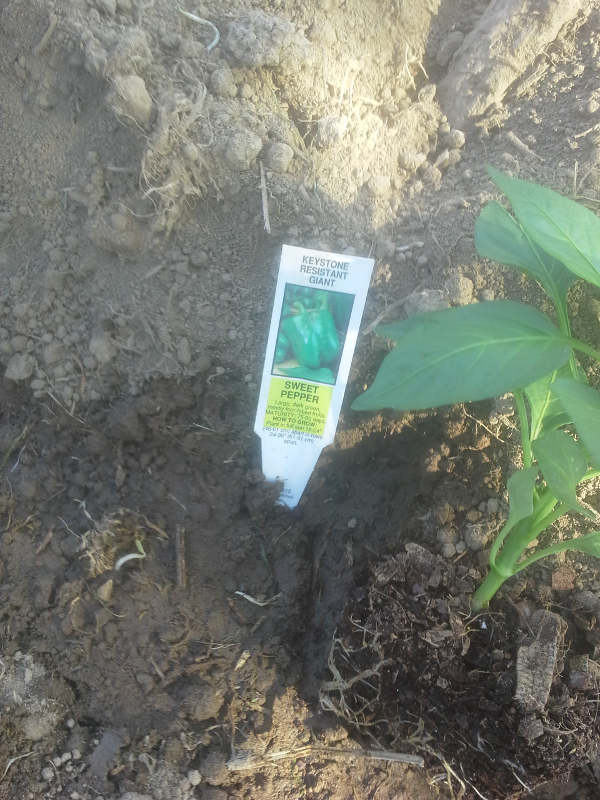
and appearing incognito (In 22 ft rows):
1/2 row
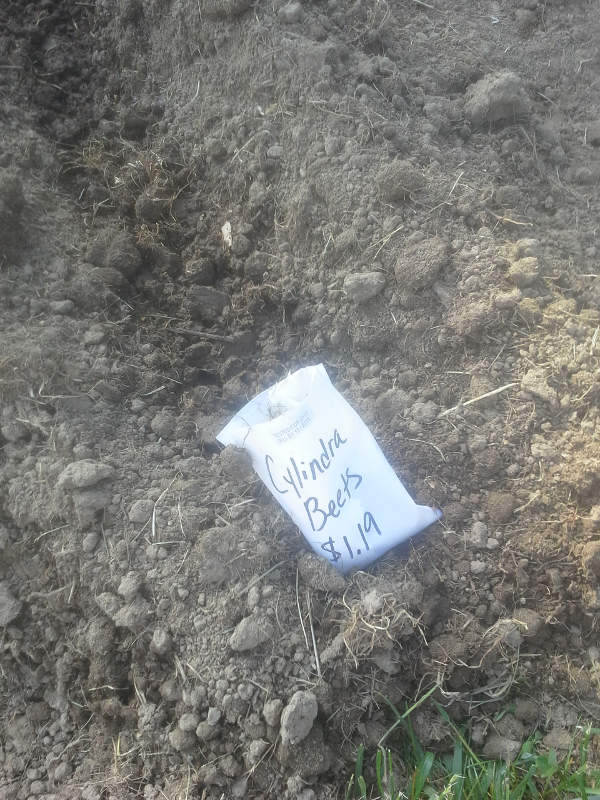
1 row
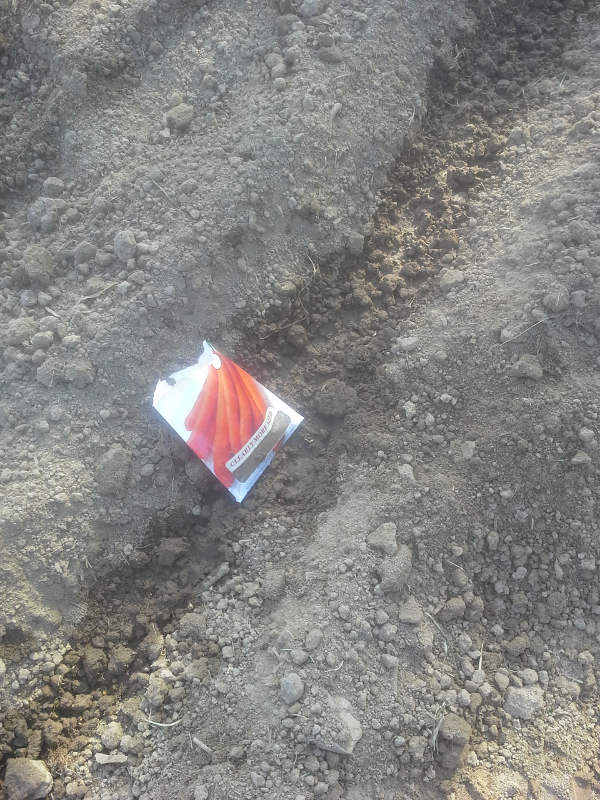
2 rows
4 rows
and
2 rows
Now that you've met the garden, let's see how it's planted!
To be continued.....
Topic: All-At-Once Planting.
(A special thanks goes out to the ATS Research Forum and Team Leader otherpotato for the ability to participate in what is sure to be an interesting project. I employ time tested gardening methods, having gardened for many, many years, and while my techniques are not meant to be a standard, they have proven to yield results, and have been used for over three generations. I tend to maximize yields with my methods, with the major intent of producing enough vegetables to can and/or freeze for the upcoming winter months. My goals for this project are to provide an A-Z explanation of how vegetables are planted, harvested, and preserved relative to the planting zone that I am in.
Around the beginning of May every year, it's time to tune up the rototiller and start tilling, albeit a chance of frost is still possible. This gives aeration to the soil, and allows the incumbent weeds to decompose. At this time, the first tilling, the garden size is determined, and the possible crops are contemplated. The first tilling was on May 3rd, and in this file photo dated May 10th, I am prepared to do a second tilling:

Notice the one week old growth of weeds? Weeds are truly the bane of every gardener!
Since this is the second tilling, I am able to set the tiller to a deep setting, and aerate down to the 6 inch level:

During the garden bed preparation process, you'll notice that I walk behind the tiller, mostly for steering and control purposes, but that leaves undesirable compacted areas where my footprints are.

On the final pass, I'll stand beside the tiller, guiding it with one hand, as the soil is loose, well refined, and almost ready to plant.

May 17th rolls around, and all danger of frost has passed. I'll make just one more pass over the whole garden bed, and we'll begin planting. Last year's garden was 17 x 40, so this year I made it 5ft larger on two sides.

The day before, May 16th, we went to a local greenhouse to pick up our veggie plants and seeds:

The amount of plants and seeds to buy is a quick calculation, based on the total size of the garden. We make every row 24" apart, as will be explained in a bit, and 2' will go into 45' 22 times. We'll have 21 rows at 22' in length. Spacing for plants to maximize yield depends on the plant, from 6 inches to 20 inches, so I'll average 10-16 plants per row and say a dozen plants per row. Well, 12 x 21=252 plants, but we are planning on corn, beans and onions, which are all seeds, so rough estimates say half seed and half plants. The plants take priority, and the seeding will be done after the plants are in.
The first step is to mark all 21 rows, and I use a rather crude but effective method. Two stakes, some rope, and a mark on each stake at the 24" mark. The rock is used to tap the stake into the soft, freshly tilled soil, and the rope is tensioned between the two stakes.


It's the method my grandfather used, and it still works to this day. Why complicate it?
You sight from directly above the rope, and scratch a row into the soil, and walk to the other end, marking your row. Dig it about 3 inches deep, making a nice furrow, and you'll have plenty of loose soil to pack back around the plants once they are in.

You use the hole the stake has made as the start point for the next row, laying the stake top centered in the empty hole, and the 24" mark shows you where to tap the stake in next. Once all the rows are marked, it's time to commence planting.
Introducing the cast of characters in this year's feature presentation (Feel free to zoom in on the plant tags to read about their characteristics, "crtl+" works in most browsers):
3

3

6

6

6

6

12

24

6

12

3

3

6

6

12

9

9

12

and appearing incognito (In 22 ft rows):
1/2 row

1 row

2 rows

4 rows

and
2 rows

Now that you've met the garden, let's see how it's planted!
To be continued.....
Post #1, Continued.....
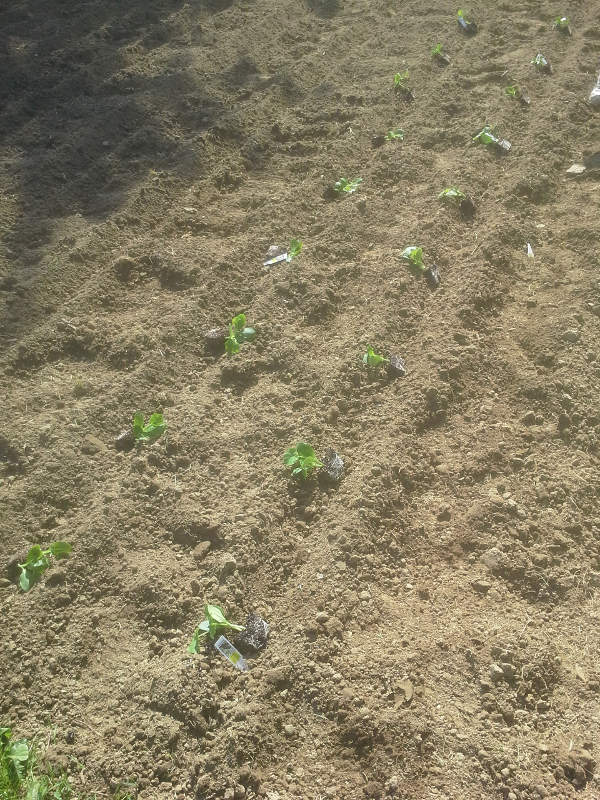
Starting with the first two marked rows, we space out the Zucchini and Yellow squash. They are prolific once they start coming on, and I like to have them near the edge of the garden for easy picking. The first two rows are finished out with cucumbers, as they will also sprawl, and need the room to bush out.
The 6 eggplant fill in the ends of the tomato rows, so I'll drop them in before I space out the tomatoes. We went heavy on Roma Tomatoes this year, as we have plans to make sauce to can.
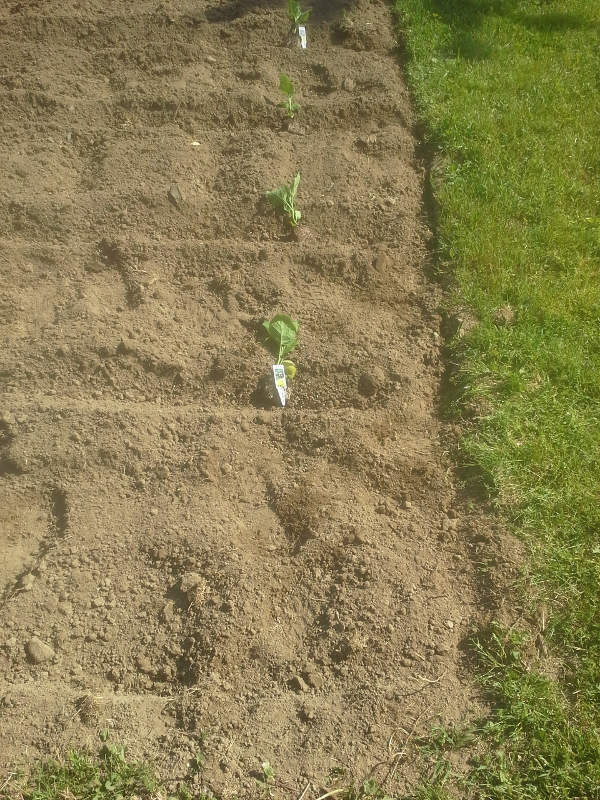
The first two rows are watered and planted, time to set out the tomatoes. It's nice to have a helper, as it makes things go a bit quicker. She spaced, and I planted. (Identity blurred, of course!)
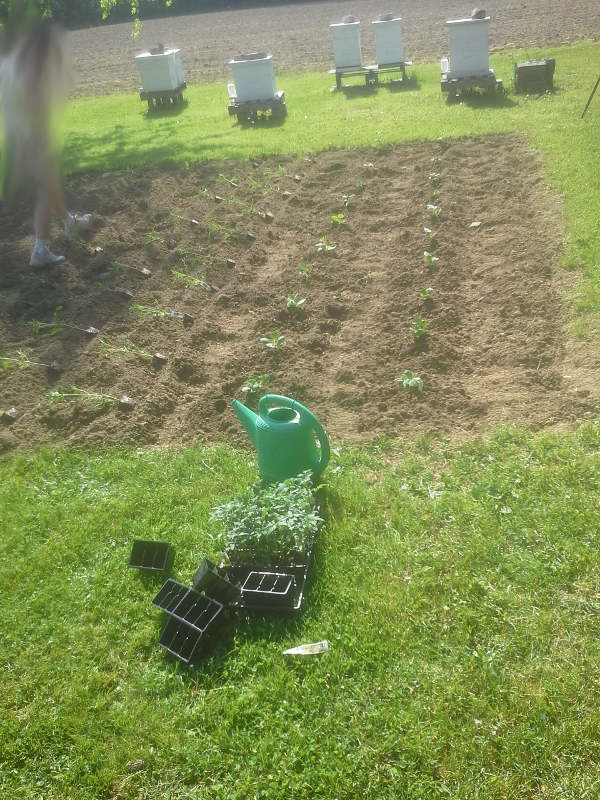
So far:
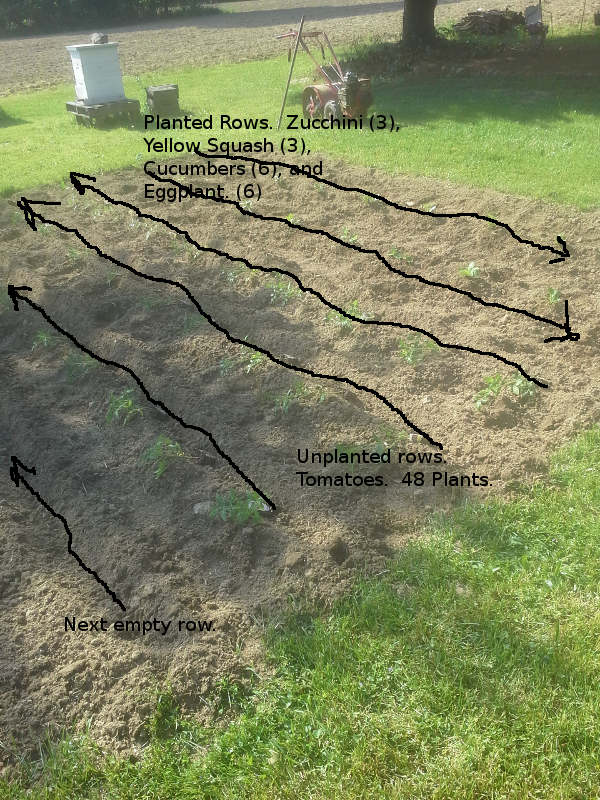
And progressing along:
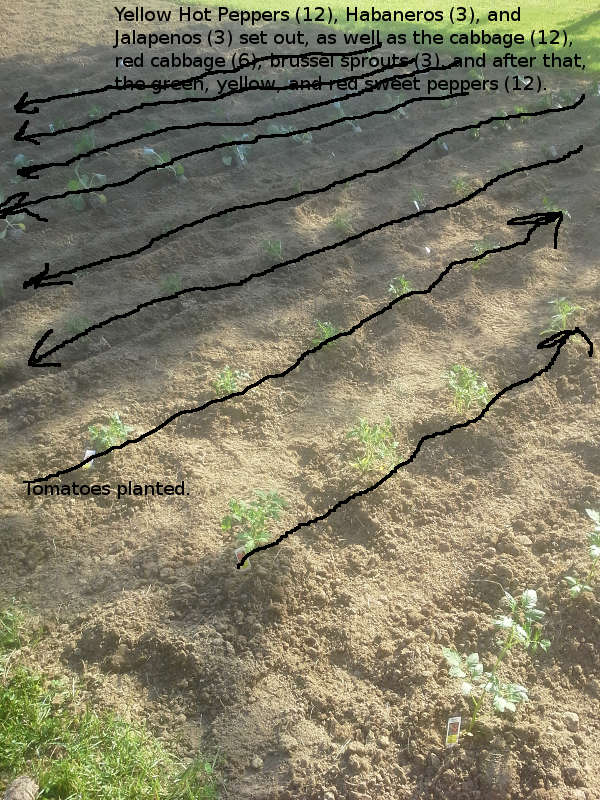
(I realized just now that the numbers don't quite add up, but the previous post works out to 144 plants. I'll figure that out later, as I was editing pics over the course of the past few days. Remember, this was all planted on the 17th of May, and it took me a while, in several batches to edit all the pics. I had to re-size all the pics from hi-res 2460x1640 down to 800x600, to get them to fit the uploader in order to post them, so my apologies if the numbers aren't exact.)
One important thing to note: Never plant hot peppers beside sweet peppers. If you notice, I have 2 rows, or approximately 4 feet, between the hot peppers and the green peppers. If you plant a jalapeño beside a green pepper, prepare to have a mouth burning green pepper! Been there before.
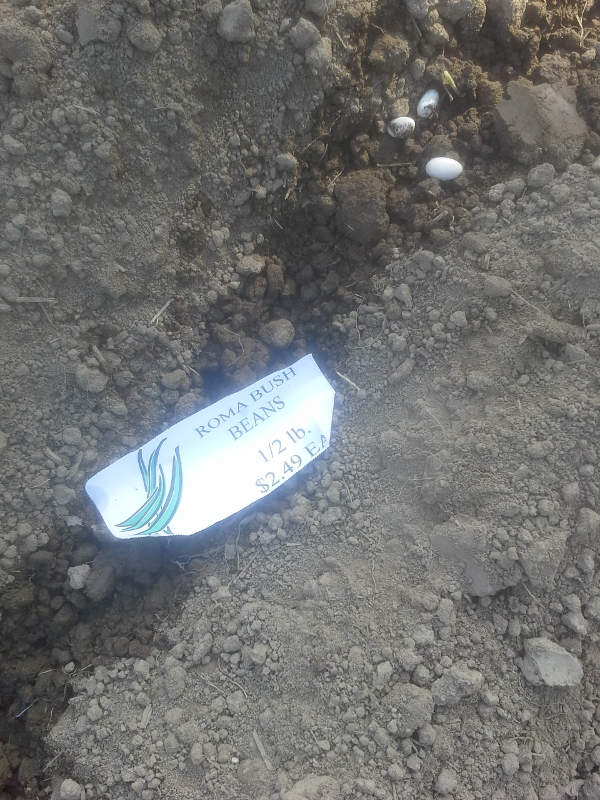
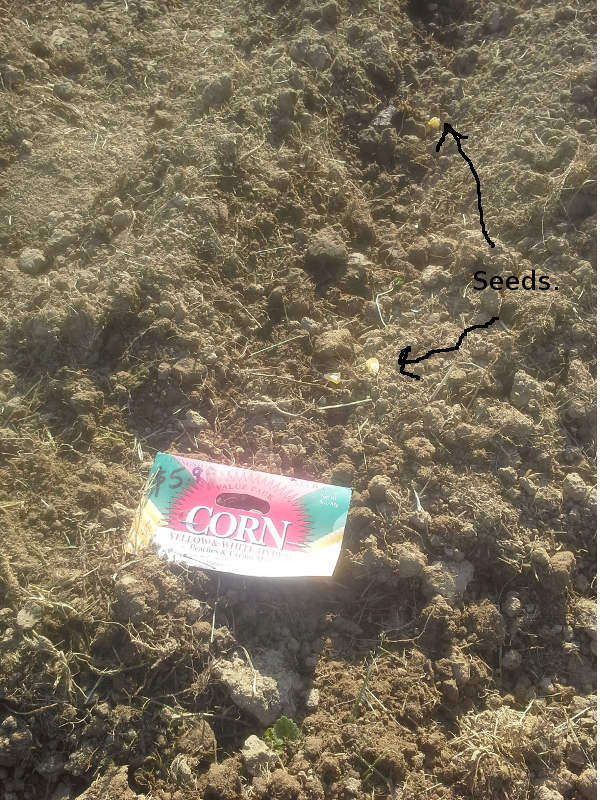
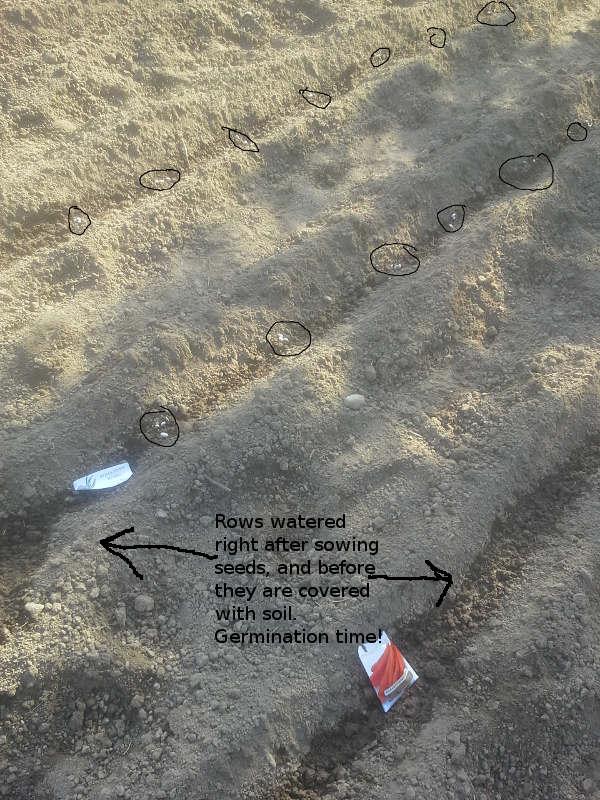
After all the plants are laid out and planted, it's time to start the seeds. Beets went in, and then the carrots. We had enough seed to plant either 3 rows of corn and 3 rows of beans, or 4 rows of corn and 2 rows of beans. Since we had 8 rows of beans last year, and well over 80 quarts canned plus several meals and the rest given away, we decided to lean heavier on corn. I still have about 6 quarts of green beans from last year. The used beans will store, just keep them in a cool dry space.
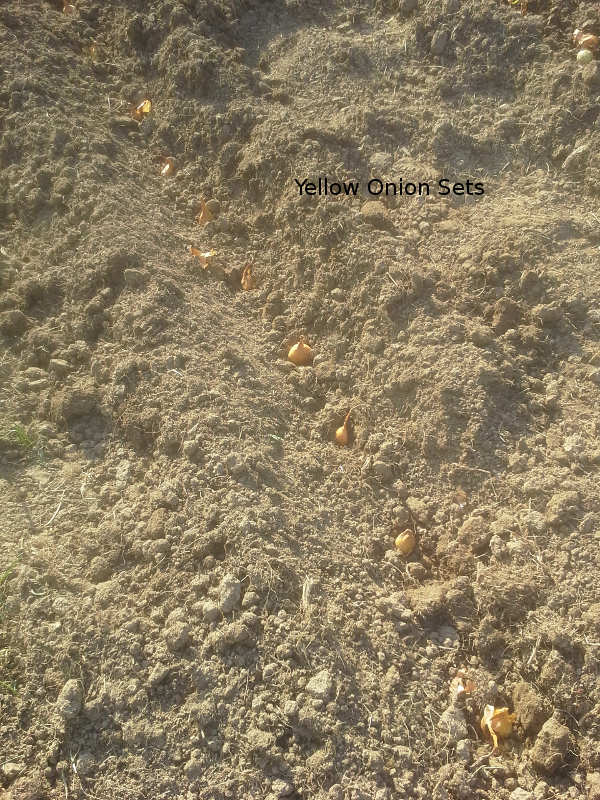
The garden is finished out with the corn, 4 rows, and yellow onions, 2 rows:
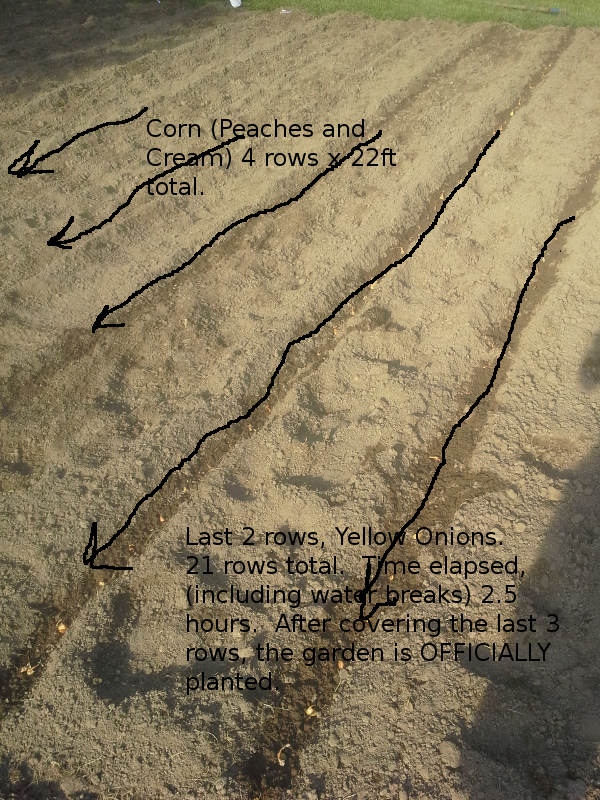
Last four rows need covered, having been watered, so we're almost done!
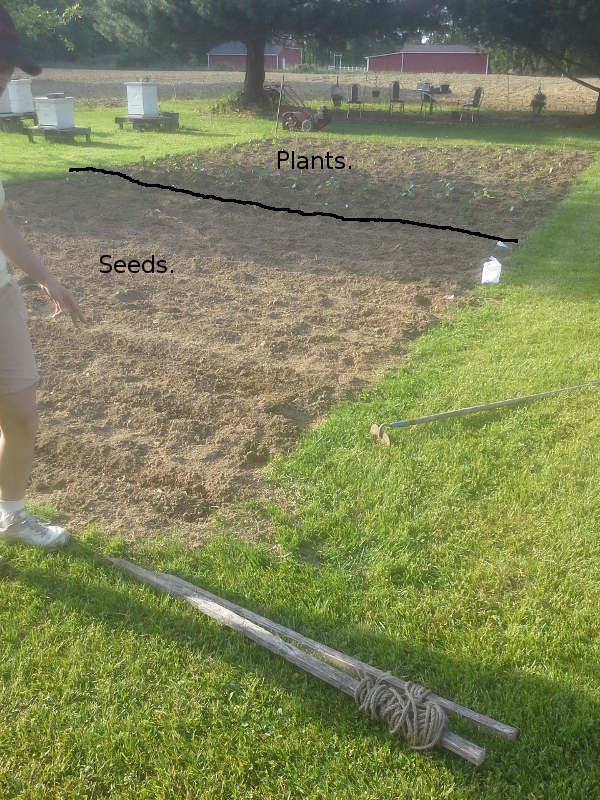
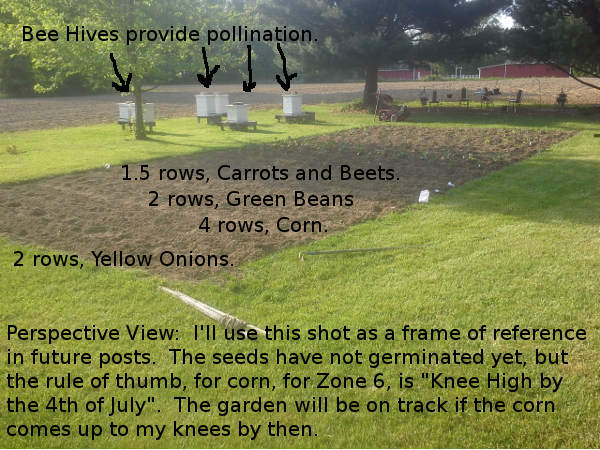
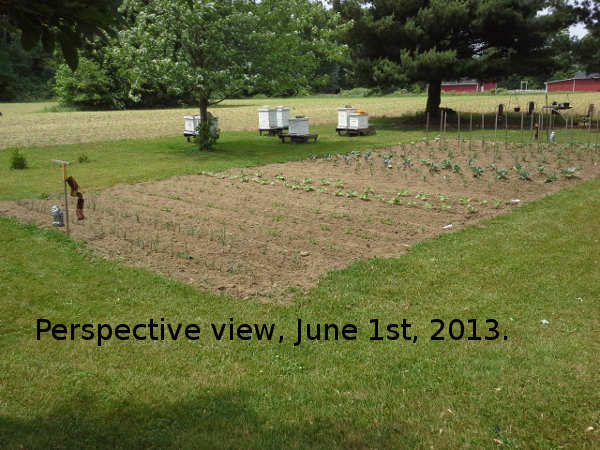
A perspective view:
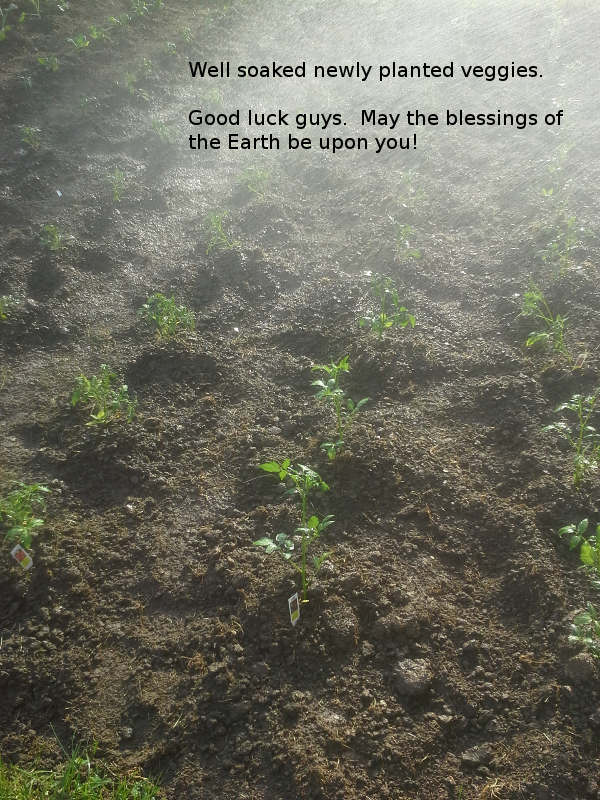
A garden isn't planted without a nice soaking afterwards:
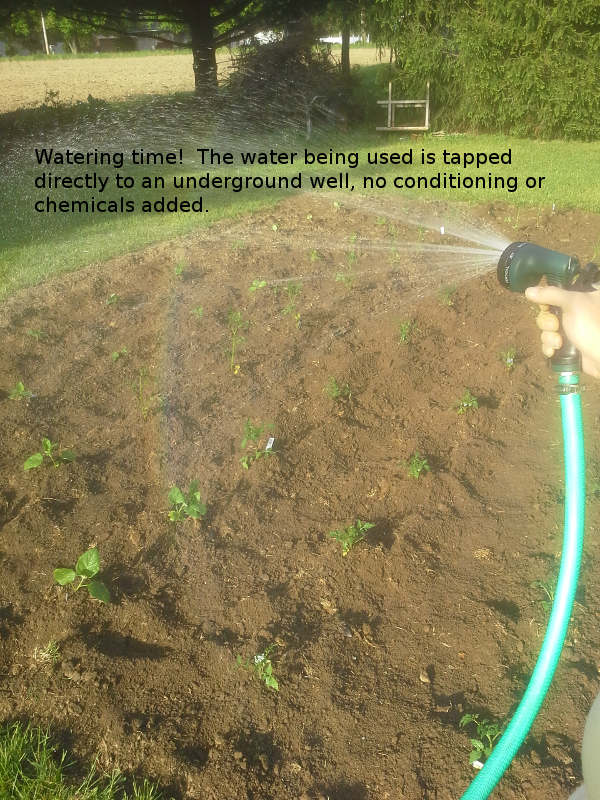
Like this:
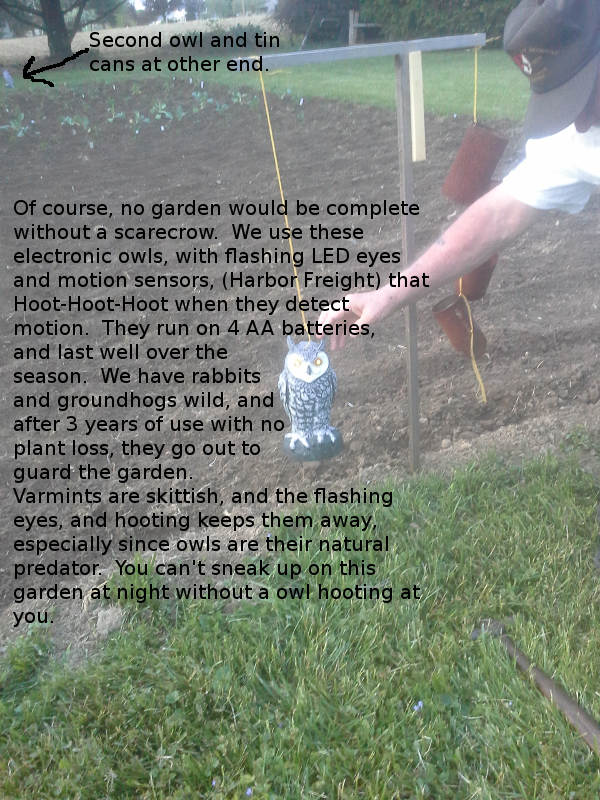
Then we worry, being out in the country, about pest control. Rabbits and groundhogs love fresh veggies, especially cabbage and spinach. We've tried deer pee, marigolds, and fencing, all with limited success. Our solution, which has worked amazingly well:
My next post will include updates on how everything is progressing. Of course, I'll be tilling the weeds, and hoeing around the plants, keeping things looking pretty. Further on in the season I'll be explaining processing techniques for preservation, and with 12 cabbages, we are planning on making sauerkraut this year. I have a dill pickle recipe to share, as well as a fresh salsa recipe, and a tried a true technique for canning your own tomato sauce. Stay tuned.
Starting with the first two marked rows, we space out the Zucchini and Yellow squash. They are prolific once they start coming on, and I like to have them near the edge of the garden for easy picking. The first two rows are finished out with cucumbers, as they will also sprawl, and need the room to bush out.

The 6 eggplant fill in the ends of the tomato rows, so I'll drop them in before I space out the tomatoes. We went heavy on Roma Tomatoes this year, as we have plans to make sauce to can.

The first two rows are watered and planted, time to set out the tomatoes. It's nice to have a helper, as it makes things go a bit quicker. She spaced, and I planted. (Identity blurred, of course!)

So far:

And progressing along:

(I realized just now that the numbers don't quite add up, but the previous post works out to 144 plants. I'll figure that out later, as I was editing pics over the course of the past few days. Remember, this was all planted on the 17th of May, and it took me a while, in several batches to edit all the pics. I had to re-size all the pics from hi-res 2460x1640 down to 800x600, to get them to fit the uploader in order to post them, so my apologies if the numbers aren't exact.)
One important thing to note: Never plant hot peppers beside sweet peppers. If you notice, I have 2 rows, or approximately 4 feet, between the hot peppers and the green peppers. If you plant a jalapeño beside a green pepper, prepare to have a mouth burning green pepper! Been there before.
After all the plants are laid out and planted, it's time to start the seeds. Beets went in, and then the carrots. We had enough seed to plant either 3 rows of corn and 3 rows of beans, or 4 rows of corn and 2 rows of beans. Since we had 8 rows of beans last year, and well over 80 quarts canned plus several meals and the rest given away, we decided to lean heavier on corn. I still have about 6 quarts of green beans from last year. The used beans will store, just keep them in a cool dry space.

The garden is finished out with the corn, 4 rows, and yellow onions, 2 rows:

Last four rows need covered, having been watered, so we're almost done!

A perspective view:

A garden isn't planted without a nice soaking afterwards:

Like this:

Then we worry, being out in the country, about pest control. Rabbits and groundhogs love fresh veggies, especially cabbage and spinach. We've tried deer pee, marigolds, and fencing, all with limited success. Our solution, which has worked amazingly well:

My next post will include updates on how everything is progressing. Of course, I'll be tilling the weeds, and hoeing around the plants, keeping things looking pretty. Further on in the season I'll be explaining processing techniques for preservation, and with 12 cabbages, we are planning on making sauerkraut this year. I have a dill pickle recipe to share, as well as a fresh salsa recipe, and a tried a true technique for canning your own tomato sauce. Stay tuned.
reply to post by otherpotato
PHOTO ADDENDUM TO FIRST POST
These photos supplement my first post and provide context. I take pictures from my phone (I don't have a proper camera) and usually the pictures aren't taken in the best light so lower your expectations.
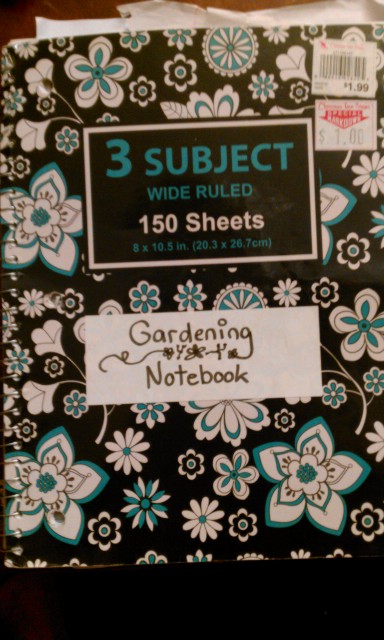
The Gardening Notebook
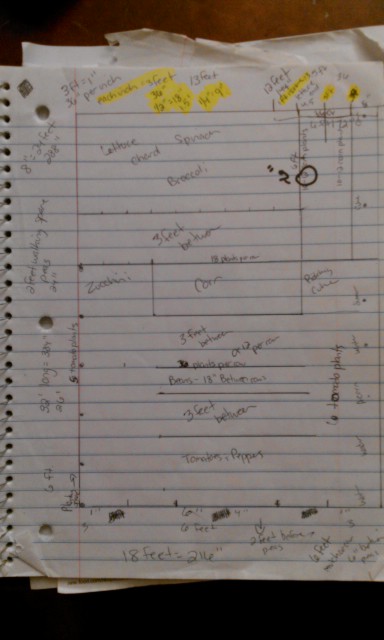
This paper trail was my inspiration for starting this thread. I keep handwritten notes of my plans, what I plant, when I plant, research, and what happened during the season. My neighbor keeps trying to steal this from me. If you ever find this notebook in a bus station somewhere, please try to return it to me. Don't let the dollar price tag fool you.
Here's an example of the "super scientific" way I plan out my garden - at least this year. I converted all measurements to scale and planned out spacing accordingly. If you can actually read the measurements please don't call me out on my lack of math skills. I may not follow this plan exactly when I do my final planting - the corn row is still subject to debate.
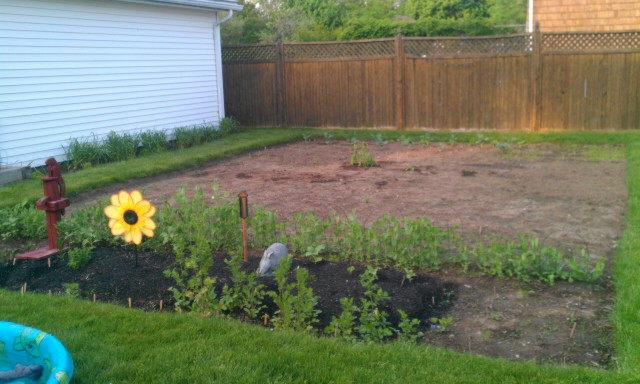
The garden:
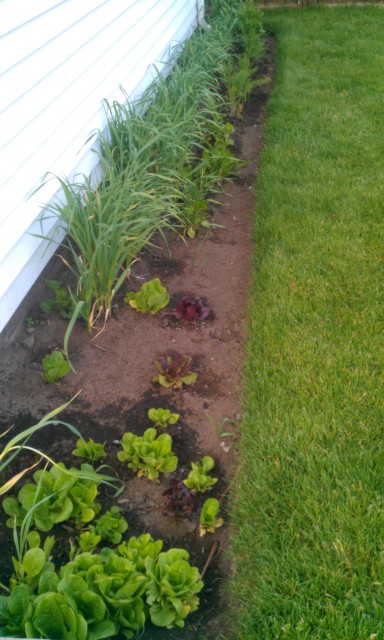
The garlic patch
Lettuce in the patch:
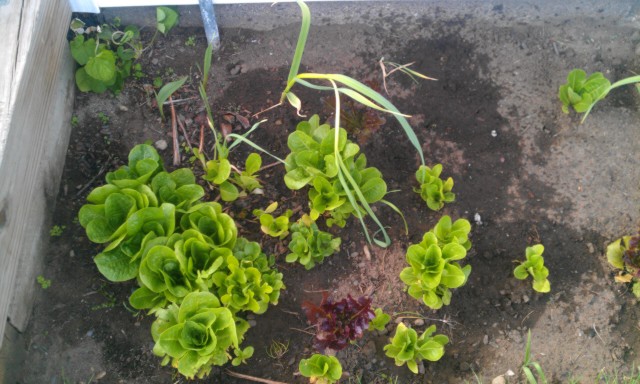
The self-seeding method is working very well - we haven't had to buy lettuce in over a month.
Chard from last year:
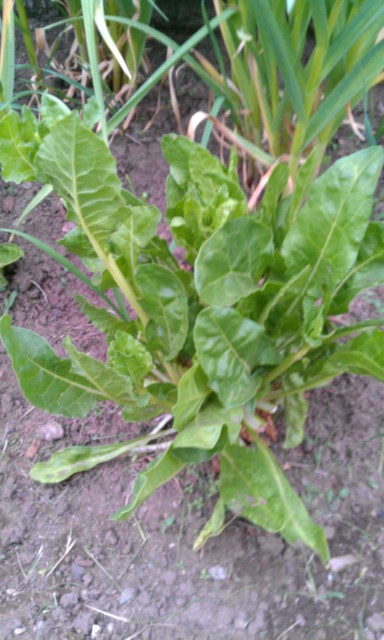
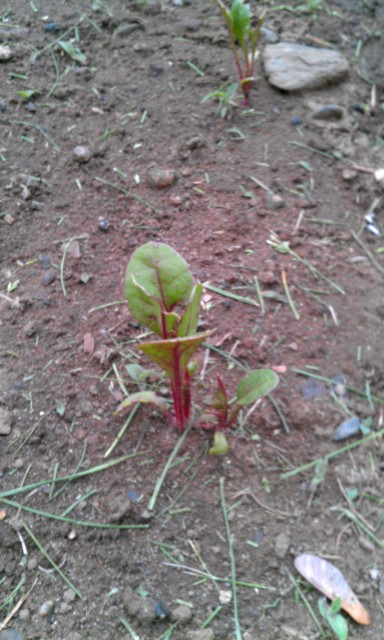
It seems to take a year to get a good chard growth. The patch from last year has been picked several times though it seems to be going to seed now. The patch planted this year is still tiny. We have five solid chard plants we're picking from and that is definitely not enough. Here are some of the babies, holding their own against nibbly pests:
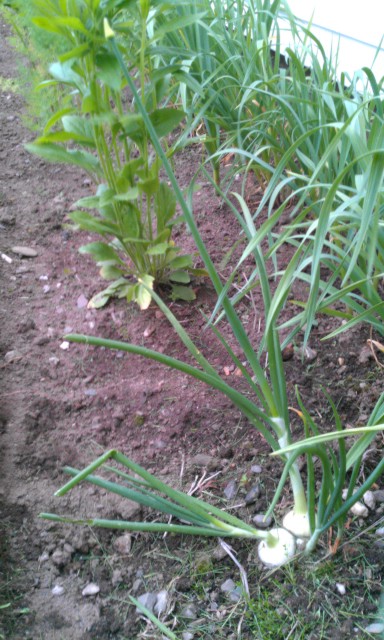
My fluke onions - starting to go to seed:
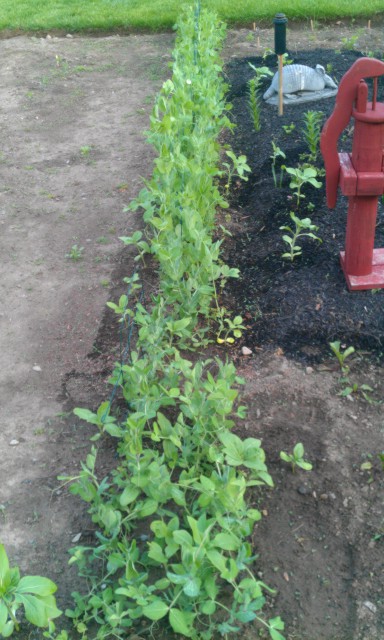
Peas and sunflowers experiment - the end of the row has sunflowers in between the peas as support.
First pea blossom, May 20 (Thomas Laxton - shelling peas):
Here were the peas May 4 weekend, from the opposite angle. The spotty patch from the mulch out are the ones from the saved seed. And it's clear my rows are "interpretive."
Main Bed
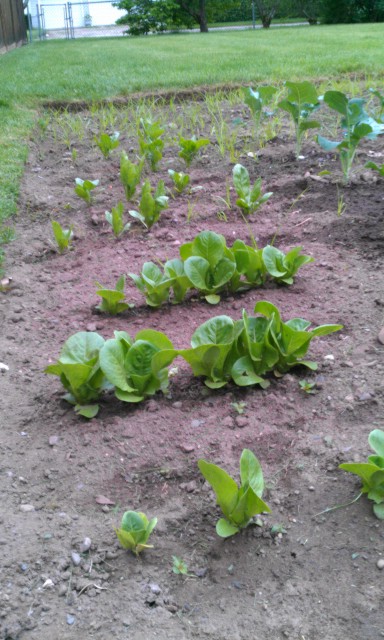
Broccoli a few weeks ago:
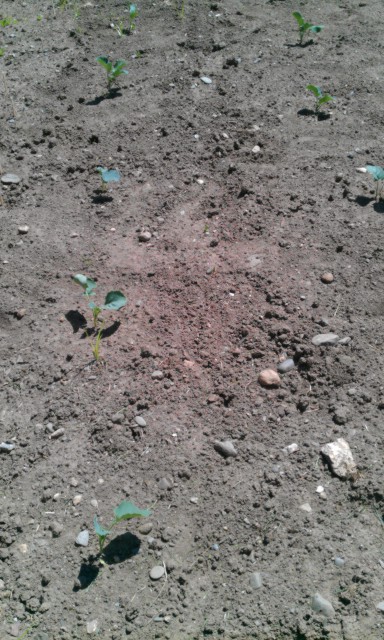
Lettuce, Spinach, Broccoli (and nutsedge!) last week:
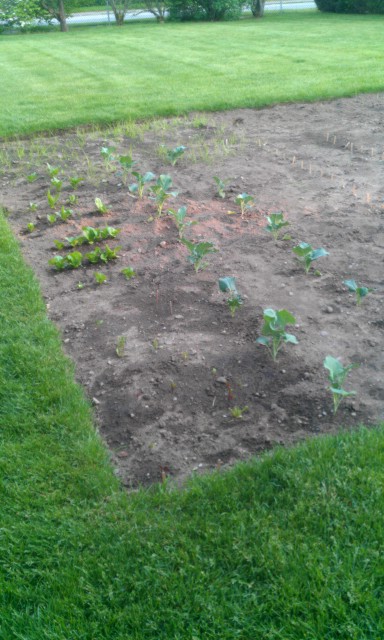
And today (with even more nutsedge):
Beans a couple weeks ago:
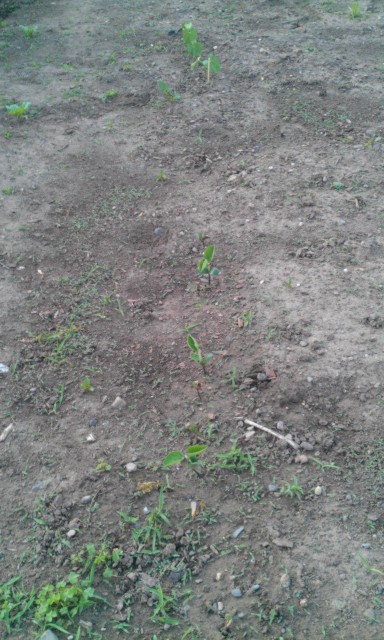
Beans today:
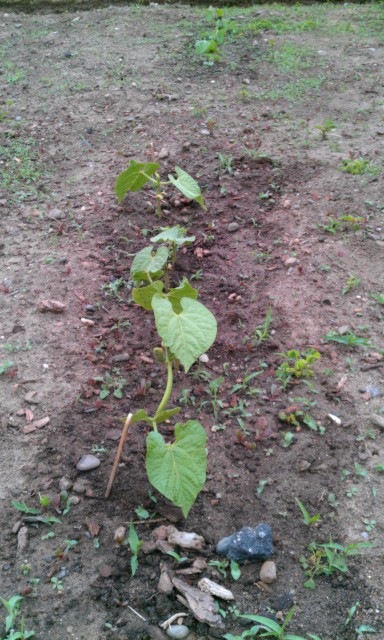
Yes I am aware I have to weed.
Potato containers:
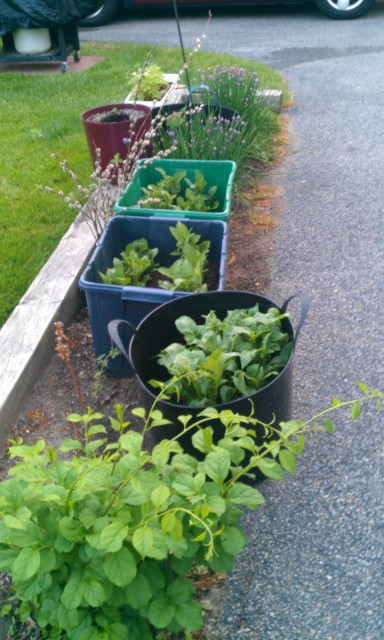
BTW if anyone knows what that plant is next to my potato plants... it traveled with last years raspberry canes and I'm not sure what to do with it.
PHOTO ADDENDUM TO FIRST POST
These photos supplement my first post and provide context. I take pictures from my phone (I don't have a proper camera) and usually the pictures aren't taken in the best light so lower your expectations.
The Gardening Notebook
This paper trail was my inspiration for starting this thread. I keep handwritten notes of my plans, what I plant, when I plant, research, and what happened during the season. My neighbor keeps trying to steal this from me. If you ever find this notebook in a bus station somewhere, please try to return it to me. Don't let the dollar price tag fool you.

Here's an example of the "super scientific" way I plan out my garden - at least this year. I converted all measurements to scale and planned out spacing accordingly. If you can actually read the measurements please don't call me out on my lack of math skills. I may not follow this plan exactly when I do my final planting - the corn row is still subject to debate.

The garden:

The garlic patch

Lettuce in the patch:

The self-seeding method is working very well - we haven't had to buy lettuce in over a month.
Chard from last year:

It seems to take a year to get a good chard growth. The patch from last year has been picked several times though it seems to be going to seed now. The patch planted this year is still tiny. We have five solid chard plants we're picking from and that is definitely not enough. Here are some of the babies, holding their own against nibbly pests:

My fluke onions - starting to go to seed:

Peas and sunflowers experiment - the end of the row has sunflowers in between the peas as support.

First pea blossom, May 20 (Thomas Laxton - shelling peas):

Here were the peas May 4 weekend, from the opposite angle. The spotty patch from the mulch out are the ones from the saved seed. And it's clear my rows are "interpretive."

Main Bed
Broccoli a few weeks ago:

Lettuce, Spinach, Broccoli (and nutsedge!) last week:

And today (with even more nutsedge):

Beans a couple weeks ago:

Beans today:

Yes I am aware I have to weed.
Potato containers:

BTW if anyone knows what that plant is next to my potato plants... it traveled with last years raspberry canes and I'm not sure what to do with it.
reply to post by otherpotato
VIDEO ADDENDUM TO FIRST POST
This video summarizes why I garden.
Learn. Grow. Eat.
And live.
VIDEO ADDENDUM TO FIRST POST
This video summarizes why I garden.
Learn. Grow. Eat.
And live.
Garden Update: (Not a Research Post)
After 6 days in the soil, all my seeds are sprouting, from the beets and carrots, to the beans:
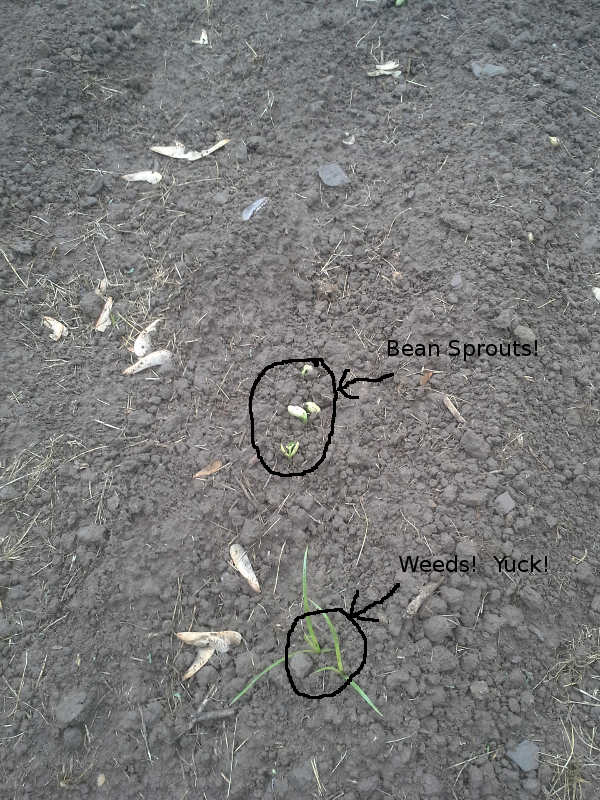
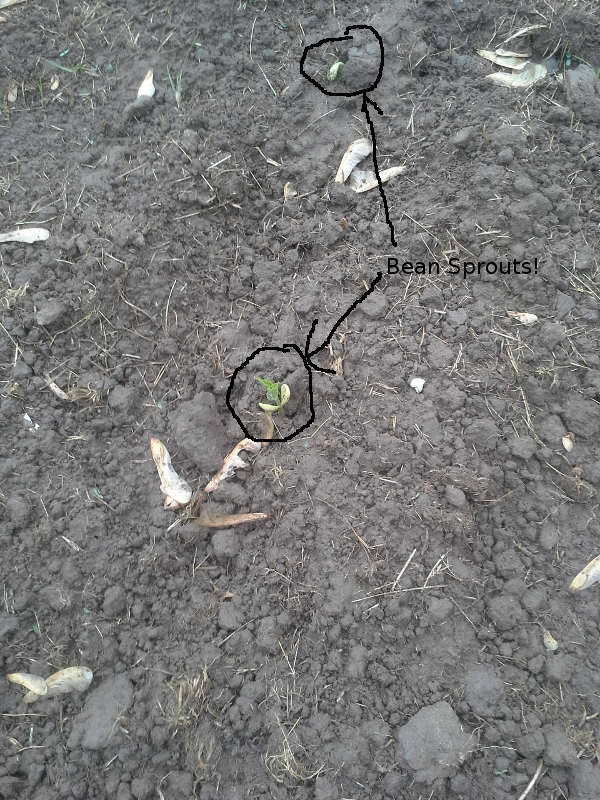
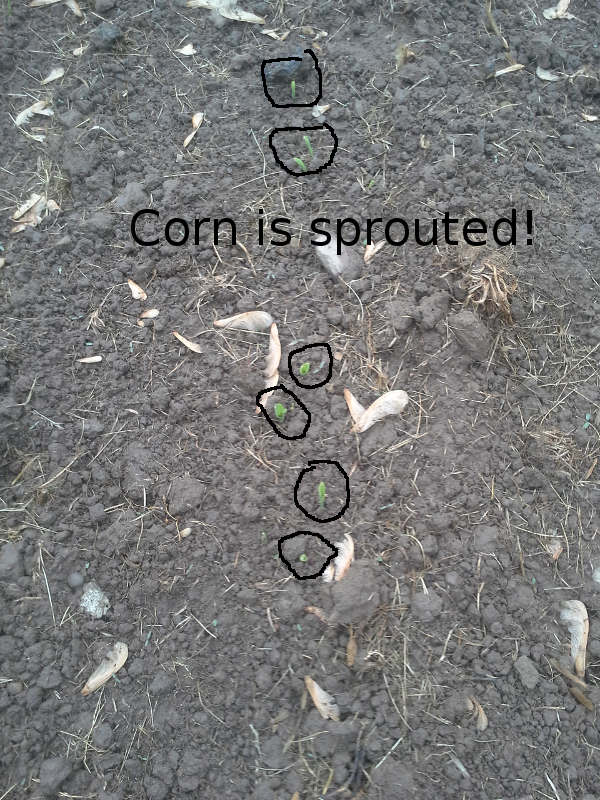
The corn:
and, the yellow onions:
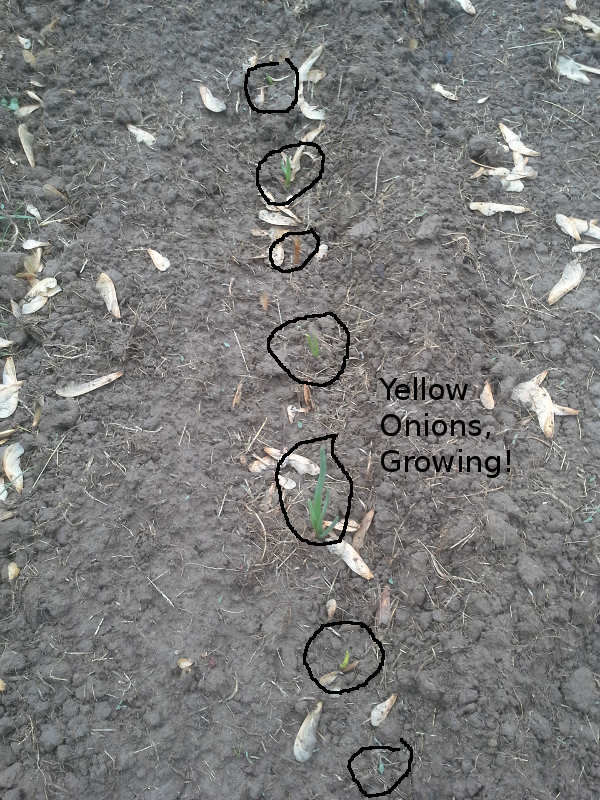
There's always a brief worry during germination time and sprouting that one may wonder if they are planting viable seeds, especially when dealing with a new source, but alas, that fear is now assailed. Everything's coming up. After a week of dry weather and hose watering, we finally got a nice thunderstorm to move in and thoroughly soak the whole garden.
Overview from May 23rd, 2013:
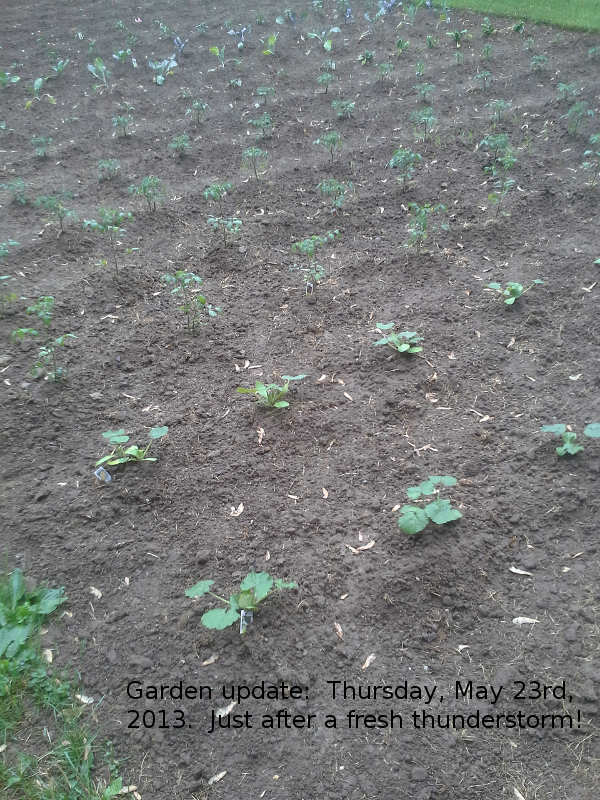
Looking good so far!
After 6 days in the soil, all my seeds are sprouting, from the beets and carrots, to the beans:


The corn:

and, the yellow onions:

There's always a brief worry during germination time and sprouting that one may wonder if they are planting viable seeds, especially when dealing with a new source, but alas, that fear is now assailed. Everything's coming up. After a week of dry weather and hose watering, we finally got a nice thunderstorm to move in and thoroughly soak the whole garden.
Overview from May 23rd, 2013:

Looking good so far!
Post #1 Planting Zone 5b Midwest Great Lakes Region
I would like to thank everyone involved in creating this research project, and I would also like to thank Otherpotato for allowing me to participate and contribute to this project. I enjoy gardening and being outdoors in general, so this will be something that I will enjoy participating in.
Getting Started:
**First off I would like to let everyone know that I was away for a little over a week and while I was gone I suffered a pretty major set back in my garden. We had a very late frost, and it wiped out almost every single plant in my garden. I have just reseeded my entire garden, and will get some pictures together once I have seedlings again.
My main focus in this project is going to be plants of the nightshade variety, which includes many of the most common plants that you will find in your average garden. The nightshade plant varieties consist of the following: potatoes (not including sweet), tomatoes, peppers, and eggplants.
I will also be attempting to cover different growing methods for each of these to see which method produces the greatest yield for those who are working with limited space. (will cover in my next post) I generally plant my entire garden from seed, rather than using greenhouse raised plants. I do this for two reasons, the first is I do not have to acclimate the plants using this method, and the second is that it is far more economical to plant using seed. Also in a survival situation you would need to store and use seed anyhow, because there would not be any greenhouses available to purchase commercially raised plants from.
Main Garden:
My main garden consists of an area that is approximately 16'x60' of loose lightly rocky mild soil with a heavy earth worm presence. I do not use commercial fertilizers in my garden area at all, I instead use a combination of lime, white wood ash, manure, and hay/straw for aeration. I find that this combination gives my plants the nutrients that they need and it keeps the chemicals out of my garden soil.
The main garden planting consists of the following plants spaced according to the guide that is provided on the back of the seed package:
Tomatoes: Beefsteak, Roma
Peppers: Bell, Jalapeno, Chili
Potato: Redskin, White (Use traditional non hybrid potatoes for larger yields)
Peas: Sweet bush
Beans: Bush beans, Wax beans
Zucchini: Dark green
Squach: Summer, Spaghetti
Cucumbers: Straight, Chicago pickling
Cantaloupe: Jumbo
Water melon: Sugar baby
Onions: Red
Corn: Sweet bi-color early (Pro tip for continuous sweet corn throughout the season: Instead of planting all your corn at once, plant shorter rows every 2 weeks throughout the summer and they will mature in the order panted giving you a supply of fresh sweet corn until the end of the growing season.)
(if your seeds do not have a guide on the back, remember that you can plant them closer together as seeds and later thin them out if needed by removing or transplanting some of the excess plants)
Raised Bed
The raised bed is a simple 6'X6'X6" raised growing area with a similar light mild soil that is in my main garden. The reason I used a raised bed for some of my garden is ease of maintenance, and replanting as I harvest some of my early vegetables. This year I have only a few varieties in my raised bed that I use the most of and they are:
Carrot: Mini, Jumbo
Lettuce: Red romaine, Butter crunch
Radish: Early, Red globe
By planting these in my raised bed, as I use them I can just reseed and have a continuous supply throughout the growing season.(very useful for radishes as they mature quickly) It also gives me easy access to the lettuce for that fresh garden salad to go with that juicy steak fresh off the grill MmmmMmm .
Garden Update: June 1st, 2013.
It's been over a week, and have a bit of sad news and well as good news.
The weeds are coming!
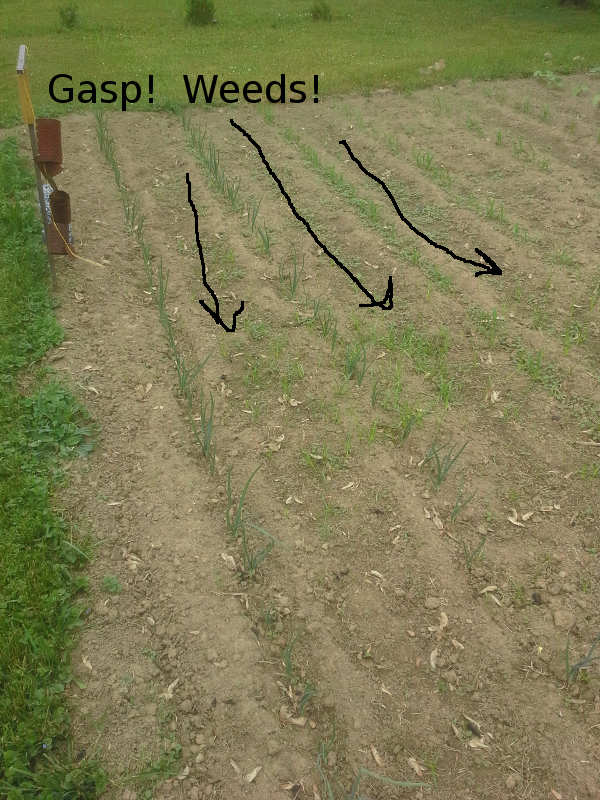
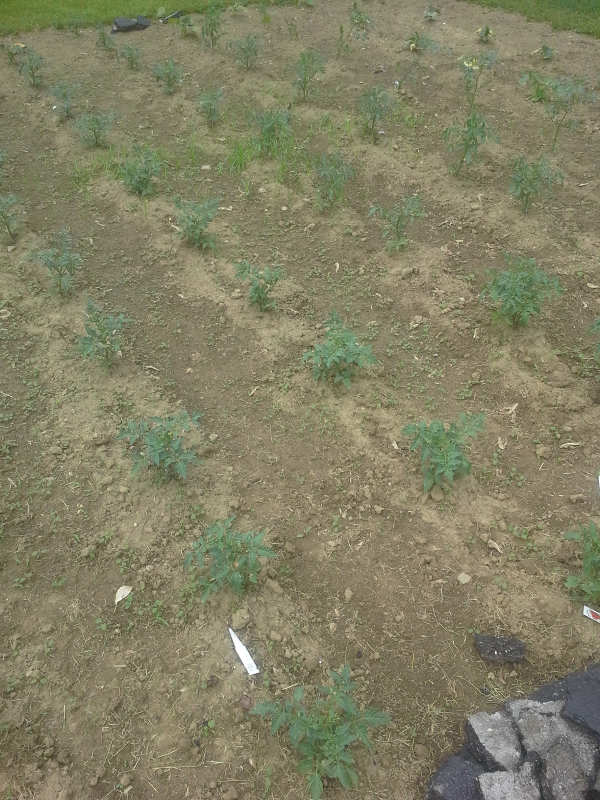
Well, that's normal, for week of weed growth. Time to bust out the rototiller and trusty garden hoe. It'll take about 2 hours to pull all the maintenance, and get the garden back into immaculate condition. I like to grow vegetables, not weeds.
The sad news:
I thought we were past all dangers of frost, yet had three cold nights. Even with covering the plants each night, we still took some frost damage.
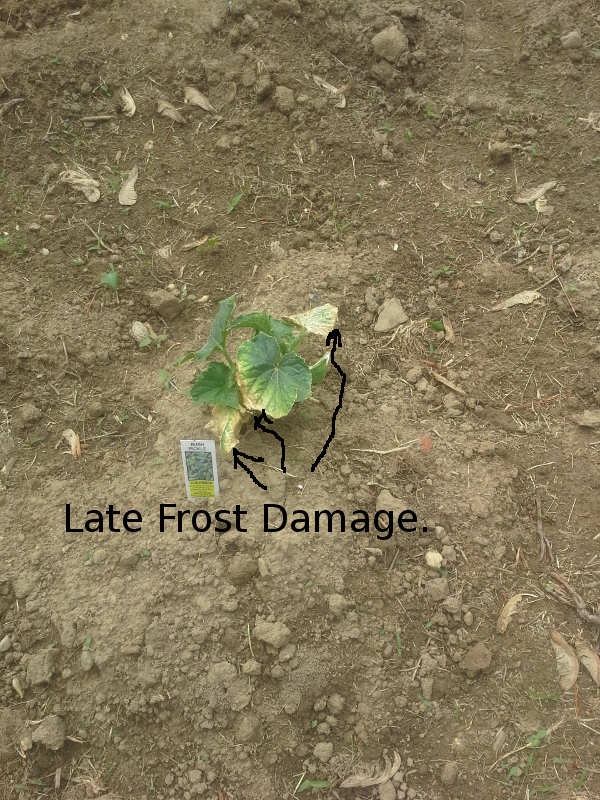
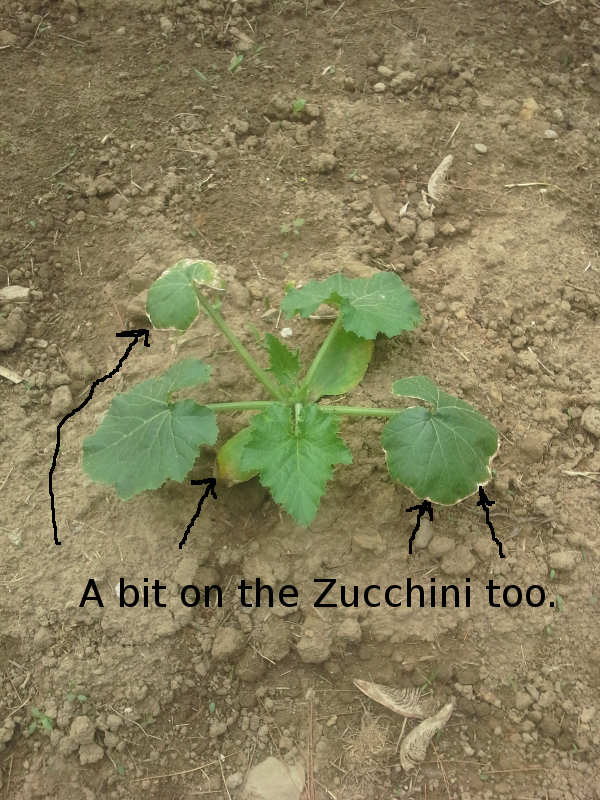
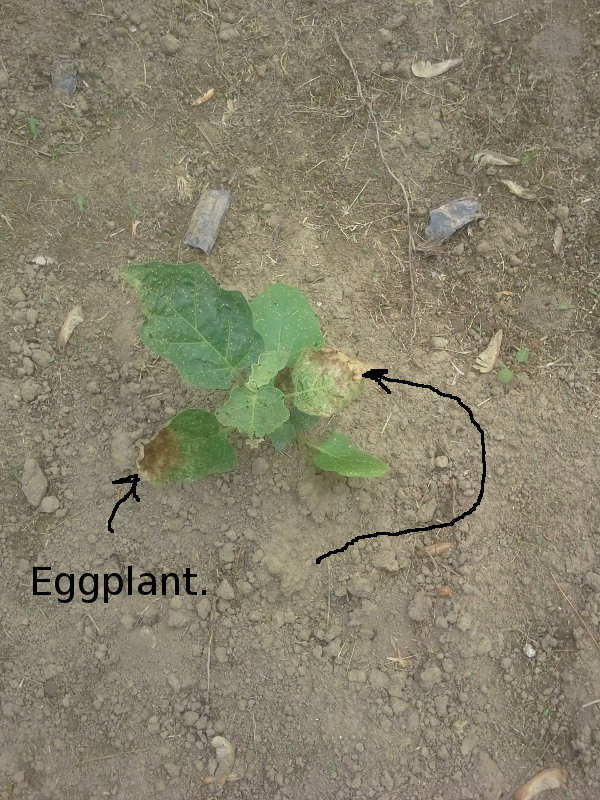
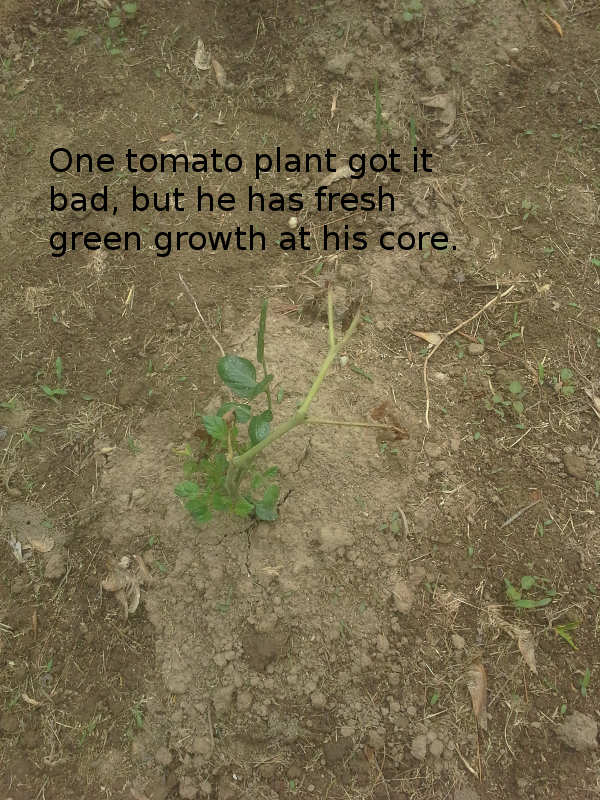
Ouch. However, on closer inspection, all the frost damaged plants do have fresh green growth, so although we didn't lose any plants, they did take a beating. Not good, but it is one of those things every gardener learns to deal with.
Now to get down to work. I rototilled the whole garden, fresh loose soil on each side of each row, then grabbed my trusty hoe to work the rest of the garden:
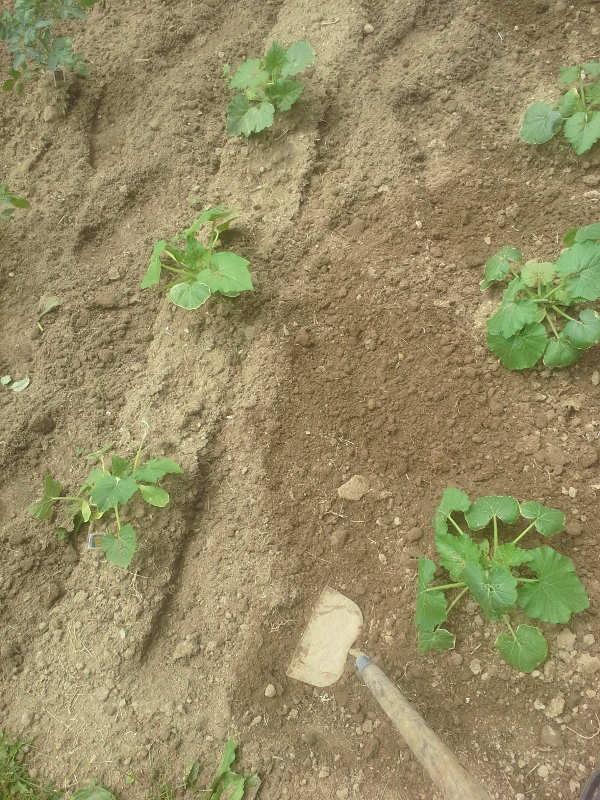
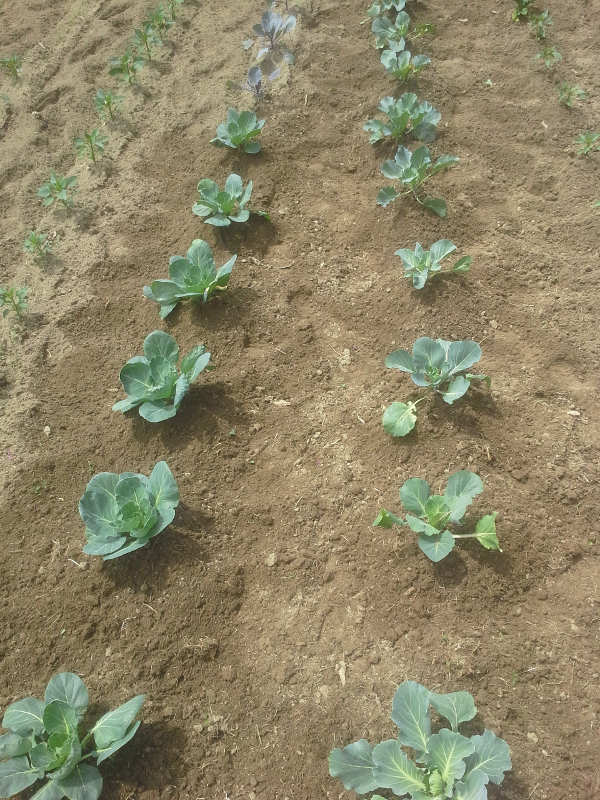
Cabbages done, onto the green peppers:
While gardening is quite a bit of hard work, there are periodic rewards. The peppers and tomatoes have blossoms coming on!
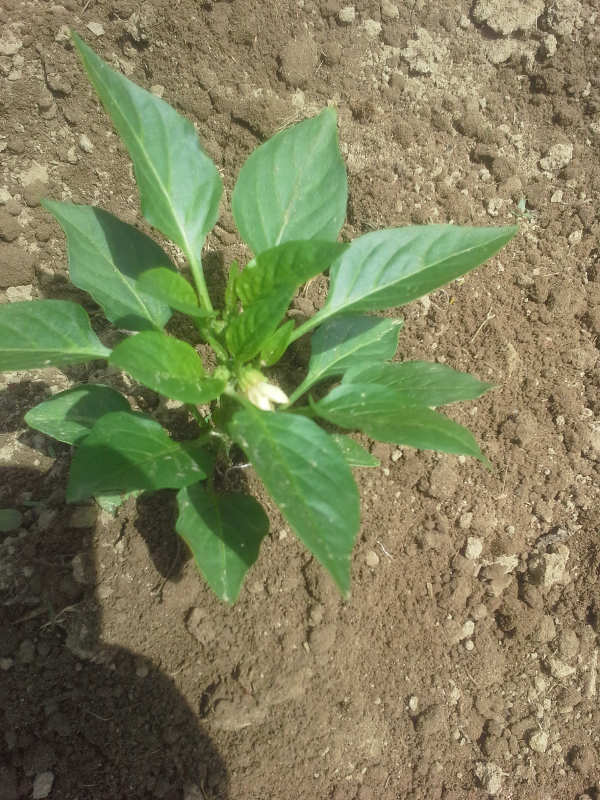
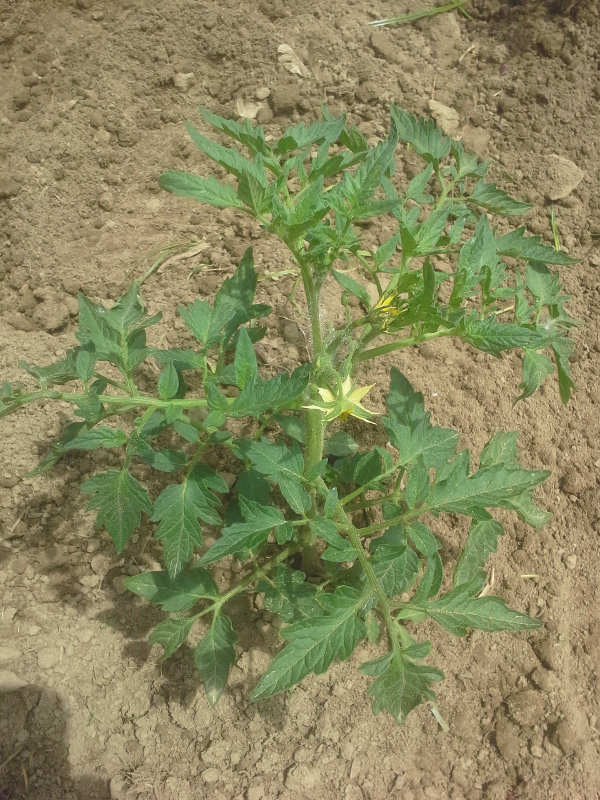
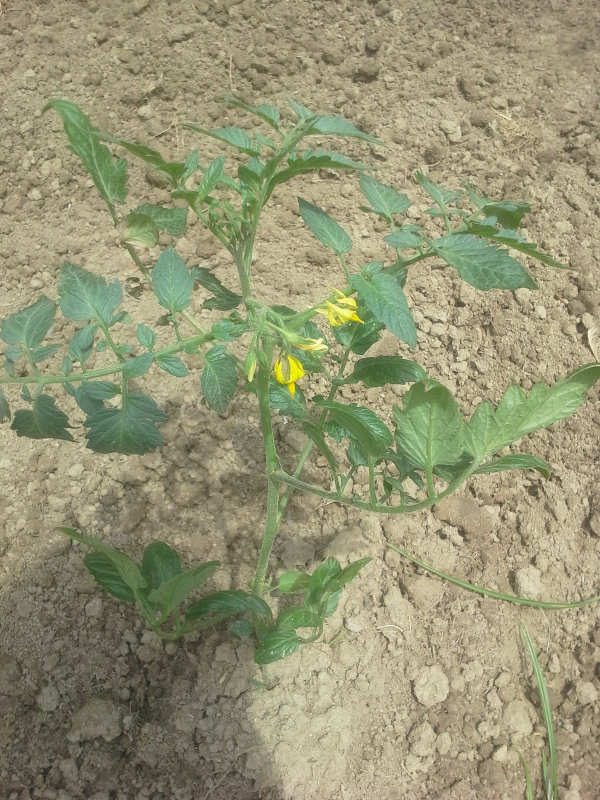
Each of those blossoms will be a pepper or a tomato, so you tend to gain satisfaction when you see those signs.
Now, I like to stake my tomato plants, for a number of reasons. It keeps the fruit off the ground. You can trim the plant for maximum fruit production. It makes the fruit easy to see and pick. It's also a bit more work.
I had enough stakes to stake up 14 plants, and I'll have to cut out some more in the next week, but the grape tomatoes and beefsteaks were getting ready to topple over:
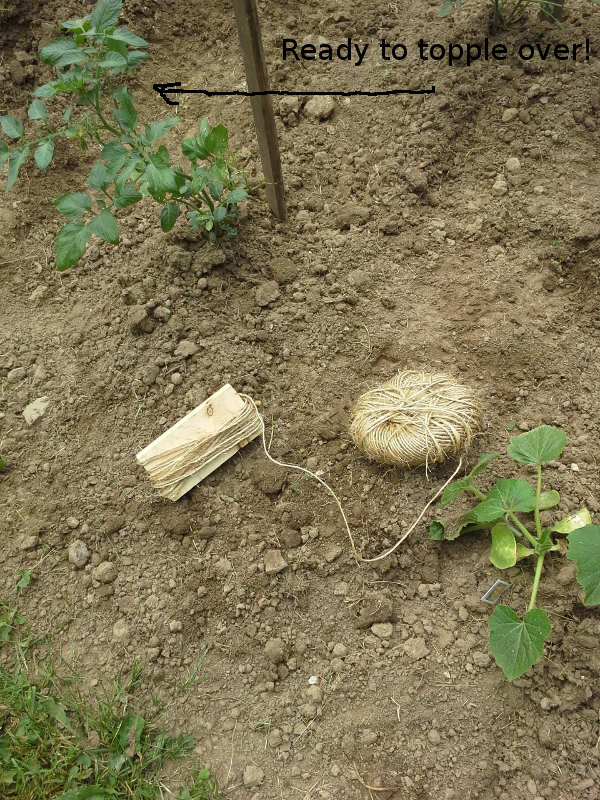
I use a ball of twine, and a 5 inch block of wood, wrapping the twine (biodegradable) around the block about 15 times. That'll give you 15 nice pieces of twine, cut all at once, to tie up plants with.
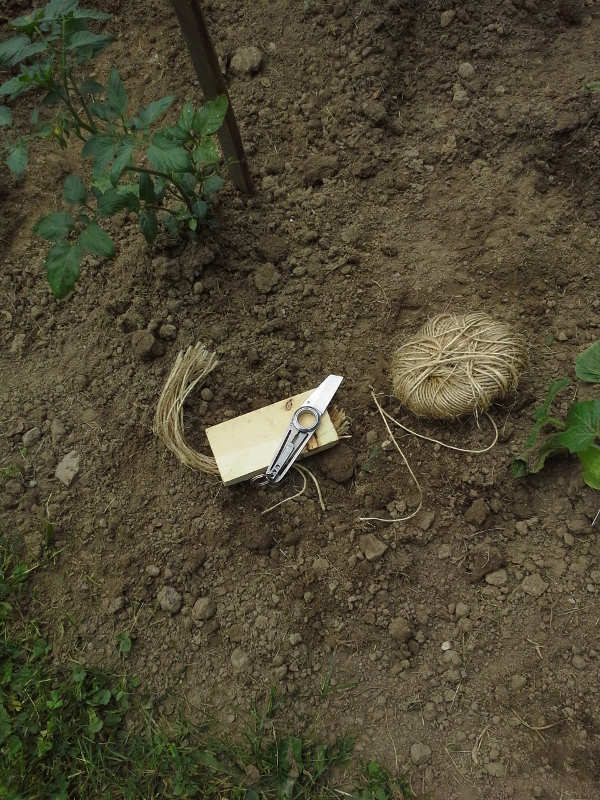
I'll tie each tomato plant up just under each blossom, and at this stage I leave the string rather loose to account for future plant growth. The stalk will be at least a half inch thick later in the year.
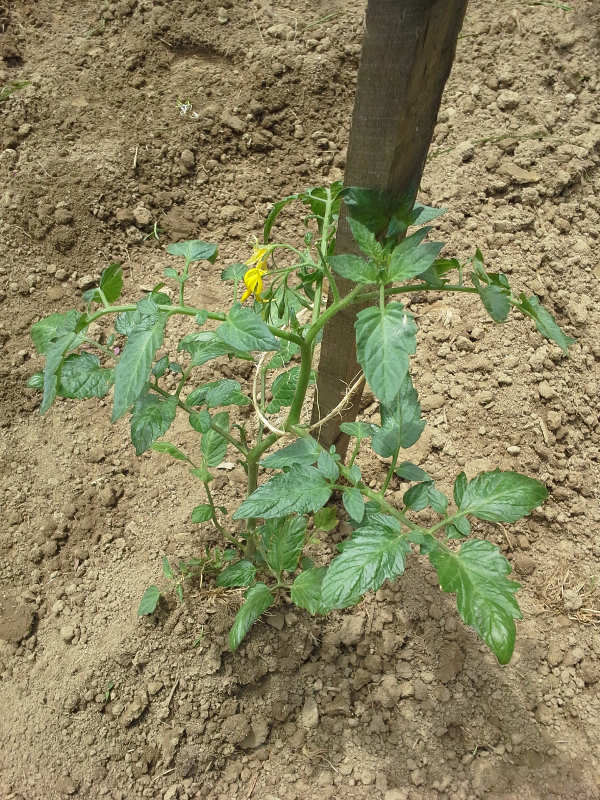
All done for now, 14 tomato plants staked and tied up. Set for at least a week.
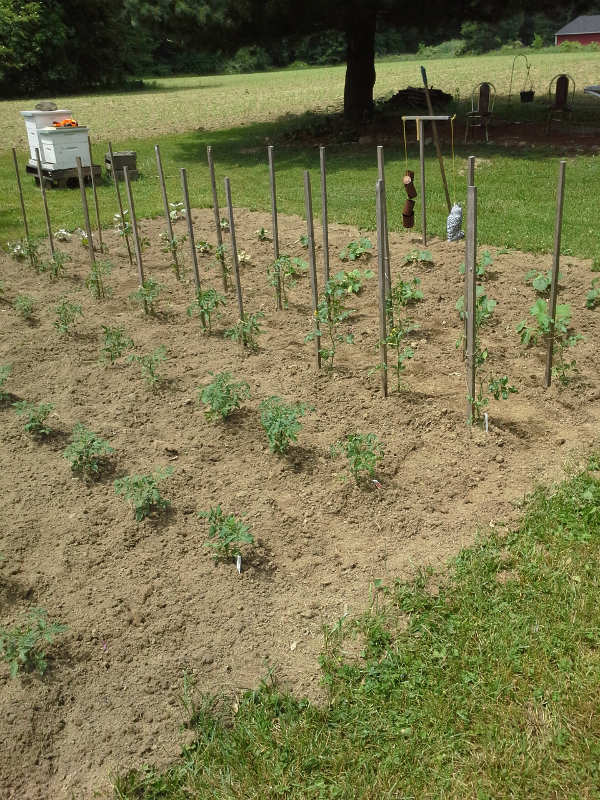
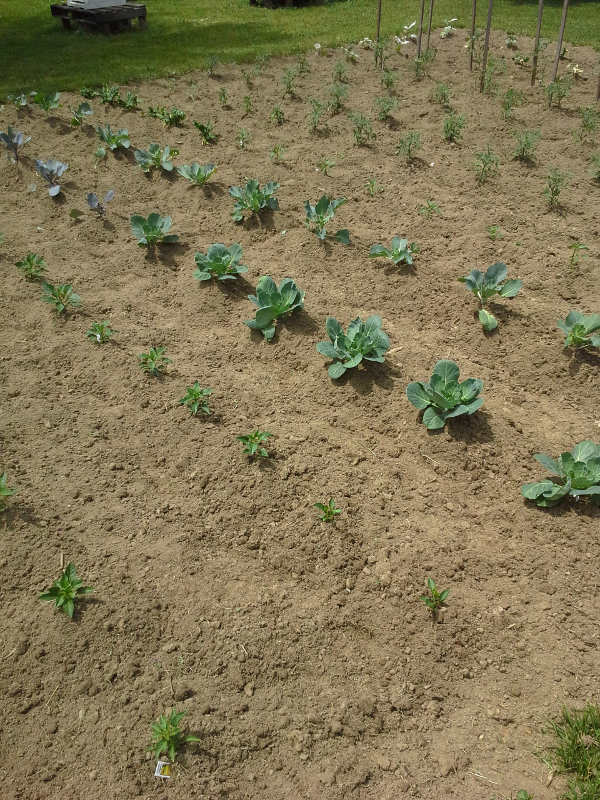
Cabbages progressing nicely, no gnawing by varmints.
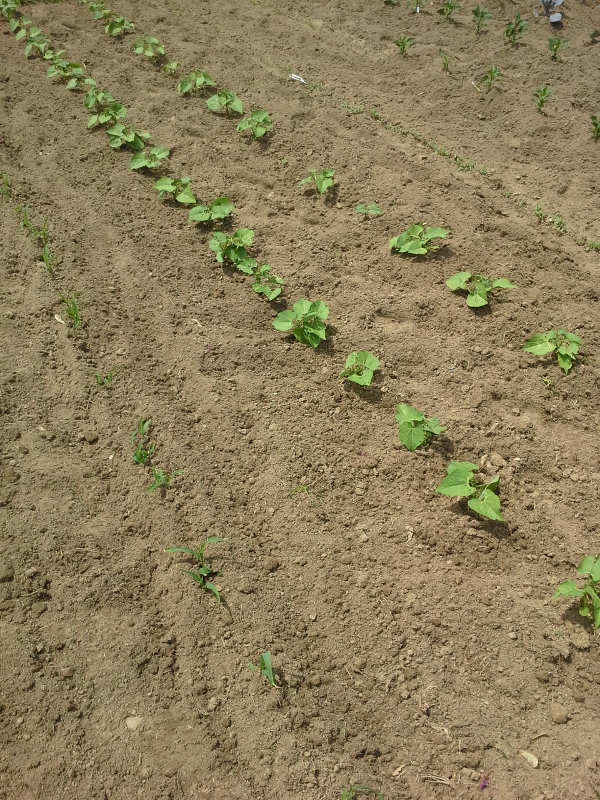
Beans and corn doing well.
For now, that's all the updates:
It's been over a week, and have a bit of sad news and well as good news.
The weeds are coming!


Well, that's normal, for week of weed growth. Time to bust out the rototiller and trusty garden hoe. It'll take about 2 hours to pull all the maintenance, and get the garden back into immaculate condition. I like to grow vegetables, not weeds.
The sad news:
I thought we were past all dangers of frost, yet had three cold nights. Even with covering the plants each night, we still took some frost damage.


Ouch. However, on closer inspection, all the frost damaged plants do have fresh green growth, so although we didn't lose any plants, they did take a beating. Not good, but it is one of those things every gardener learns to deal with.
Now to get down to work. I rototilled the whole garden, fresh loose soil on each side of each row, then grabbed my trusty hoe to work the rest of the garden:

Cabbages done, onto the green peppers:

While gardening is quite a bit of hard work, there are periodic rewards. The peppers and tomatoes have blossoms coming on!


Each of those blossoms will be a pepper or a tomato, so you tend to gain satisfaction when you see those signs.
Now, I like to stake my tomato plants, for a number of reasons. It keeps the fruit off the ground. You can trim the plant for maximum fruit production. It makes the fruit easy to see and pick. It's also a bit more work.
I had enough stakes to stake up 14 plants, and I'll have to cut out some more in the next week, but the grape tomatoes and beefsteaks were getting ready to topple over:

I use a ball of twine, and a 5 inch block of wood, wrapping the twine (biodegradable) around the block about 15 times. That'll give you 15 nice pieces of twine, cut all at once, to tie up plants with.

I'll tie each tomato plant up just under each blossom, and at this stage I leave the string rather loose to account for future plant growth. The stalk will be at least a half inch thick later in the year.

All done for now, 14 tomato plants staked and tied up. Set for at least a week.

Cabbages progressing nicely, no gnawing by varmints.

Beans and corn doing well.

For now, that's all the updates:

Post #2 - Northern Hemisphere - Zone 5/6 - New England
RESEARCH POST
TOPIC: Nutsedge
It's been an interesting month since I last posted, filled with medical problems that I'm trying to pretend aren't happening. In avoidance, most of my free time has been spent gardening - with a vengeance! I took a photo update of my garden progress, but my convoluted uploading process means the pictures aren't yet ready. In the meantime enjoy the trials and tribulations of how I spend most of my time - weeding. May my obsession become your gain.
MY "FRIEND" - NUTSEDGE
For the past couple of years I've been fighting with a grass-like weed in my garden. We just kept pulling it out every time we saw it but it always came back. This year I finally got clued in to what it really was: NUTSEDGE (insert dramatic theme music).
Nutsedge (also known in some circles as nutgrass) is notorious for being nearly impossible to get rid of once you get it in your lawn or garden. Here is my favorite quote about this little bugger (source):
This would be funny if it wasn’t so very true.
As soon as I had a name for this invader I did all the research I could into what it was and how to get rid of it. This particular page gave me heart palpitations. You'd think nutsedge was the second coming (source):
Oh great.
But before we all throw in the towel let's take a deep breath, take a step back, and gain some perspective. Turns out nutsedge is a mixed blessing. And perhaps a foe that could turn into a friend.
WHAT NUTSEDGE IS
Nutsedge’s latin name is Cyperus esculentus L. It is is part of the the sedge family.
I have a few sources I found useful in understanding this little bugger. This Clemson Cooperative Extension page has a generally useful summary of this plucky pest:
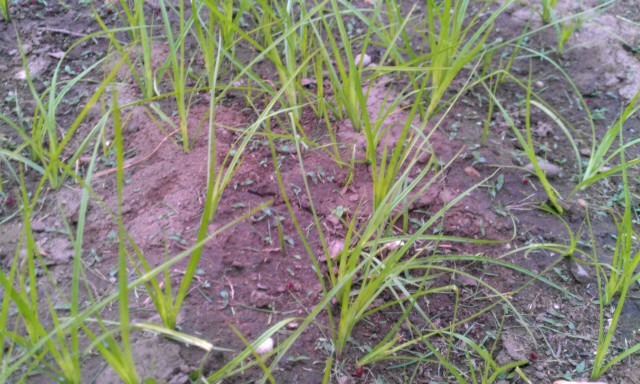
In my case I have the variety of nutsedge known as yellow nutsedge. Here’s an example of what the yellow variety looks like. The grass stems are a bright yellow green and they form in distinct clusters.
This is another site I found useful concerning the yellow variety (source):
It makes sense to me now that nutsedge prefers damper soil as I find it grows most voraciously during the spring and in a section of the garden that tends to get damper. It has not spread to the entire garden (yet) and I couldn't tell you when we first started having the problem. Doubtless tilling the soil made it worse.... (cont'd)
RESEARCH POST
TOPIC: Nutsedge
It's been an interesting month since I last posted, filled with medical problems that I'm trying to pretend aren't happening. In avoidance, most of my free time has been spent gardening - with a vengeance! I took a photo update of my garden progress, but my convoluted uploading process means the pictures aren't yet ready. In the meantime enjoy the trials and tribulations of how I spend most of my time - weeding. May my obsession become your gain.
MY "FRIEND" - NUTSEDGE
For the past couple of years I've been fighting with a grass-like weed in my garden. We just kept pulling it out every time we saw it but it always came back. This year I finally got clued in to what it really was: NUTSEDGE (insert dramatic theme music).
Nutsedge (also known in some circles as nutgrass) is notorious for being nearly impossible to get rid of once you get it in your lawn or garden. Here is my favorite quote about this little bugger (source):
There is only one guaranteed, foolproof method to completely kill nutgrass. First, dig out every tiny piece of the plant including the seeds and nutlets. Make sure you get it all by sifting the soil through a mesh such as a window screen. Dump the collected material on the driveway and burn it. Sweep up all the ashes and seal in a concrete box. Drive to the coast and dump the sealed box 20 miles off shore. There are other controls, but none that work completely every time.
This would be funny if it wasn’t so very true.
As soon as I had a name for this invader I did all the research I could into what it was and how to get rid of it. This particular page gave me heart palpitations. You'd think nutsedge was the second coming (source):
Yellow Nutsedge is considered one of the world’s worst weeds; it is a particular problem in irrigated agricultural areas and row crops. It competes with crops for water, light and nutrients, reducing crop yields....Control of this species is difficult once an infestation occurs, because of the large number of reproductive tubers it produces. It is estimated there are 12 million tubers per infested acre.
Oh great.
But before we all throw in the towel let's take a deep breath, take a step back, and gain some perspective. Turns out nutsedge is a mixed blessing. And perhaps a foe that could turn into a friend.
WHAT NUTSEDGE IS
Nutsedge’s latin name is Cyperus esculentus L. It is is part of the the sedge family.
I have a few sources I found useful in understanding this little bugger. This Clemson Cooperative Extension page has a generally useful summary of this plucky pest:
Nutsedges are often called "nutgrass" because they closely resemble grasses. Correct identification is very important, as most herbicides for grass control are not effective on sedges. Nutsedges can be distinguished from grasses by their stems, which are triangular or V-shaped in cross section, while grass stems are hollow and round. Their leaves are thicker and stiffer than most grasses and are arranged in groups of three at the base. Nutsedge leaves appear creased with prominent mid-veins.
In my case I have the variety of nutsedge known as yellow nutsedge. Here’s an example of what the yellow variety looks like. The grass stems are a bright yellow green and they form in distinct clusters.

This is another site I found useful concerning the yellow variety (source):
Yellow nutsedge is found worldwide in warm and temperate zones, occurring in Europe and Africa. It was introduced into the New World from the Old World. In the Western Hemisphere, it grows from southern Canada to northern Argentina. The plant is known in most of the United States, except Wyoming and Montana (see map). It occurs elsewhere in the world in regions with temperate to tropical climates.
Yellow nutsedge is a noxious weed of wet soil. The nutsedge is most difficult to control in cultivated soils, often forming a solid cover over large areas in cotton fields, sorghum and alfalfa pastures, flood plains, dams, ditches, and along streams and roadsides. In Arizona, it is common throughout most of the state, from 100 to 8200 ft elevation, flowering from May to November. In California it occurs throughout the state, up to elevations of 1000 m.
It makes sense to me now that nutsedge prefers damper soil as I find it grows most voraciously during the spring and in a section of the garden that tends to get damper. It has not spread to the entire garden (yet) and I couldn't tell you when we first started having the problem. Doubtless tilling the soil made it worse.... (cont'd)
edit on 9-6-2013 by otherpotato because: (no reason given)
(Nutsedge cont'd)
Here is the most important part about nutsedge that you must learn. I'm going to re-quote it for emphasis:
You can pull that grass out all you want but as long as those tubers are still in the ground that nutsedge will come back. And trust me - pulling up the grass NEVER pulls up the tuber. So let's proceed to how to get rid of the tubers.
CONTROLLING NUTSEDGE (hahaha)
I’m almost certain it’s no accident that nutsedge has the words “nuts” and “edge” in its name. Because it WILL drive you close to insanity trying to eradicate it, as others will attest (source):
I can’t imagine trying to eliminate this stuff from your lawn - and my deepest sympathies if you’ve tried to.
The method I first read about was digging up the tubers. So I set out with my trusted gardening fork and tried to dig up all I could. Then I read this little tidbit (Clemson link):
Oh awesome. My lame gardening fork wasn’t going to cut it.
So I busted out the big guns: the pitchfork. I started digging into the patch about a foot down to loosen up the rhizomes enough for unearthing. Each time I loosened a section I would rummage through with my fingers to find “the prize” - a nut:
(image not working - crashed my computer)
If you ever start digging up nutsedge let me tell you: finding these little round nuts will be your joie de vivre.
I did this over the span of two weeks for about a half hour every couple of days over the entire infested area. Notice the size of the nuts. Then imagine being the crazy person attacking your garden with a pitchfork for tiny brown nuts. I’m pretty sure my entire extended neighborhood was concerned. They don't call it "Nuts Edge" for nothing.
The result of this temporary madness? Mixed.
Sometimes the nuts broke away from the grasses resulting in renegade nuts that would just resprout and come back later. In other cases the “nuts” were so deep I couldn’t dig far enough to pull them up - not interested in digging to china I just let them be. In either case I’m pretty sure about half of what I tried to uproot ended up back in the soil, resulting in a marginal improvement when all was said and done. And I’m sure I also redistributed some nuts even deeper into the soil - working against myself. I did notice less(ish), but not “none”. A lot of sweat and dirty fingernails for superficial reward.
ALTERNATIVES TO DIGGING
After questioning the wisdom of the pitchfork, I decided to explore nutsedge a bit "deeper". While I still think digging is a good practice there are a few other methods I discovered but have not tried:
Solarizing the soil
This is a general weed control method that I was not aware of (I tend to be a digger). It does require leaving the solarized area fallow - depending on your area this may take an entire season. And once complete you must renourish the soil before planting.
The Colorado State Extension page has a good summation of how to effectively solarize for weed control (though they state it does not work on purple nutsedge - not sure why). And there's a method recorded by a motherearthnews member (paraphrased):
Take a piece of clear plastic. Remove the weeds and dampen the soil. Place the clear plastic down and bury the ends in the soil or weight down with bricks/rocks. Temperatures under the plastic need to remain at approx 99 degree farenheit for 4-6 weeks. This is the length of time needed for the deeper nutsedge rhizomes (only takes 2-4 weeks for shallower weeds) so it must be done during the hottest part of the summer depending on your region. In my Zone 5 / 6 world this cuts into prime gardening time so I might have to take a year off if I was serious about trying this.
(cont'd)
Here is the most important part about nutsedge that you must learn. I'm going to re-quote it for emphasis:
It is estimated there are 12 million tubers per infested acre.
You can pull that grass out all you want but as long as those tubers are still in the ground that nutsedge will come back. And trust me - pulling up the grass NEVER pulls up the tuber. So let's proceed to how to get rid of the tubers.
CONTROLLING NUTSEDGE (hahaha)
I’m almost certain it’s no accident that nutsedge has the words “nuts” and “edge” in its name. Because it WILL drive you close to insanity trying to eradicate it, as others will attest (source):
Q. Mike: I've been battling nutsedge in my lawn for 5 years. This stuff is tough. I am thinking about getting a flame weeder and burning it out. Any better ideas?
---Ben in Center Valley, PA
I can’t imagine trying to eliminate this stuff from your lawn - and my deepest sympathies if you’ve tried to.
The method I first read about was digging up the tubers. So I set out with my trusted gardening fork and tried to dig up all I could. Then I read this little tidbit (Clemson link):
The tubers and rhizomes can grow eight to 14 inches below the soil surface.
Oh awesome. My lame gardening fork wasn’t going to cut it.
So I busted out the big guns: the pitchfork. I started digging into the patch about a foot down to loosen up the rhizomes enough for unearthing. Each time I loosened a section I would rummage through with my fingers to find “the prize” - a nut:
(image not working - crashed my computer)
If you ever start digging up nutsedge let me tell you: finding these little round nuts will be your joie de vivre.
I did this over the span of two weeks for about a half hour every couple of days over the entire infested area. Notice the size of the nuts. Then imagine being the crazy person attacking your garden with a pitchfork for tiny brown nuts. I’m pretty sure my entire extended neighborhood was concerned. They don't call it "Nuts Edge" for nothing.
The result of this temporary madness? Mixed.
Sometimes the nuts broke away from the grasses resulting in renegade nuts that would just resprout and come back later. In other cases the “nuts” were so deep I couldn’t dig far enough to pull them up - not interested in digging to china I just let them be. In either case I’m pretty sure about half of what I tried to uproot ended up back in the soil, resulting in a marginal improvement when all was said and done. And I’m sure I also redistributed some nuts even deeper into the soil - working against myself. I did notice less(ish), but not “none”. A lot of sweat and dirty fingernails for superficial reward.
ALTERNATIVES TO DIGGING
After questioning the wisdom of the pitchfork, I decided to explore nutsedge a bit "deeper". While I still think digging is a good practice there are a few other methods I discovered but have not tried:
Solarizing the soil
This is a general weed control method that I was not aware of (I tend to be a digger). It does require leaving the solarized area fallow - depending on your area this may take an entire season. And once complete you must renourish the soil before planting.
The Colorado State Extension page has a good summation of how to effectively solarize for weed control (though they state it does not work on purple nutsedge - not sure why). And there's a method recorded by a motherearthnews member (paraphrased):
Take a piece of clear plastic. Remove the weeds and dampen the soil. Place the clear plastic down and bury the ends in the soil or weight down with bricks/rocks. Temperatures under the plastic need to remain at approx 99 degree farenheit for 4-6 weeks. This is the length of time needed for the deeper nutsedge rhizomes (only takes 2-4 weeks for shallower weeds) so it must be done during the hottest part of the summer depending on your region. In my Zone 5 / 6 world this cuts into prime gardening time so I might have to take a year off if I was serious about trying this.
(cont'd)
edit on 9-6-2013 by otherpotato because: (no reason given)
edit on 9-6-2013 by otherpotato because: (no reason
given)
edit on 9-6-2013 by otherpotato because: (no reason given)
(Nutsedge cont'd)
Molasses
Some gardening forums mentioned this option but with unsatisfactory results - no one proclaimed “it’s gone!” but some thought *maybe* the nutsedge was doing poorly after the molasses. One source for what to do:
Another source for what to do:
I have no report on the effectiveness of this method as I have no desire to feed the ants.
DON’T WORRY?
I started to relax my pitchforking when I read that nutsedge doesn’t actually hurt most things in your garden - it only affects bulbing/tuberous plants such as potatoes, garlic, carrots, beets, etc. Consider the root structures of most of your garden plants and this makes a bit of sense. I read this comment somewhere and cannot at the moment find the source so it's complete heresay. My garden will report in later.
IF YOU CAN’T BEAT EM - EAT EM
The exciting conclusion to this tale is that nutsedge may be more friend than foe. Because nutsedge appears to be edible.
Yes - edible. It’s closely related to a crop called chufa, which is actually grown ON PURPOSE in some parts of the world. A sampling (source):
Another source
Little advice on how to harvest and prepare it for eating so more research is needed.
Maybe next May when I’m "nuts over nutsedge" I'll consider cultivating this interesting plant intentionally. Maybe I'll even learn to make some horchata of my own.
For now I'll keep my pitchfork close
Molasses
Some gardening forums mentioned this option but with unsatisfactory results - no one proclaimed “it’s gone!” but some thought *maybe* the nutsedge was doing poorly after the molasses. One source for what to do:
Dry or liquid molasses can be used to kill off hard to control weeds - even nutsedge. The dry product is used at 20 lbs. per 1000 sq. ft. as a fertilizer and fire ant repellant. Doubling that rate causes a herbicidal effect on certain weeds. Liquid molasses used at about a cup per gallon of water kills nutsedge. It usually takes 2 or 3 applications and the nutsedge slowly dies away.
Another source for what to do:
I have had luck, and others have reported success, killing nutgrass with kindness. Mow, clip or pull as often as you can and apply a heavier than normal application of dry molasses. Use about 3 – 5 lbs. per 100 sq. ft. and repeat in two weeks. Use lesser rates in turf to avoid damage to grasses. The mixed products that contain molasses, cornmeal and wheat bran will also help. The idea here is to stimulate a furious level of biological activity aimed at rotting the crowns of the undesired plants. Pouring liquid molasses or piling dry molasses on each nutgrass plant works if you have the patience.
I have no report on the effectiveness of this method as I have no desire to feed the ants.
DON’T WORRY?
I started to relax my pitchforking when I read that nutsedge doesn’t actually hurt most things in your garden - it only affects bulbing/tuberous plants such as potatoes, garlic, carrots, beets, etc. Consider the root structures of most of your garden plants and this makes a bit of sense. I read this comment somewhere and cannot at the moment find the source so it's complete heresay. My garden will report in later.
IF YOU CAN’T BEAT EM - EAT EM
The exciting conclusion to this tale is that nutsedge may be more friend than foe. Because nutsedge appears to be edible.
Yes - edible. It’s closely related to a crop called chufa, which is actually grown ON PURPOSE in some parts of the world. A sampling (source):
Yellow nutsedge is closely related to chufa (Cyperus esculentus variety sativus); some taxonomists treat them as the same species. In parts of Africa, Europe and Asia, chufa is grown for its edible tubers. The tubers contain protein, carbohydrates, sugars, and lots of oil and fiber. The chufa nut is good for human health, containing high levels of iron and potassium, and no sodium. The Spanish produce a drink called "horchata" made out of the nuts (tubers) of the yellow nutsedge. The popularity of this drink has recently extended to other countries such as France, Great Britain, and Argentina. Chufa tubers are ground into flour, as well as being used to produce a cold drink (horchata), a coffee substitute, vegetable oil, and cellulose.
In the United States, the primary use of chufa as a crop is to attract and feed game, particularly wild turkeys. Turkeys love chufa tubers; as natural scratchers, once discovering a plot of chufa, they will return again and again, all winter long, or until spring arrives and other food is readily available.
Chufa tubers have been planted so that pigs could be turned into the fields to fatten and improve the taste of pork. In the United States, chufa tubers have been used as hog feed, pastured in the field in states such as Florida, Georgia, and Alabama.
Tubers of chufa have also been identified as valuable food for waterfowl and cranes. Ducks dive for them when wetland fields are flooded. Chufa is also used in seed mixes for wetland restoration, mitigation, and erosion control.
Another source
In Spain, the tubers are added to horchata de chufa (see photo), a beverage “prepared by mixing the ground tubers with water, cinnamon, sugar, vanilla and ice....William Woys Weaver even suggests growing your own nutsedge for food in his book, “Heirloom Vegetable Gardening.” Praising the tubers’ similarities to other nuts, he says “In texture, [nutsedge] is somewhat mealy like a chestnut, yet with a distinct almondlike flavor. It was used by country people as an almond substitute in cookies and confectionery, and was even pounded with sugar to make a type of faux marzipan once quite popular among the Pennsylvania Germans.”
Little advice on how to harvest and prepare it for eating so more research is needed.
Maybe next May when I’m "nuts over nutsedge" I'll consider cultivating this interesting plant intentionally. Maybe I'll even learn to make some horchata of my own.
For now I'll keep my pitchfork close
Supplemental Foraging post #1, Northern Hemisphere, short Zone 4, Boreal Forest
My season has finally begun in earnest. While I nurse tender starts and baby seedlings, protecting them from baby moose, dogs, kids, weeds and a wide variety of garden issues, my property has exploded into full growth. Last night I was able to feed my family with the fruits of natures labor. Forgive my lack of meal photo, by the time I put the food on the table and grabbed my drink, it had already been attacked.
Foraging has long supplemented our diets. Berries are one of the first and tastiest foods that come to my mind, but the possibilities are endless. To be fair to people living in more populated areas I stuck to my very own property to gather yesterdays meal, with the exception of the halibut we caught last summer.
According to my journal, the edibles started showing back up on May 27 this year, which is very late. I harvested my fiddlehead ferns the first week of June. A fiddlehead fern is the head of the ferns as they just start growing for the season.
To harvest, snip the heads off after they pop up but before they start to uncurl.
When wild harvesting ANY food, please remember to leave some of each plant, in each place you harvest from. This promises the return and spread of the desired edible. Besides we aren't the only ones who enjoy them.
To clean the fiddleheads, you must remove most of the brown papery covering. I use a little vegetable brush. It is easiest to remove when dry. Give yourself a couple of hours to clean them, it takes awhile.
They are excellent just sauteed in some butter, but I made baked fiddleheads with this batch.
My recipes for this meal all came from "COOKING ALASKAN" by Alaskans.
This dish consists of layers of par cooked fiddleheads, breadcrumbs and an easy alfredo sauce, baked at 375 degrees F, for 20 minutes. This one must have been a winner, because my husband immediately claimed the leftovers for his lunch today.
I also made wilted wild greens with young fireweed leaves, baby dandelions, lamb's quarters and a bit of chickweed.
Fireweed
Lambs Quarters
Chickweed
Baby Dandelion: I did not take more than 1 photo to identify dandelion. I only took this to show how young you want them, they are best to harvest before the leaves get the ridges along the edge.
With these simple, common greens, I made wilted greens with bacon dressing. They also went over beautifully.
Another trick that I just came across in my cookbook yesterday is that fireweed stalks can be cooked up like asparagus. I gave it a try and they were delicious! I just sauteed them in some butter. They tend to woodiness, just like asparagus, but younger stalks shorter than 6 inches would help to avoid that.
All of these foods were found in about half an acre of area. Most of these foods can be found in most areas, including urban environments. The exceptions would be the ferns and the fireweed, though they are common enough to cover a wide range of locales on their own. Foraging for these foods was even easier than harvesting my gardens. Though they inhabit the same space, these "weeds" have grown to full crops while I struggle to establish my gardens for the season. I even got to make my first rhubarb crisp for the season last night as well.
We can go a very long way toward feeding ourselves by merely being aware of our natural surroundings. Nature provides us with an incredible bounty, whether they are weeds or perennials or our more common fruits and vegetables. Just remember when foraging to always be respectful of private property, many times when you ask someone to forage, they see it as a favor. Many of these foods are weeds that we poison to remove from our homes.Why not try weeding them into the kitchen instead? Just be aware that the weeds you harvest are clean of chemicals and road grime.
Garden Update (Not a research post)
Even though I live in the southern hemisphere, and are currently experiencing our winter, I have attempted the beginning of my garden, more in preparation for August/September when Spring next hits and I can have the grounds ready for my summer crops to be planted. I have to say I am insanely envious of the beauty of the gardens shown thus far, and cannot wait for our spring/summer to come round again, so I can begin planting anew.
I have plans for two separate gardens, one tilled in the earth (the one I have just started), and a few raised beds near the front of my property. The idea is to have both a private and public garden, to trade and swap with people from our local community, and to allow people to help themselves to fresh, home grown produce.
I have also been exceptionally busy with the beginnings of a garden grown trading group from people in our own community. Our first showing was an epic success, having over two hundred people come and basically take what they wanted from our organic stores, and at least another 35-40 people who have committed to the project. We also planted several fruit trees on a local public reserve, which will hopefully grow and bear fruit on otherwise wasted land for all to try and see. After tasting an organic Golden Delicious apple for the first time in recent memory, I hope to spread this idea to others.
Please forgive the messiness of the garden so far, this is just the initial stages, I will be (hopefully) tilling and weed removing this coming weekend. Thus far it has been difficult due an unusual extension of the rains which by now is usually winter blue skies, but the June long weekend two weeks ago saw constant rain, as have many days since. We have also had very cold nights, some as low as 2C (around 38F), and frost has been keeping my efforts at bay for fear of losing crops due to the cold.
Despite this, here is what I have so far;
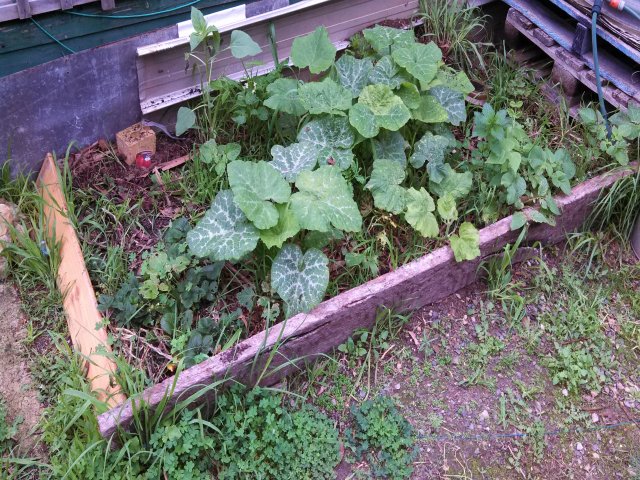
This is the remnant of the summer garden. There are strawberries that were originally potted, and despite the cold seem to be still growing well, even if not bearing fruit. There are also some potatoes, some pumpkin (Kent, I think) and some lemongrass in the top right. There is also a strange leaf that has popped up at the top left, near the small brick. A few people have said it is watermelon, but for the time being I will let it grow and see what comes of it.
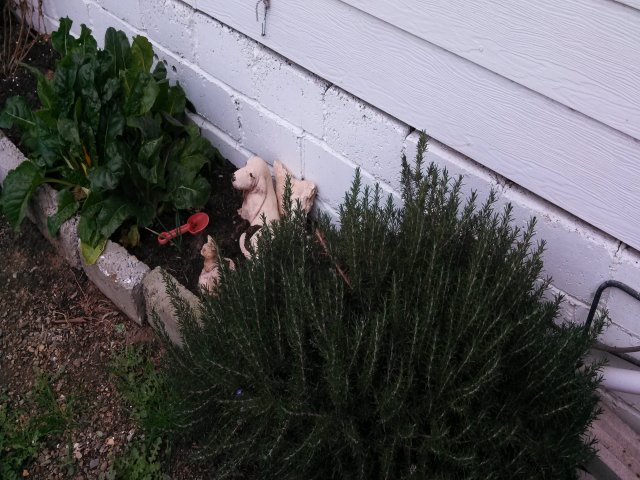
This is the small garden I planted along the back edge of the house a couple of years ago. It did have salad lettuce in it at one stage, but the Chard is still going well. There are two rosemary bushes either side that grow well here too.
You can also see the leftovers of the sunflowers that were planted here in the top left, unfortunately winter and the unseasonal cold hasn't fared them too well. I do have seeds however, and will be re-planting later in the year.
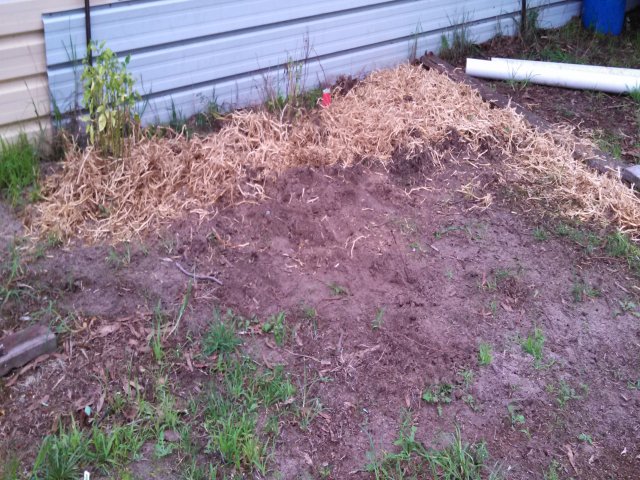
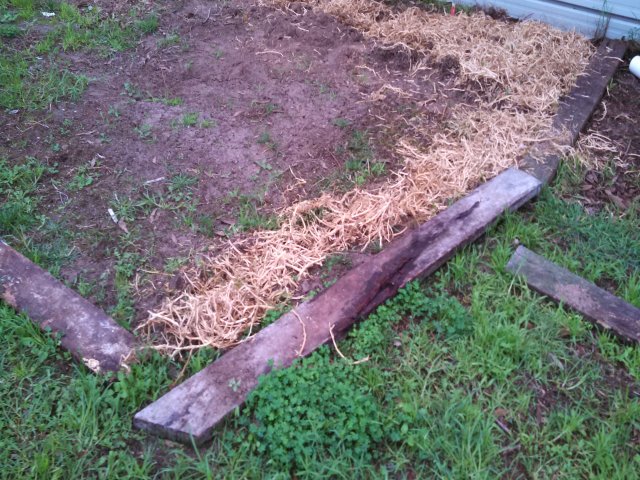
This area is approx. 5mX6m (about 15x18ft) total. Under the lucerne at the moment is spring onion and broccoli shoots, and more potatoes and celery, that is still coming up. There is also the leftover corn from the summer harvest, that is still hanging on despite the cold. I plan for snow peas, cauliflower and string and broad beans at this stage, but really need to get the garden tilled, especially considering they are forecasting more rain this weekend.
For now, I leave it to my summer gardeners in the Northen Hemisphere. Enjoy your summer harvest friends.
Stay tuned for the second part of my report into the corporations Monsanto and Bayer.
Even though I live in the southern hemisphere, and are currently experiencing our winter, I have attempted the beginning of my garden, more in preparation for August/September when Spring next hits and I can have the grounds ready for my summer crops to be planted. I have to say I am insanely envious of the beauty of the gardens shown thus far, and cannot wait for our spring/summer to come round again, so I can begin planting anew.
I have plans for two separate gardens, one tilled in the earth (the one I have just started), and a few raised beds near the front of my property. The idea is to have both a private and public garden, to trade and swap with people from our local community, and to allow people to help themselves to fresh, home grown produce.
I have also been exceptionally busy with the beginnings of a garden grown trading group from people in our own community. Our first showing was an epic success, having over two hundred people come and basically take what they wanted from our organic stores, and at least another 35-40 people who have committed to the project. We also planted several fruit trees on a local public reserve, which will hopefully grow and bear fruit on otherwise wasted land for all to try and see. After tasting an organic Golden Delicious apple for the first time in recent memory, I hope to spread this idea to others.
Please forgive the messiness of the garden so far, this is just the initial stages, I will be (hopefully) tilling and weed removing this coming weekend. Thus far it has been difficult due an unusual extension of the rains which by now is usually winter blue skies, but the June long weekend two weeks ago saw constant rain, as have many days since. We have also had very cold nights, some as low as 2C (around 38F), and frost has been keeping my efforts at bay for fear of losing crops due to the cold.
Despite this, here is what I have so far;

This is the remnant of the summer garden. There are strawberries that were originally potted, and despite the cold seem to be still growing well, even if not bearing fruit. There are also some potatoes, some pumpkin (Kent, I think) and some lemongrass in the top right. There is also a strange leaf that has popped up at the top left, near the small brick. A few people have said it is watermelon, but for the time being I will let it grow and see what comes of it.

This is the small garden I planted along the back edge of the house a couple of years ago. It did have salad lettuce in it at one stage, but the Chard is still going well. There are two rosemary bushes either side that grow well here too.
You can also see the leftovers of the sunflowers that were planted here in the top left, unfortunately winter and the unseasonal cold hasn't fared them too well. I do have seeds however, and will be re-planting later in the year.


This area is approx. 5mX6m (about 15x18ft) total. Under the lucerne at the moment is spring onion and broccoli shoots, and more potatoes and celery, that is still coming up. There is also the leftover corn from the summer harvest, that is still hanging on despite the cold. I plan for snow peas, cauliflower and string and broad beans at this stage, but really need to get the garden tilled, especially considering they are forecasting more rain this weekend.
For now, I leave it to my summer gardeners in the Northen Hemisphere. Enjoy your summer harvest friends.
Stay tuned for the second part of my report into the corporations Monsanto and Bayer.
edit on 17/6/2013 by 74Templar because: eta
Garden Updates: June 22nd, 2013 (Not a Research Post.)
(I'm saving the bulk of my Research Posts for when the harvest starts to come in, as we are planning Sauerkraut this year, as well as canning many different veggies. Basically, the whole garden will be processed. My main contribution will be in the preservation of garden vegetables, but it's been nearly 3 weeks since the last contribution. Things REALLY grow in that amount of time, as you will see....)
I'm a "lazy" gardener, not going out everyday to pick a few weeds, and I prefer to let Mother Nature run her course. It was over two weeks before I touched the garden again, and sure enough, Mother let the weeds grow again as well as the veggies. This time, it took me four hours of back-breaking work to get caught up, hand weeding 6 rows, (UGH!) but before I get ahead of myself, let me show you what it looked like:
Weeds in the onions.

REALLY bad weeds, onions, into the corn.
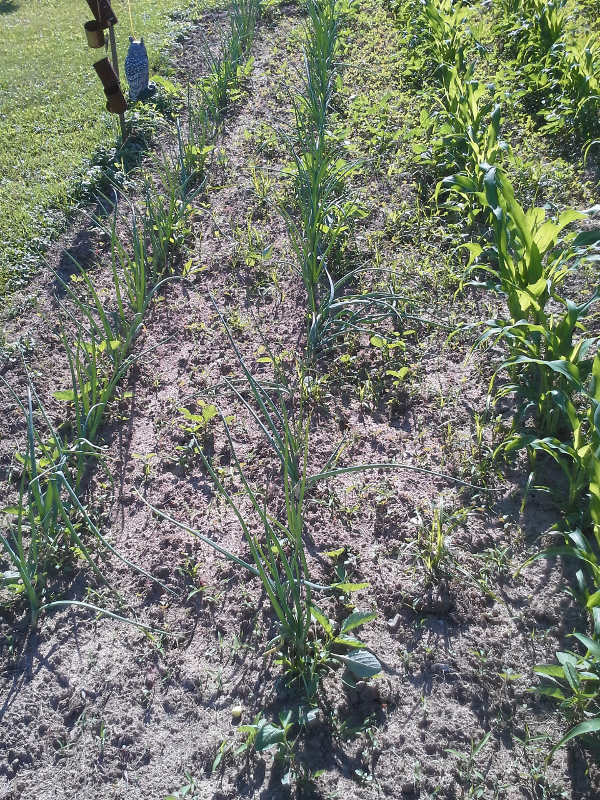
Simply disgusting.
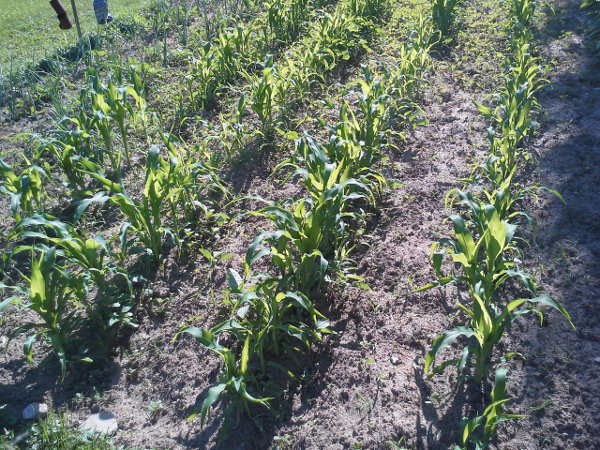
To top it off, rampant tomatoes.
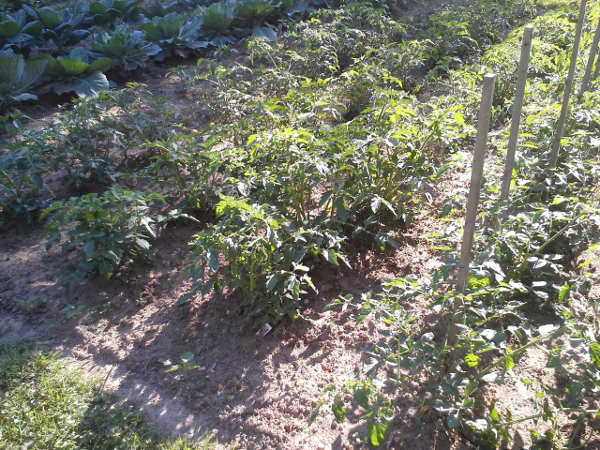
(Remember I ran out of tomato stakes? Well, I got 1x4s, 8 ft long, cut them in half, then ripped them in half. I made 32 stakes from 8 1x4s purchased at the local lumber yard on the tablesaw. I had 30 more tomato plants that needed staked.)
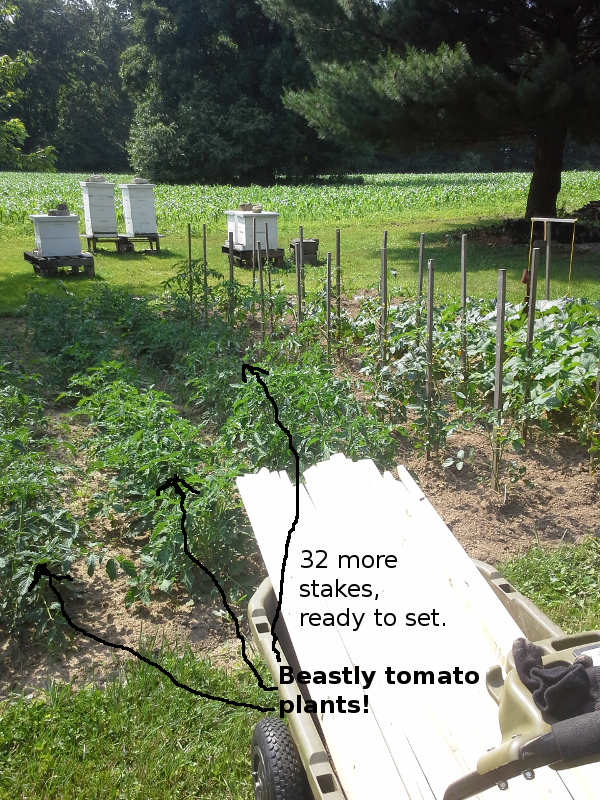
It's here I'll digress, and explain a bit about tomato plants. They are vining creatures, and will sprawl as much as they can. I don't want vines, I want tomatoes, with a maximum yield. In a survival situation, you want maximum yield on everything! They need pruned, and trained, to accomplish that. Looking at the plants above, you may wonder where to begin. It's rather easy if your not queasy about cutting a living creature back a bit.
Just follow the main stalk. Find the branches. Everything growing from the stalk and branches is called a "sucker", which basically sucks the energy from the plant, and prevents it from producing a high yield of tomatoes.
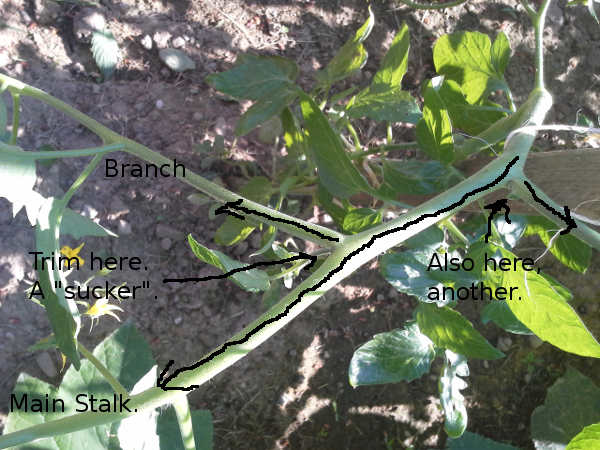
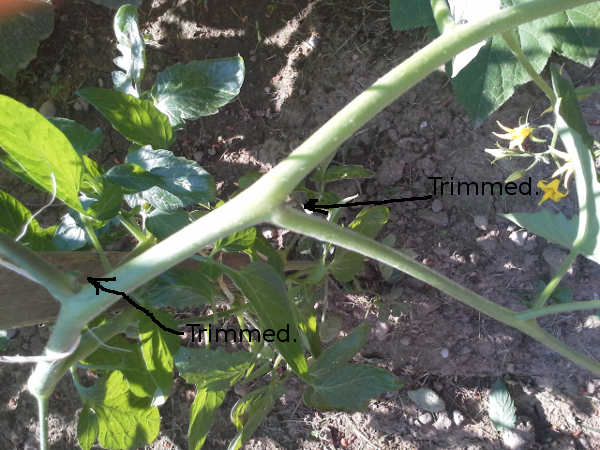
This one has been trimmed, and is ready to "tie up" to it's stake. Why stakes? Well, you don't want the tomato to lay on the ground, and rot up, you want it supported in the air. Easy to pick, as well, when they are ripe.
Mind you, "suckering" tomato plants leaves a lot of excess vegetation, but it gets spread back into the rows before tilling, and gets worked back into the soil. As a rule of thumb, you should leave 20% of your harvest to fertilize the soil for next season, especially if you work the same patch of ground. All the spare vegetation makes excellent compost.
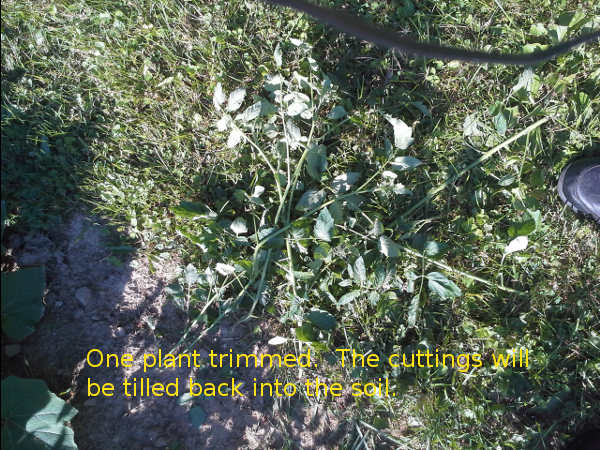
After about an hour of work, I was ready to start tilling.
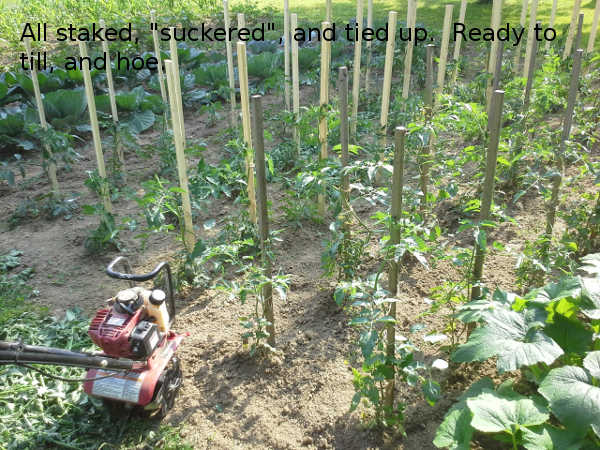
I made this garden with 24 inch spacing between rows. I used the big tiller to work it up, and was able to use it until the plants started growing. Now, it's midseason, and the plants take up too much room for the big tiller. Time to switch to the "Power Hoe". That lil guy has a 9 inch cut, yet it's 4-cycle, (meaning it uses straight gasoline, and sips at it at that) and is super easy to handle. Such things would be very useful if gas was in short supply!
I'll be using it until the harvest is over, then switch back to the bigger tiller to work the garden over once before winter. It's worth the investment.
Needless to say, the garden is filling out.
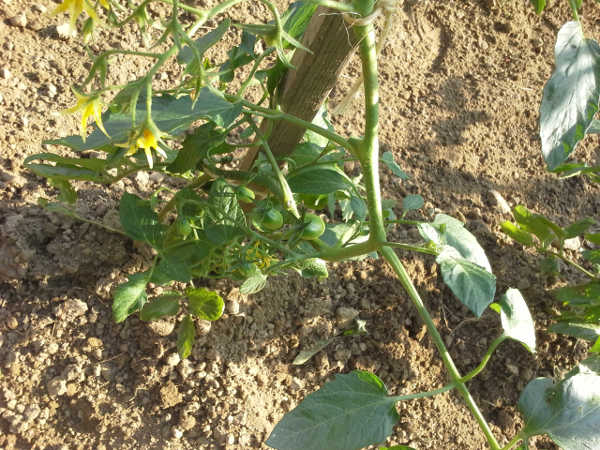
Grape tomatoes are coming along nicely.
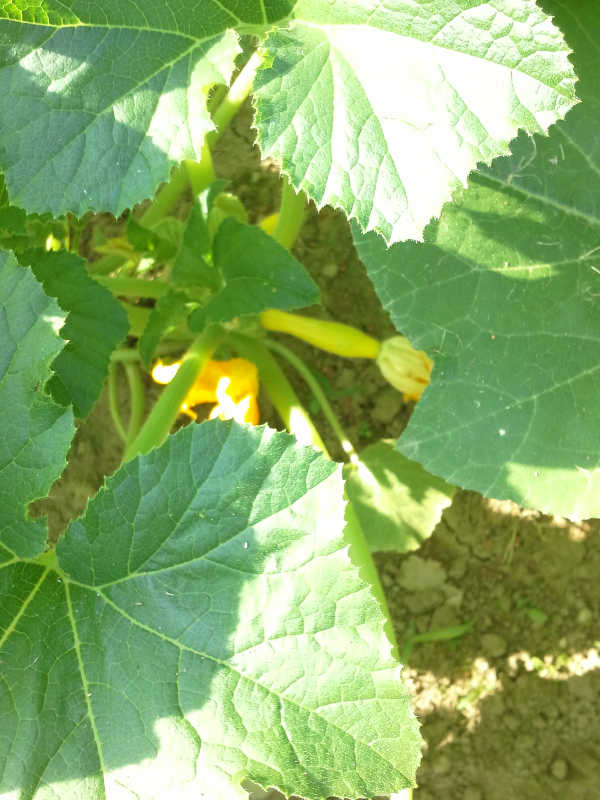
Baby squash.
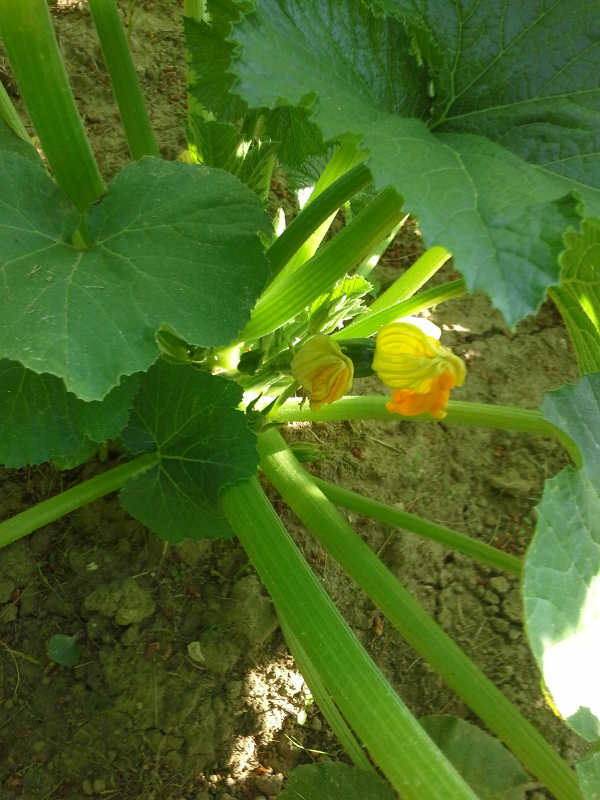
Baby zucchini.
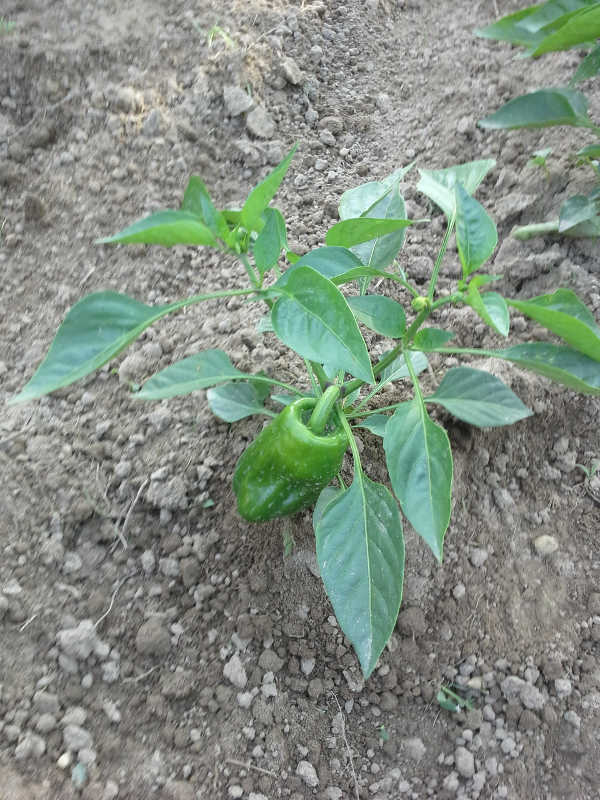
Baby green peppers.
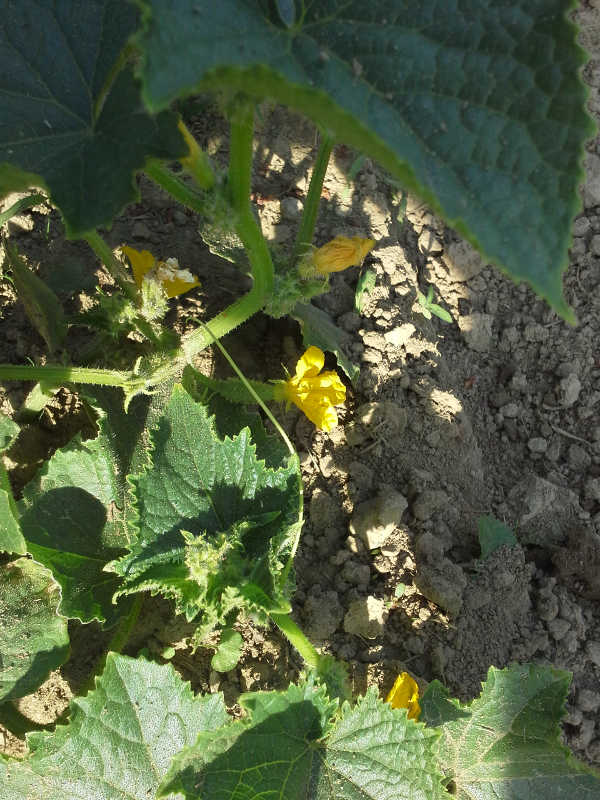
Baby cucumbers. (Pickles!)
Before maintenance (overview):
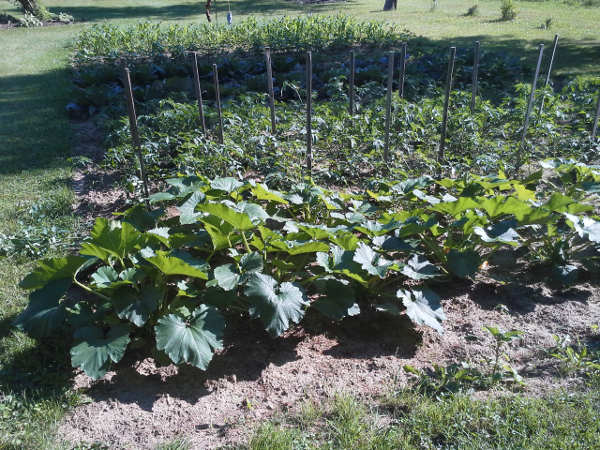
No complaints about the cabbage and brussel sprouts.
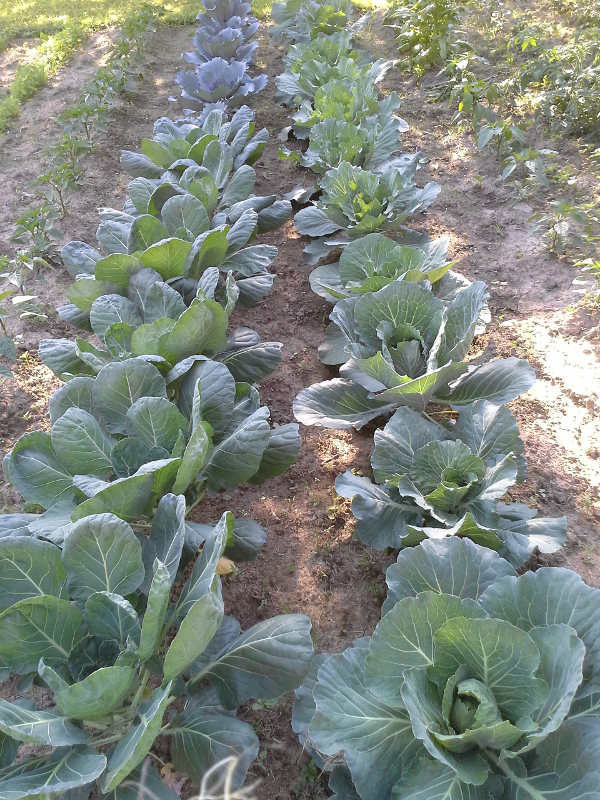
Tomatoes reigned in, and under control.
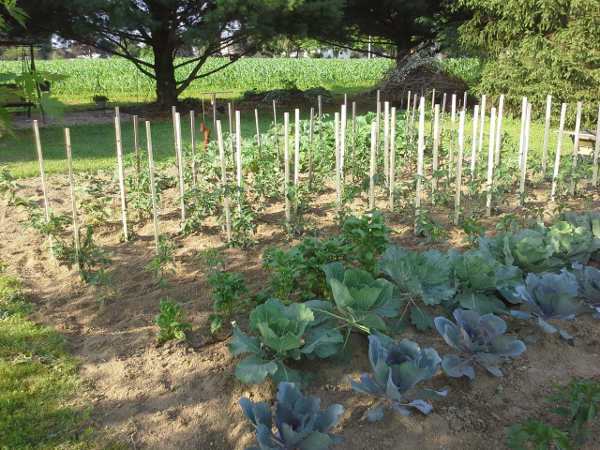
So that's all the updates for now:
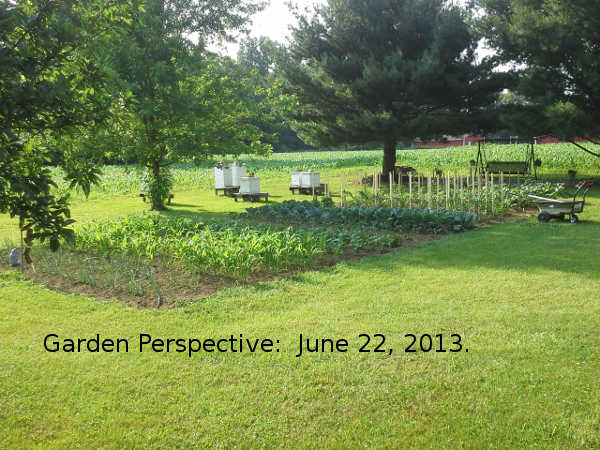
(I bumped this pic up for comparison.)

The garden, she's a growin'!
(I'm saving the bulk of my Research Posts for when the harvest starts to come in, as we are planning Sauerkraut this year, as well as canning many different veggies. Basically, the whole garden will be processed. My main contribution will be in the preservation of garden vegetables, but it's been nearly 3 weeks since the last contribution. Things REALLY grow in that amount of time, as you will see....)
I'm a "lazy" gardener, not going out everyday to pick a few weeds, and I prefer to let Mother Nature run her course. It was over two weeks before I touched the garden again, and sure enough, Mother let the weeds grow again as well as the veggies. This time, it took me four hours of back-breaking work to get caught up, hand weeding 6 rows, (UGH!) but before I get ahead of myself, let me show you what it looked like:
Weeds in the onions.

REALLY bad weeds, onions, into the corn.

Simply disgusting.

To top it off, rampant tomatoes.

(Remember I ran out of tomato stakes? Well, I got 1x4s, 8 ft long, cut them in half, then ripped them in half. I made 32 stakes from 8 1x4s purchased at the local lumber yard on the tablesaw. I had 30 more tomato plants that needed staked.)

It's here I'll digress, and explain a bit about tomato plants. They are vining creatures, and will sprawl as much as they can. I don't want vines, I want tomatoes, with a maximum yield. In a survival situation, you want maximum yield on everything! They need pruned, and trained, to accomplish that. Looking at the plants above, you may wonder where to begin. It's rather easy if your not queasy about cutting a living creature back a bit.
Just follow the main stalk. Find the branches. Everything growing from the stalk and branches is called a "sucker", which basically sucks the energy from the plant, and prevents it from producing a high yield of tomatoes.


This one has been trimmed, and is ready to "tie up" to it's stake. Why stakes? Well, you don't want the tomato to lay on the ground, and rot up, you want it supported in the air. Easy to pick, as well, when they are ripe.
Mind you, "suckering" tomato plants leaves a lot of excess vegetation, but it gets spread back into the rows before tilling, and gets worked back into the soil. As a rule of thumb, you should leave 20% of your harvest to fertilize the soil for next season, especially if you work the same patch of ground. All the spare vegetation makes excellent compost.

After about an hour of work, I was ready to start tilling.

I made this garden with 24 inch spacing between rows. I used the big tiller to work it up, and was able to use it until the plants started growing. Now, it's midseason, and the plants take up too much room for the big tiller. Time to switch to the "Power Hoe". That lil guy has a 9 inch cut, yet it's 4-cycle, (meaning it uses straight gasoline, and sips at it at that) and is super easy to handle. Such things would be very useful if gas was in short supply!
I'll be using it until the harvest is over, then switch back to the bigger tiller to work the garden over once before winter. It's worth the investment.
Needless to say, the garden is filling out.

Grape tomatoes are coming along nicely.

Baby squash.

Baby zucchini.

Baby green peppers.

Baby cucumbers. (Pickles!)
Before maintenance (overview):

No complaints about the cabbage and brussel sprouts.

Tomatoes reigned in, and under control.

So that's all the updates for now:

(I bumped this pic up for comparison.)

The garden, she's a growin'!
new topics
-
Just learned a really helpful trick for internet searches
Computer Help: 4 hours ago -
Not off to a good start
General Chit Chat: 5 hours ago
top topics
-
If they can see...they can read!!
Rant: 13 hours ago, 7 flags -
Not off to a good start
General Chit Chat: 5 hours ago, 4 flags -
Just learned a really helpful trick for internet searches
Computer Help: 4 hours ago, 3 flags
active topics
-
Tesla Cybertruck Explodes in Front of Trump Hotel in Las Vegas
Mainstream News • 78 • : cherokeetroy -
How we've changed in 100 years
Ancient & Lost Civilizations • 31 • : Xtrozero -
Not off to a good start
General Chit Chat • 10 • : mysterioustranger -
If they can see...they can read!!
Rant • 20 • : bluesman023 -
The C.D.C. Says There Was NO INFLUENZA Worth Reporting for the 2020-2021 Flu Season.
Diseases and Pandemics • 90 • : AlexandrosOMegas -
Maybe they didn't get away with it: The Lincoln-Kennedy assassination parallels. 7 sentences long.
History • 11 • : BernnieJGato -
Vehicle Strikes people in New Orleans
Mainstream News • 257 • : Xtrozero -
Post A Funny (T&C Friendly) Pic Part IV: The LOL awakens!
General Chit Chat • 7977 • : baddmove -
DONALD J. TRUMP - TIME's Most Extraordinary Person of the Year 2024.
Mainstream News • 44 • : marg6043 -
Just learned a really helpful trick for internet searches
Computer Help • 6 • : grey580
