It looks like you're using an Ad Blocker.
Please white-list or disable AboveTopSecret.com in your ad-blocking tool.
Thank you.
Some features of ATS will be disabled while you continue to use an ad-blocker.
4
share:
First, to preface this post, I have personally experienced unexplained sightings of unidentified flying objects. This thread is in no way trying to
dismiss such sightings or make light of them, only trying to inform people on how to sift through the many old U.F.O. pictures and learn how to be
able to identify images that were obviously faked. I tried to duplicate the methods people used to fake flying saucer pictures and got some good
efforts and learned a lot in the process. This information is what I want to pass on to you, the reader. Once you learn a few of the things I'm
going to describe in this post, you will find it easy to spot the trickery that people have used, but for what reasons I don't know. There was a
thread today posted by devilhunter69 about an old photo that he had come across for the first time. I think his post was sincere, but taking a look
at the image in his thread makes me think it's a "classic" faked U.F.O. photo. I'll repost that photo here and tell you what to look for. Here it
is:
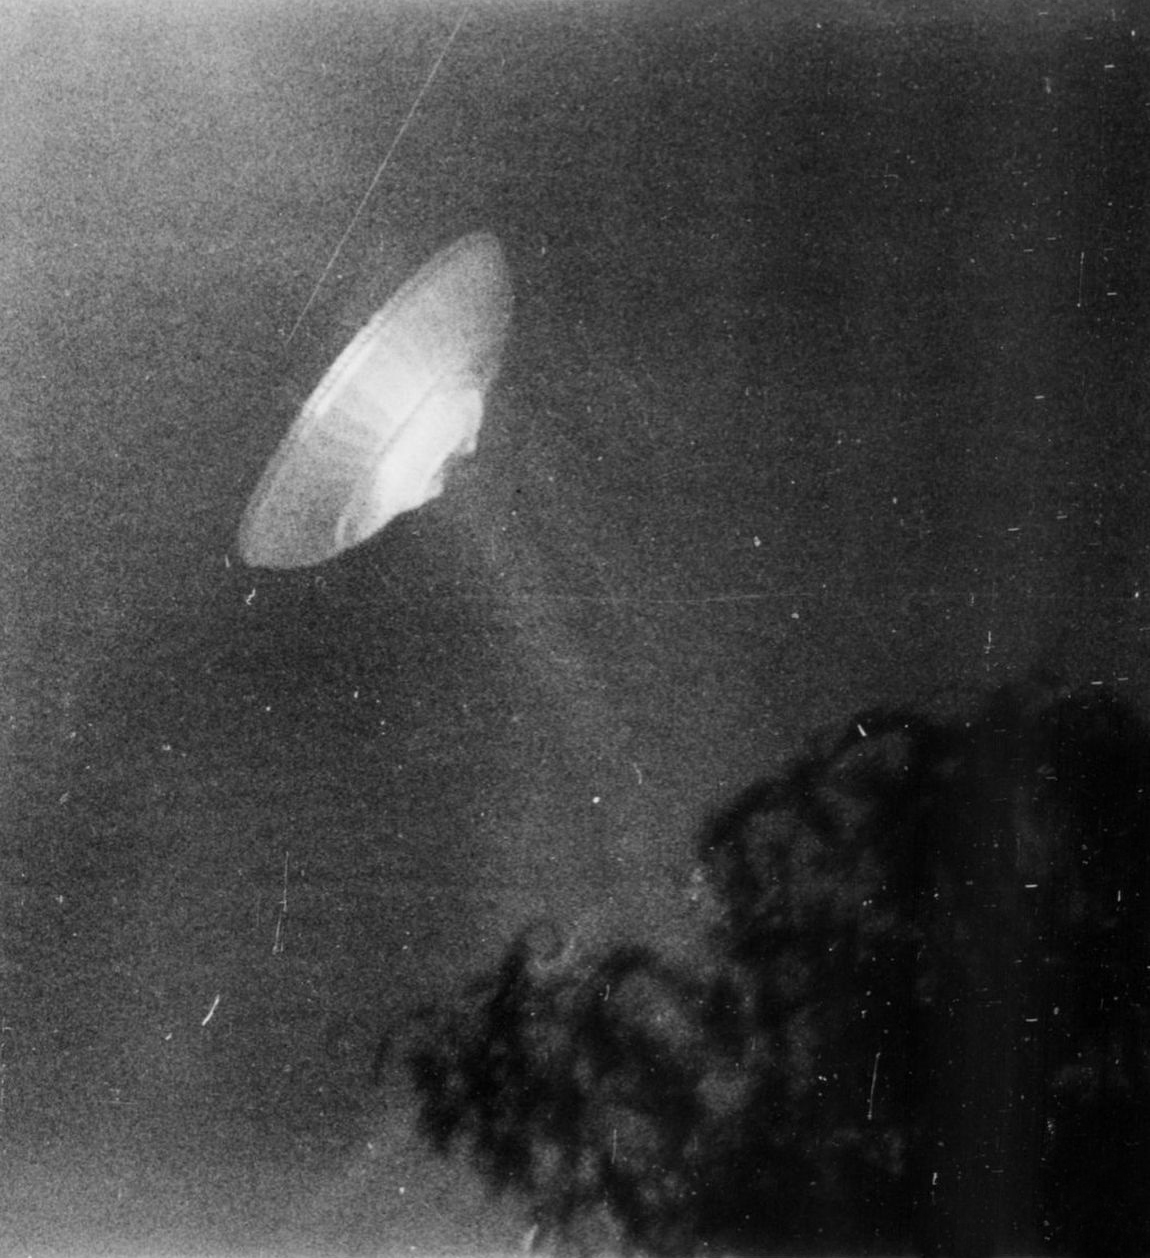
The first thing that is a dead giveaway it's a faked photo is the lack of sharpness for the tree in the lower right of the frame, but the clarity of the "object." Most old cameras were either fixed focus from 5 feet to infinity. But even higher end old cameras would not take pictures like this. The tree and "object" are far enough away from the photographer's position as to render both things in the same amount of focus - "clarity." The fact that the tree is blurry and the "object" is not, rules out motion blur, meaning the photographer didn't hold the camera still. Both things should be blurred the same amount if that was the case. So, that rules out that possibility. The other thing it can't be is that the camera was cheap and didn't have a good lens. If that was the case, both things would have had the same amount of "softness," indicating a cheap, and possibly plastic lens - not known for their clarity. Instead, you can clearly see that the "flying object" has much greater detail and sharpness than the tree. This is your indication that the image was either "double exposed" while the film was still in the camera, or the "object" was added later in the darkroom. If a person could see the original negative, that would tell the true story.
Now on to the results I achieved back in the late-1970s and some of my photos. I became a professional photographer when I was about 16. I started freelancing accident and fire pictures to the local newspapers. I also learned how to develop film by using those newspaper's darkrooms. I didn't have my own darkroom at the time, so it got to the point that when I had shot some newsworthy image, the local newspapers would tell me to just use their darkrooms, develop my film, and then print out the best one for their use and they would pay me. By doing this, I got pretty handy with a camera and the darkroom techniques. As a matter of fact, to this day I still shoot a lot of film and develop it all myself here at home.
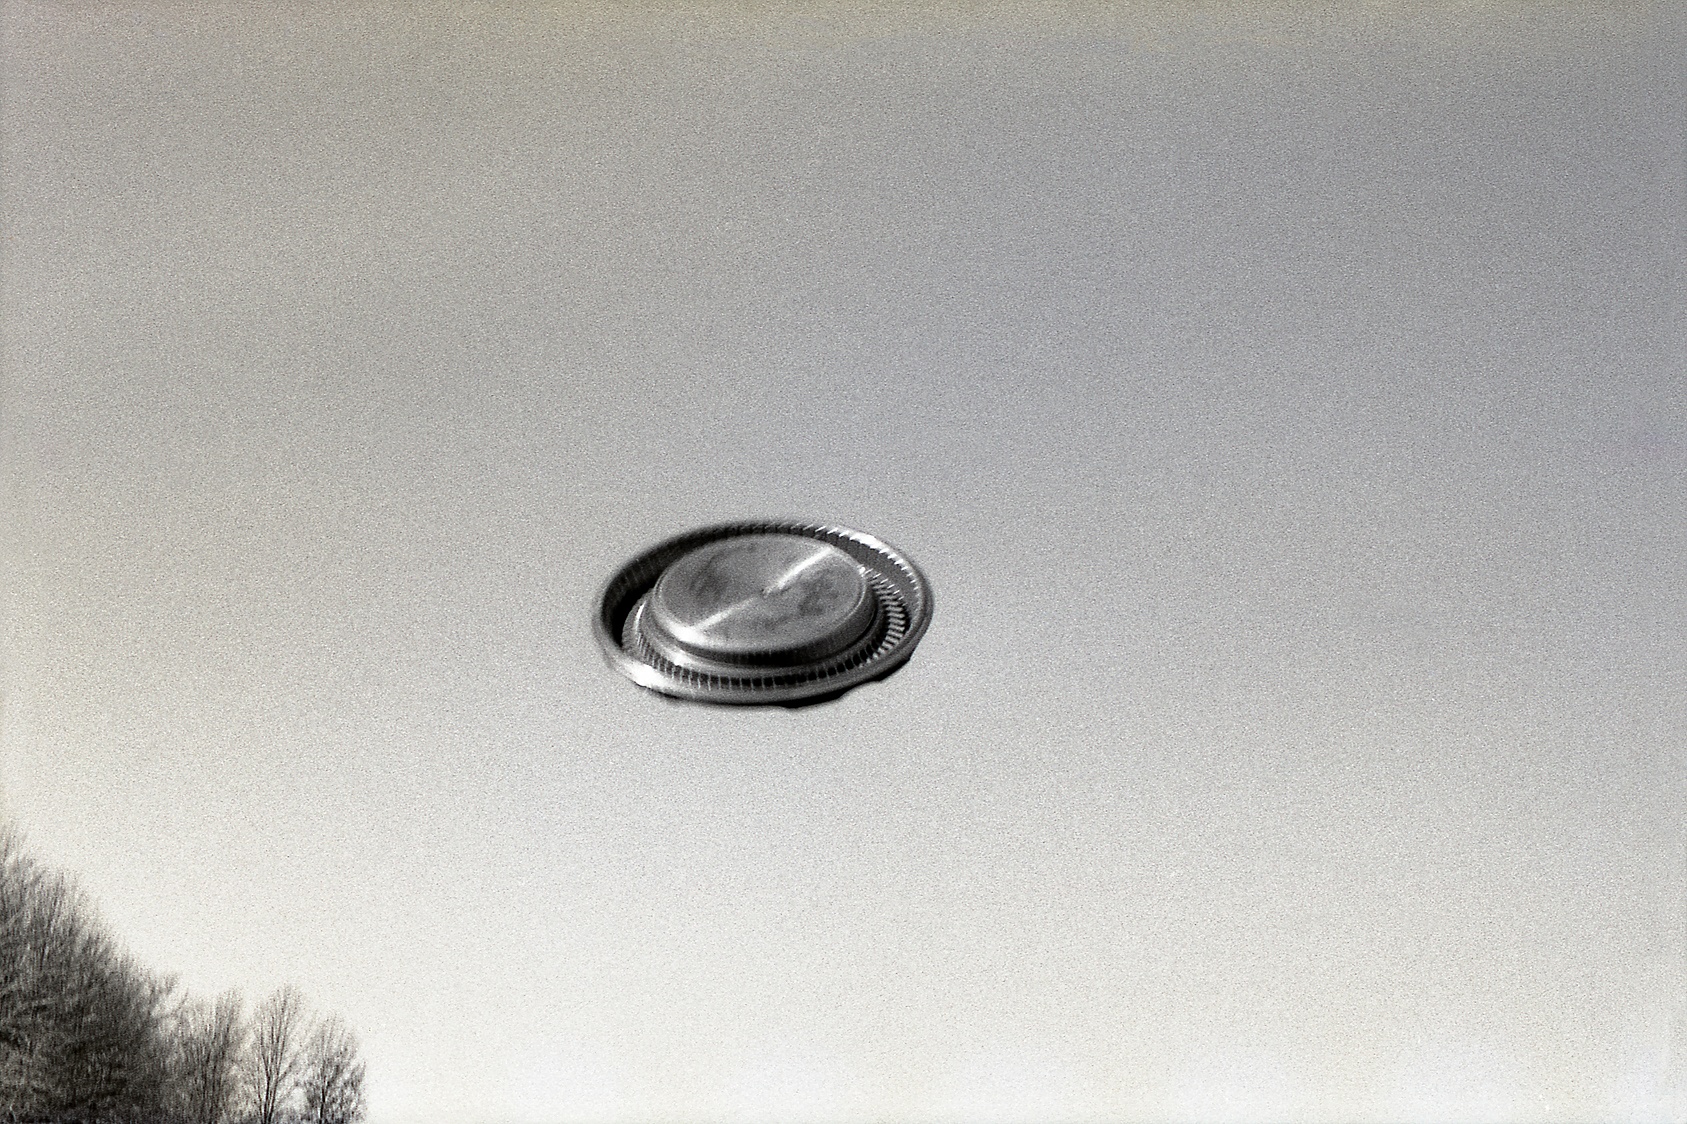
In that thread by devilhunter69, gort69 made the comment that the picture looked like the "classic hubcap thrown in the air photo." That's a very good way to describe it and it is a classic technique. It can look quite effective when done right and when using an old camera with one fixed slow shutter speed to give it a suitable blur to make it impossible to tell what it actually is. Even if using an expensive camera, just choose a slow enough shutter speed to blur your hubcap like this:

But.... don't make the mistake of using too fast of a shutter speed or your image will be too sharp, allowing people to tell exactly what it is. In this case, a hubcap off a 1969 Oldsmobile:
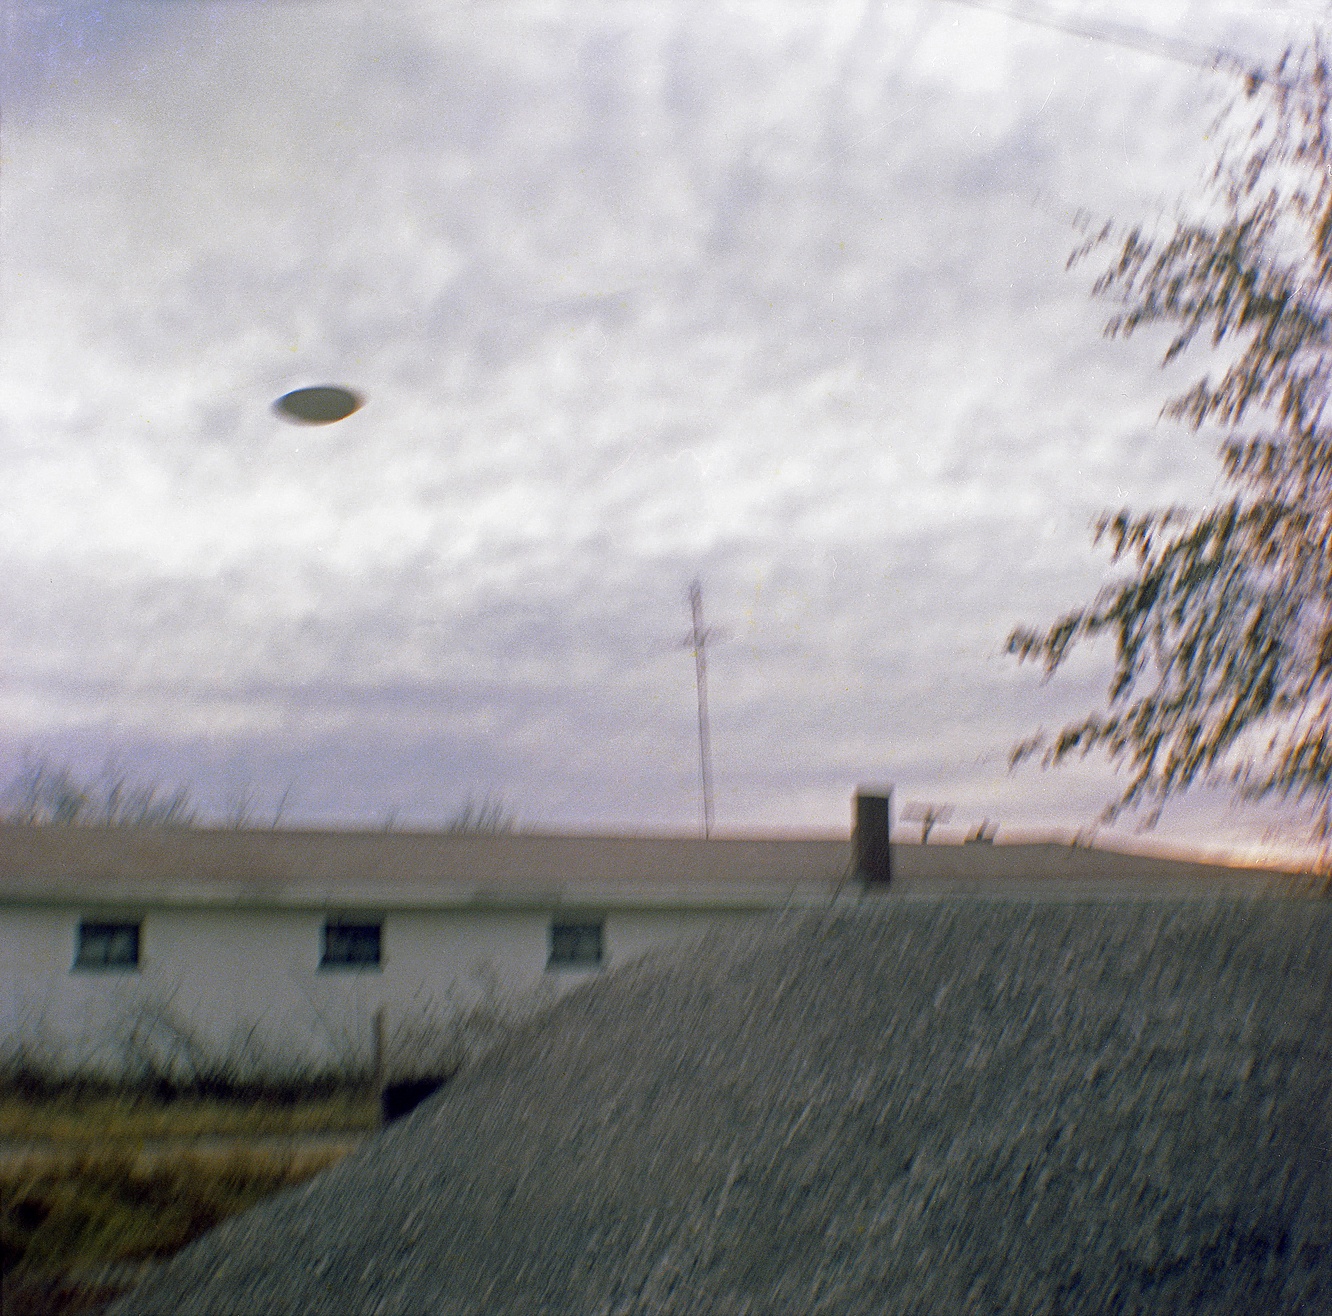
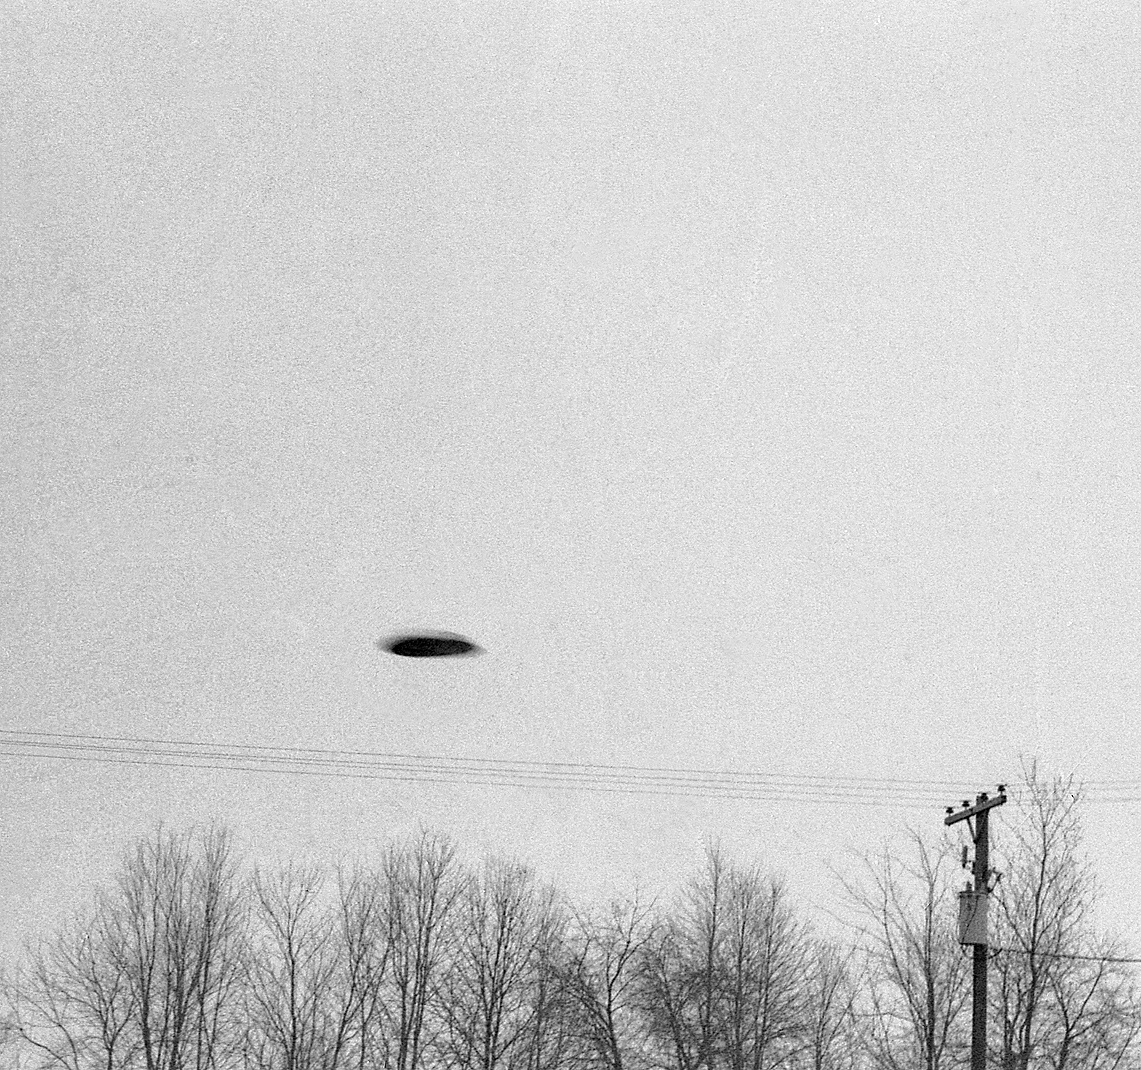
The next type of shot is one I've also considered to be a "classic" in the truest sense of the word. The classic "pie pan" shot. Here are two examples of that. The first, taken with a cheap camera with one really slow fixed shutter speed, and the second taken with an expensive SLR, but using a slow shutter speed. When done right, they can be quite effective:
The next example was easy for photographers to do in years past, whether they were using a cheap or an expensive camera. A lot of cheap cameras will accidentally "double expose" your pictures if you're not careful. And high-end cameras can do this as well. So, it was a given that somebody would have sooner or later figured out that you could double expose your film, while in the camera, and get good results by combining two images onto one negative. Such as an "unidentified flying object" with a suitable background. This is hard to detect by looking at the original negative because everything is clearly on the exposed negative, all in the same frame. Here are two examples of mine. In the first one, I used the capsule from a model Apollo rocket. The capsule was only about an inch high, I lit it from the inside, and suspended it in a totally dark room. I photographed it, then went outside and double exposed a landscape background at dusk. Doing it at dusk would help both subjects "blend" better and look convincing. I used the same technique for the second image, only I used one of those holders from an old coffee percolator and lit it from the inside as well. What do you think of these results:
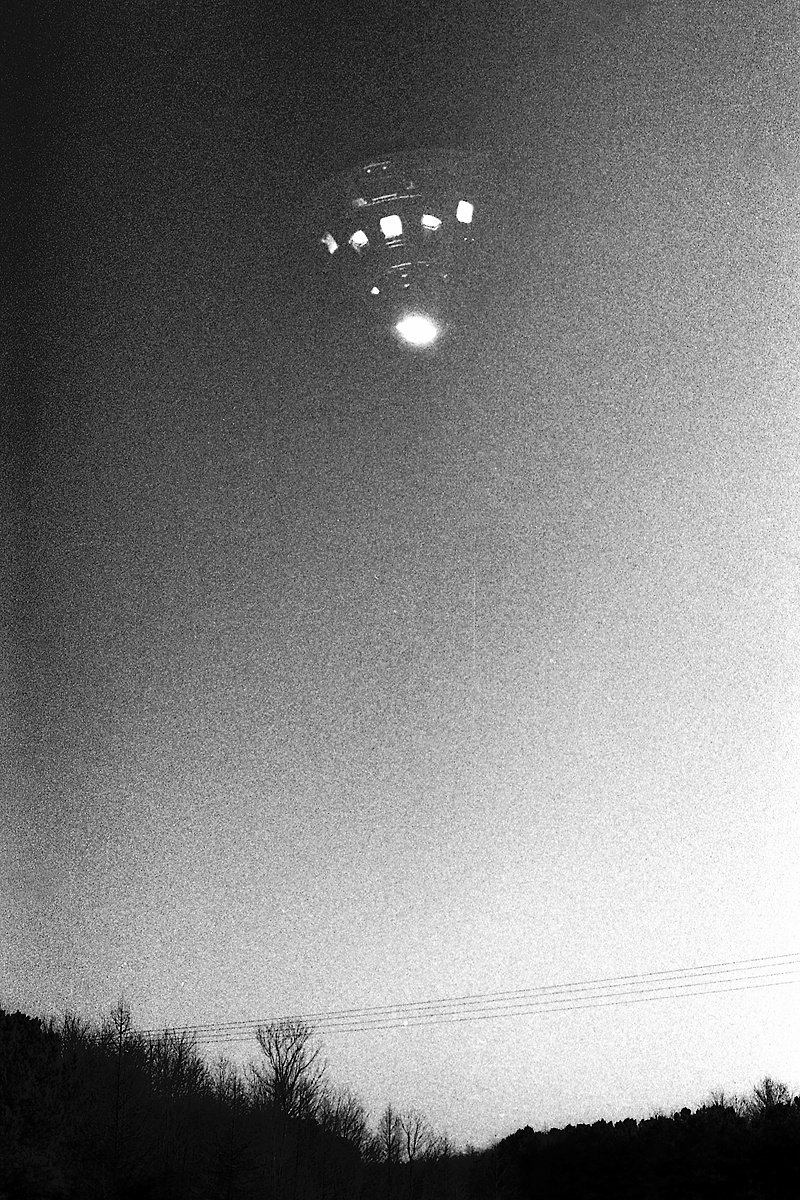
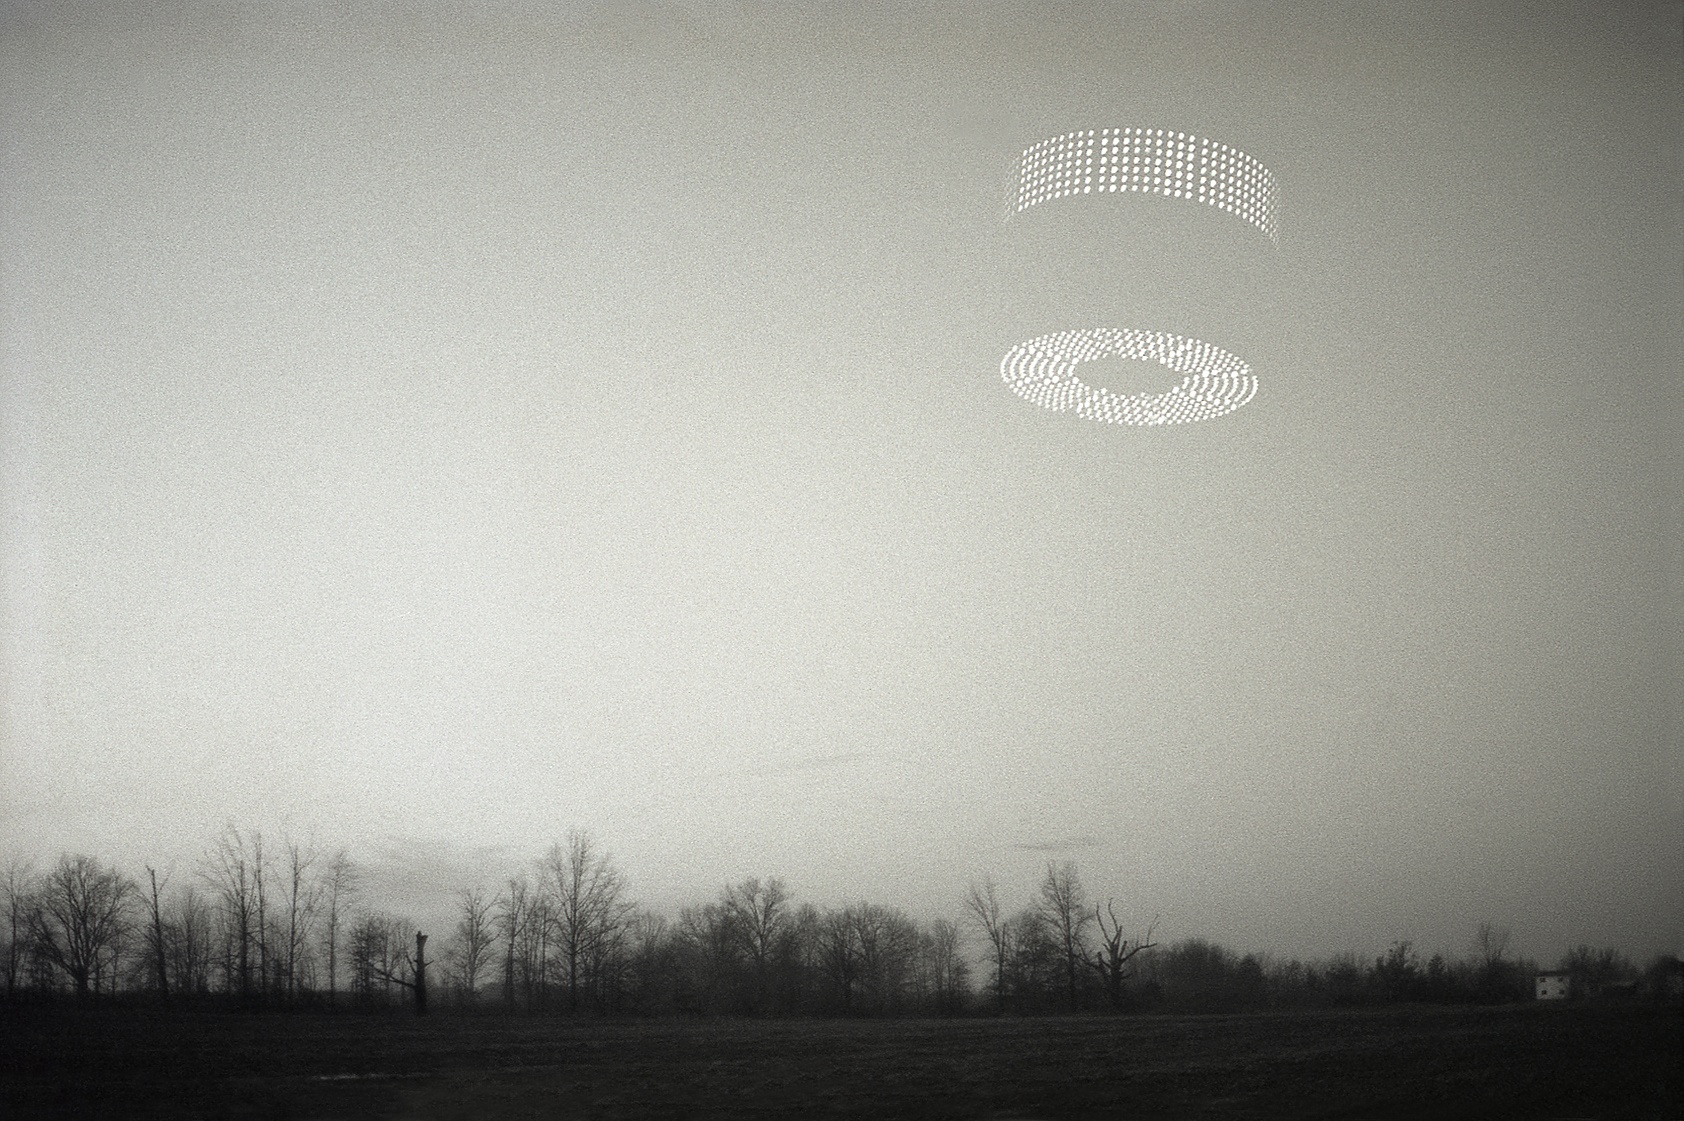
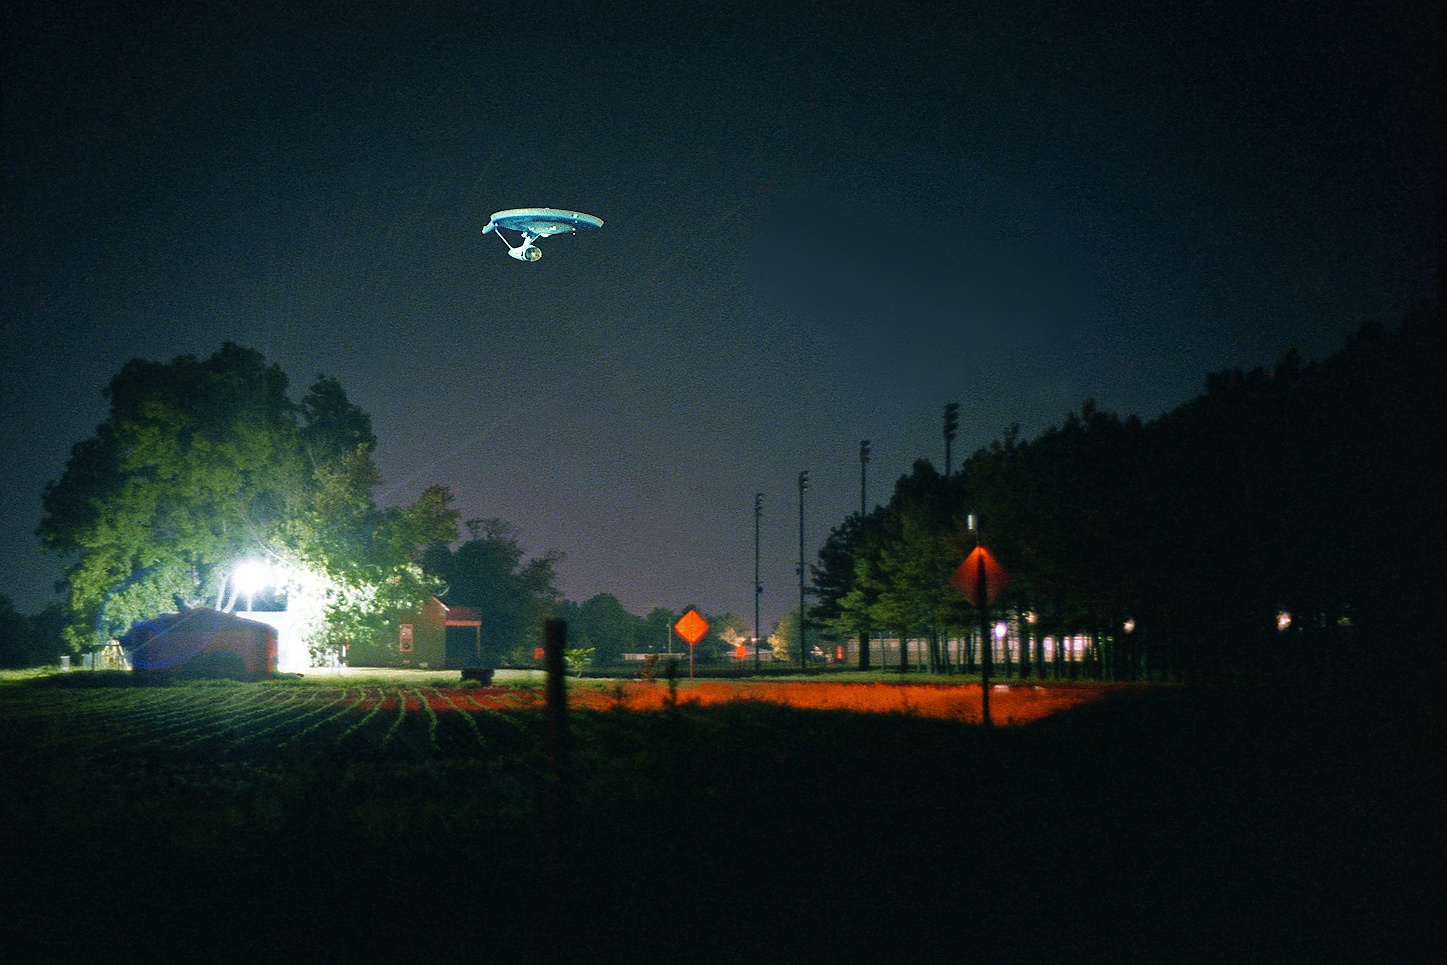
The next example is just an obvious double exposure inside the camera on one negative. Beam me up, Scotty:
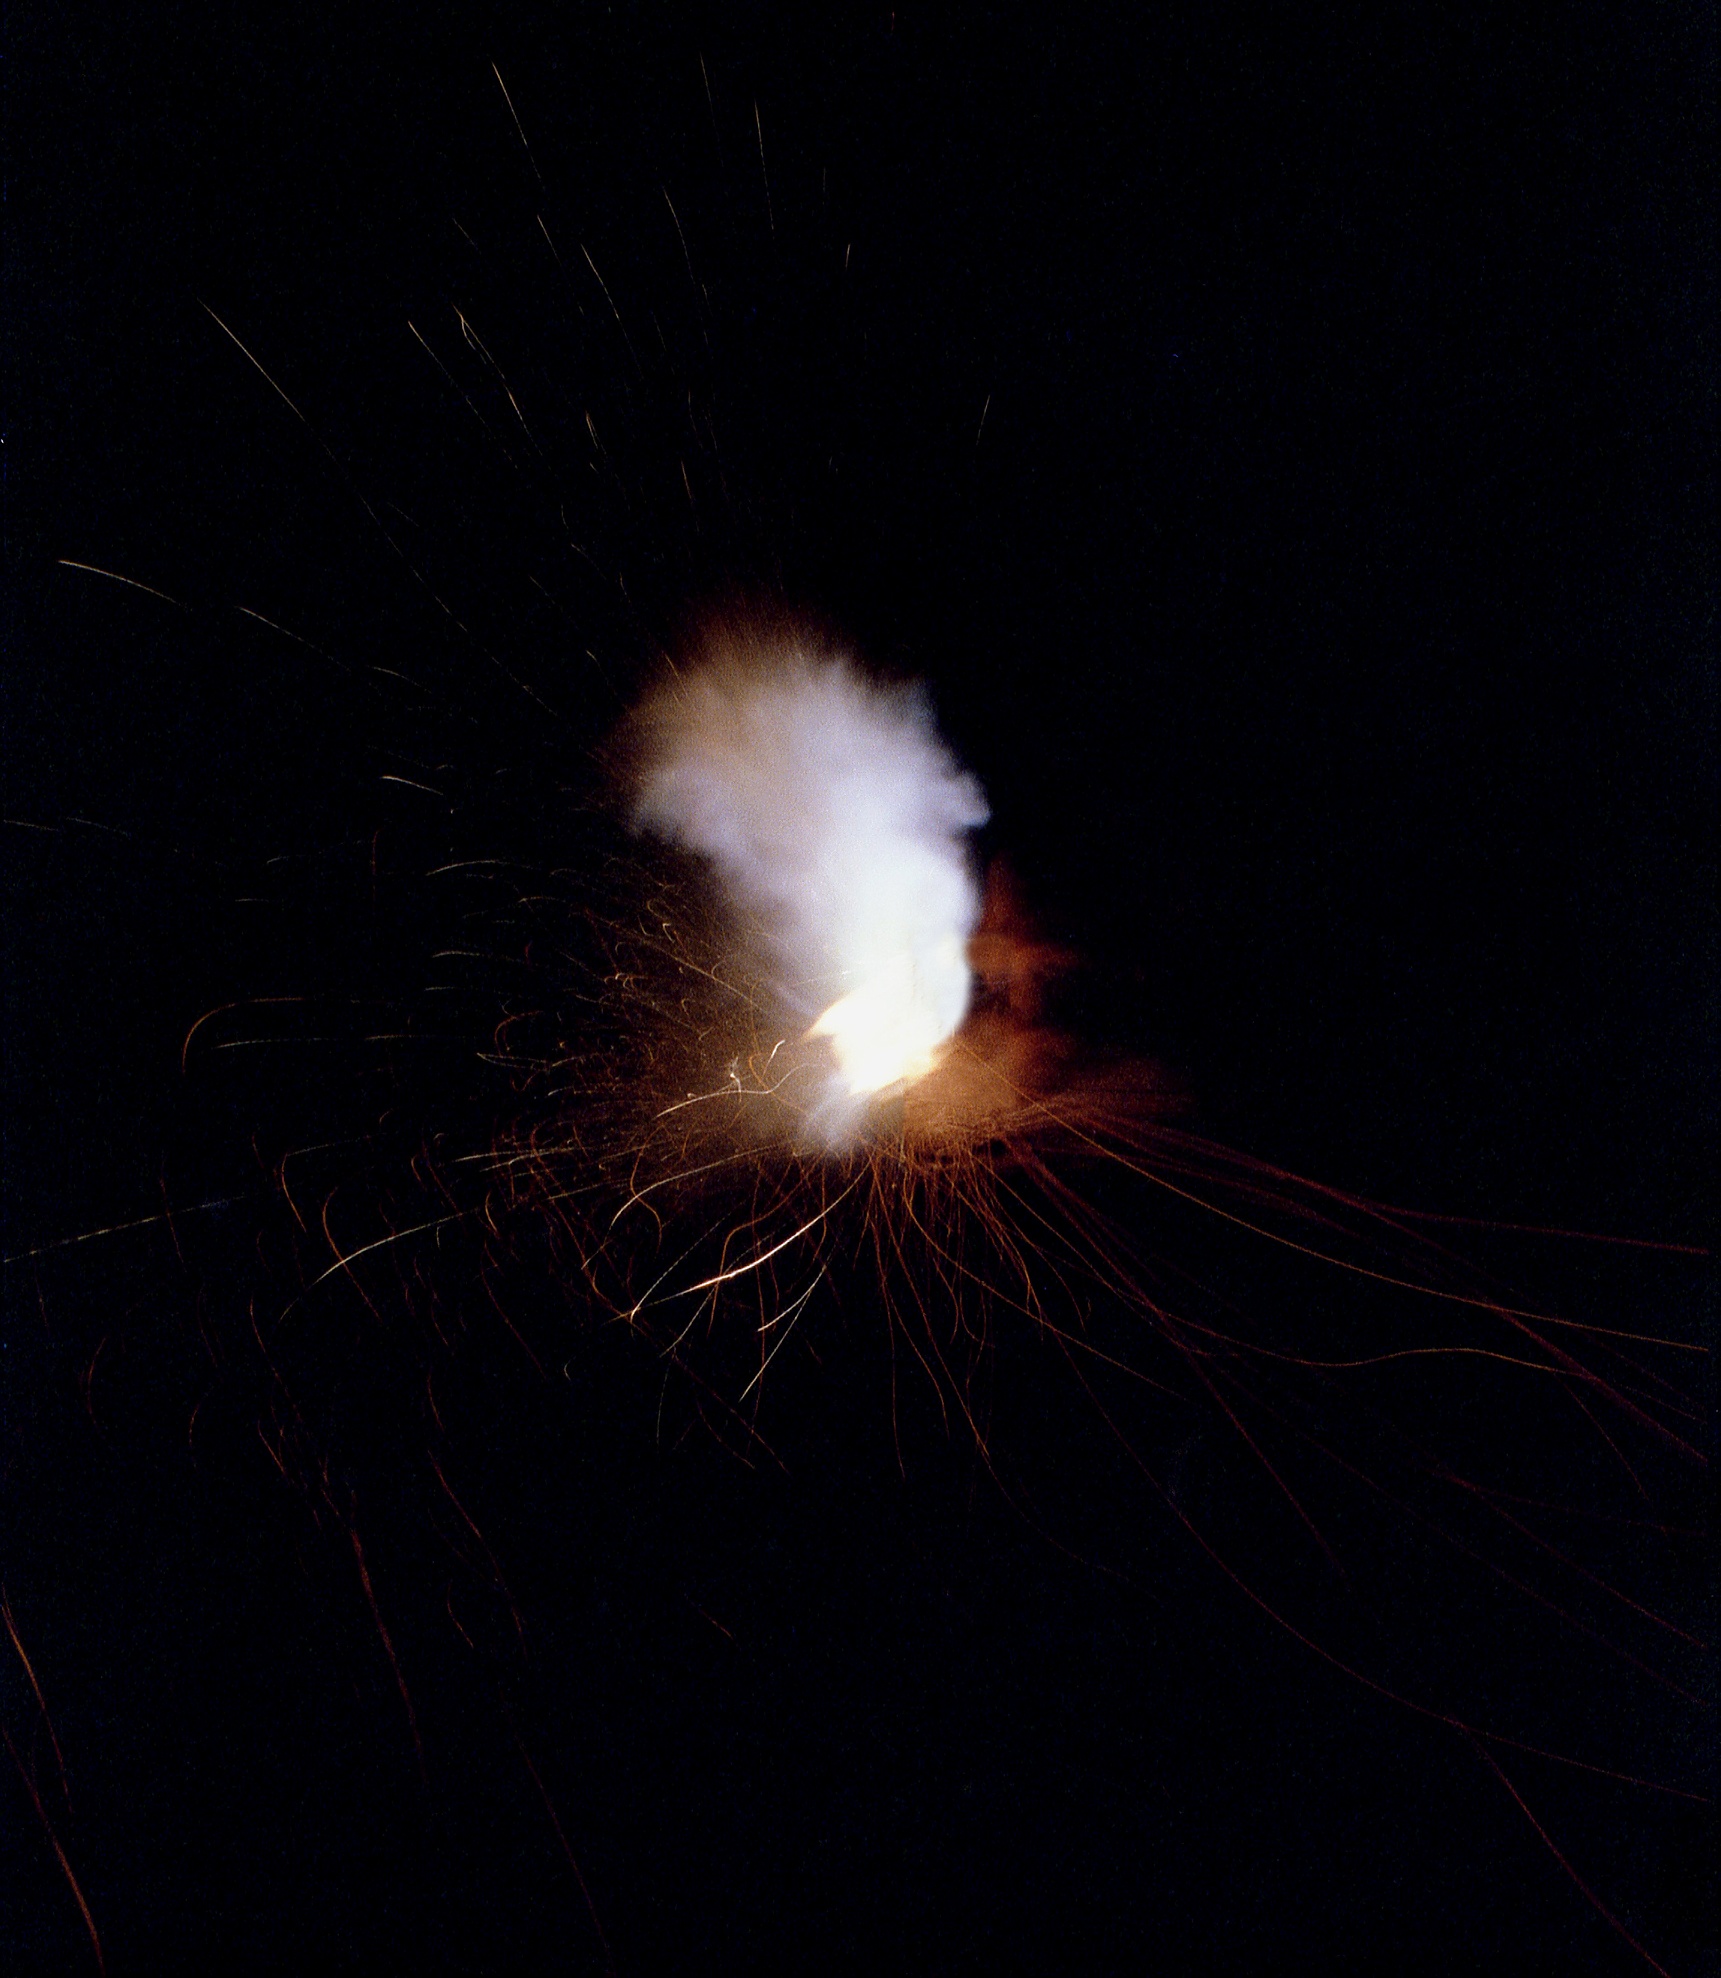
Another thing to be on the lookout for is faked images where the photographer got clever and tried to create an "action" shot. I also tried this kind of thing using the technique of an object photographed in a dark room and then superimposed over an outside image. For these two shots, first I photographed a cap, from an old cap pistol that used roll caps; I set if off by squeezing it in needle-nose pliers and photographing it up close. In the second image, I superimposed it over a small aircraft to make it look like it was blowing up in the sky. The inspiration for this image came to me from an episode of Barnaby Jones. Remember that old TV show?

Using these examples I've pointed out, you can learn to see images in a whole new light - any kind of image. When I was young, I wanted to be an astronomer so I could photograph stars and nebulas and cool stuff that was up in the night sky. But, I ended up choosing to be a regular photographer instead. However, that didn't stop me from attempting to photograph the heavens anyway. Here's a picture I took back in 1978 in which I tried to make it look like astrophotography. Using my modern computer, over my original image of holes poked in a piece of cardboard and lit from behind in a darkened room, I superimposed a bright star, and used a filter to create the lens flare. Not bad for a 17 year old kid who grew up:

You may think that some of my pictures look familiar to you and you're thinking to yourself, "Hey, I remember seeing old U.F.O. pictures that looked just like that!" Now you know how they were done. I hope you enjoyed this thread and learned a few things. And maybe had a chuckle or two in the process.

The first thing that is a dead giveaway it's a faked photo is the lack of sharpness for the tree in the lower right of the frame, but the clarity of the "object." Most old cameras were either fixed focus from 5 feet to infinity. But even higher end old cameras would not take pictures like this. The tree and "object" are far enough away from the photographer's position as to render both things in the same amount of focus - "clarity." The fact that the tree is blurry and the "object" is not, rules out motion blur, meaning the photographer didn't hold the camera still. Both things should be blurred the same amount if that was the case. So, that rules out that possibility. The other thing it can't be is that the camera was cheap and didn't have a good lens. If that was the case, both things would have had the same amount of "softness," indicating a cheap, and possibly plastic lens - not known for their clarity. Instead, you can clearly see that the "flying object" has much greater detail and sharpness than the tree. This is your indication that the image was either "double exposed" while the film was still in the camera, or the "object" was added later in the darkroom. If a person could see the original negative, that would tell the true story.
Now on to the results I achieved back in the late-1970s and some of my photos. I became a professional photographer when I was about 16. I started freelancing accident and fire pictures to the local newspapers. I also learned how to develop film by using those newspaper's darkrooms. I didn't have my own darkroom at the time, so it got to the point that when I had shot some newsworthy image, the local newspapers would tell me to just use their darkrooms, develop my film, and then print out the best one for their use and they would pay me. By doing this, I got pretty handy with a camera and the darkroom techniques. As a matter of fact, to this day I still shoot a lot of film and develop it all myself here at home.
In that thread by devilhunter69, gort69 made the comment that the picture looked like the "classic hubcap thrown in the air photo." That's a very good way to describe it and it is a classic technique. It can look quite effective when done right and when using an old camera with one fixed slow shutter speed to give it a suitable blur to make it impossible to tell what it actually is. Even if using an expensive camera, just choose a slow enough shutter speed to blur your hubcap like this:

But.... don't make the mistake of using too fast of a shutter speed or your image will be too sharp, allowing people to tell exactly what it is. In this case, a hubcap off a 1969 Oldsmobile:

The next type of shot is one I've also considered to be a "classic" in the truest sense of the word. The classic "pie pan" shot. Here are two examples of that. The first, taken with a cheap camera with one really slow fixed shutter speed, and the second taken with an expensive SLR, but using a slow shutter speed. When done right, they can be quite effective:


The next example was easy for photographers to do in years past, whether they were using a cheap or an expensive camera. A lot of cheap cameras will accidentally "double expose" your pictures if you're not careful. And high-end cameras can do this as well. So, it was a given that somebody would have sooner or later figured out that you could double expose your film, while in the camera, and get good results by combining two images onto one negative. Such as an "unidentified flying object" with a suitable background. This is hard to detect by looking at the original negative because everything is clearly on the exposed negative, all in the same frame. Here are two examples of mine. In the first one, I used the capsule from a model Apollo rocket. The capsule was only about an inch high, I lit it from the inside, and suspended it in a totally dark room. I photographed it, then went outside and double exposed a landscape background at dusk. Doing it at dusk would help both subjects "blend" better and look convincing. I used the same technique for the second image, only I used one of those holders from an old coffee percolator and lit it from the inside as well. What do you think of these results:


The next example is just an obvious double exposure inside the camera on one negative. Beam me up, Scotty:

Another thing to be on the lookout for is faked images where the photographer got clever and tried to create an "action" shot. I also tried this kind of thing using the technique of an object photographed in a dark room and then superimposed over an outside image. For these two shots, first I photographed a cap, from an old cap pistol that used roll caps; I set if off by squeezing it in needle-nose pliers and photographing it up close. In the second image, I superimposed it over a small aircraft to make it look like it was blowing up in the sky. The inspiration for this image came to me from an episode of Barnaby Jones. Remember that old TV show?


Using these examples I've pointed out, you can learn to see images in a whole new light - any kind of image. When I was young, I wanted to be an astronomer so I could photograph stars and nebulas and cool stuff that was up in the night sky. But, I ended up choosing to be a regular photographer instead. However, that didn't stop me from attempting to photograph the heavens anyway. Here's a picture I took back in 1978 in which I tried to make it look like astrophotography. Using my modern computer, over my original image of holes poked in a piece of cardboard and lit from behind in a darkened room, I superimposed a bright star, and used a filter to create the lens flare. Not bad for a 17 year old kid who grew up:

You may think that some of my pictures look familiar to you and you're thinking to yourself, "Hey, I remember seeing old U.F.O. pictures that looked just like that!" Now you know how they were done. I hope you enjoyed this thread and learned a few things. And maybe had a chuckle or two in the process.
edit on 10-1-2025 by Station27 because: Fixed a typo.
new topics
-
How To Spot Fake U.F.O. Photos
Aliens and UFOs: 2 hours ago -
Scary video of face in an abandoned house
Paranormal Studies: 4 hours ago -
Just Came Across These Unusual Old UFO Pics
Aliens and UFOs: 6 hours ago -
LA Mayor Bass Demanded $49M in Additional LAFD Cuts One Week Before Wildfires
Mainstream News: 8 hours ago -
Sepultura - Territory - With New Drummer Greyson Nekrutman
Music: 9 hours ago -
Carry On!
Short Stories: 9 hours ago
4
